Scrappy Pillow Tutorial
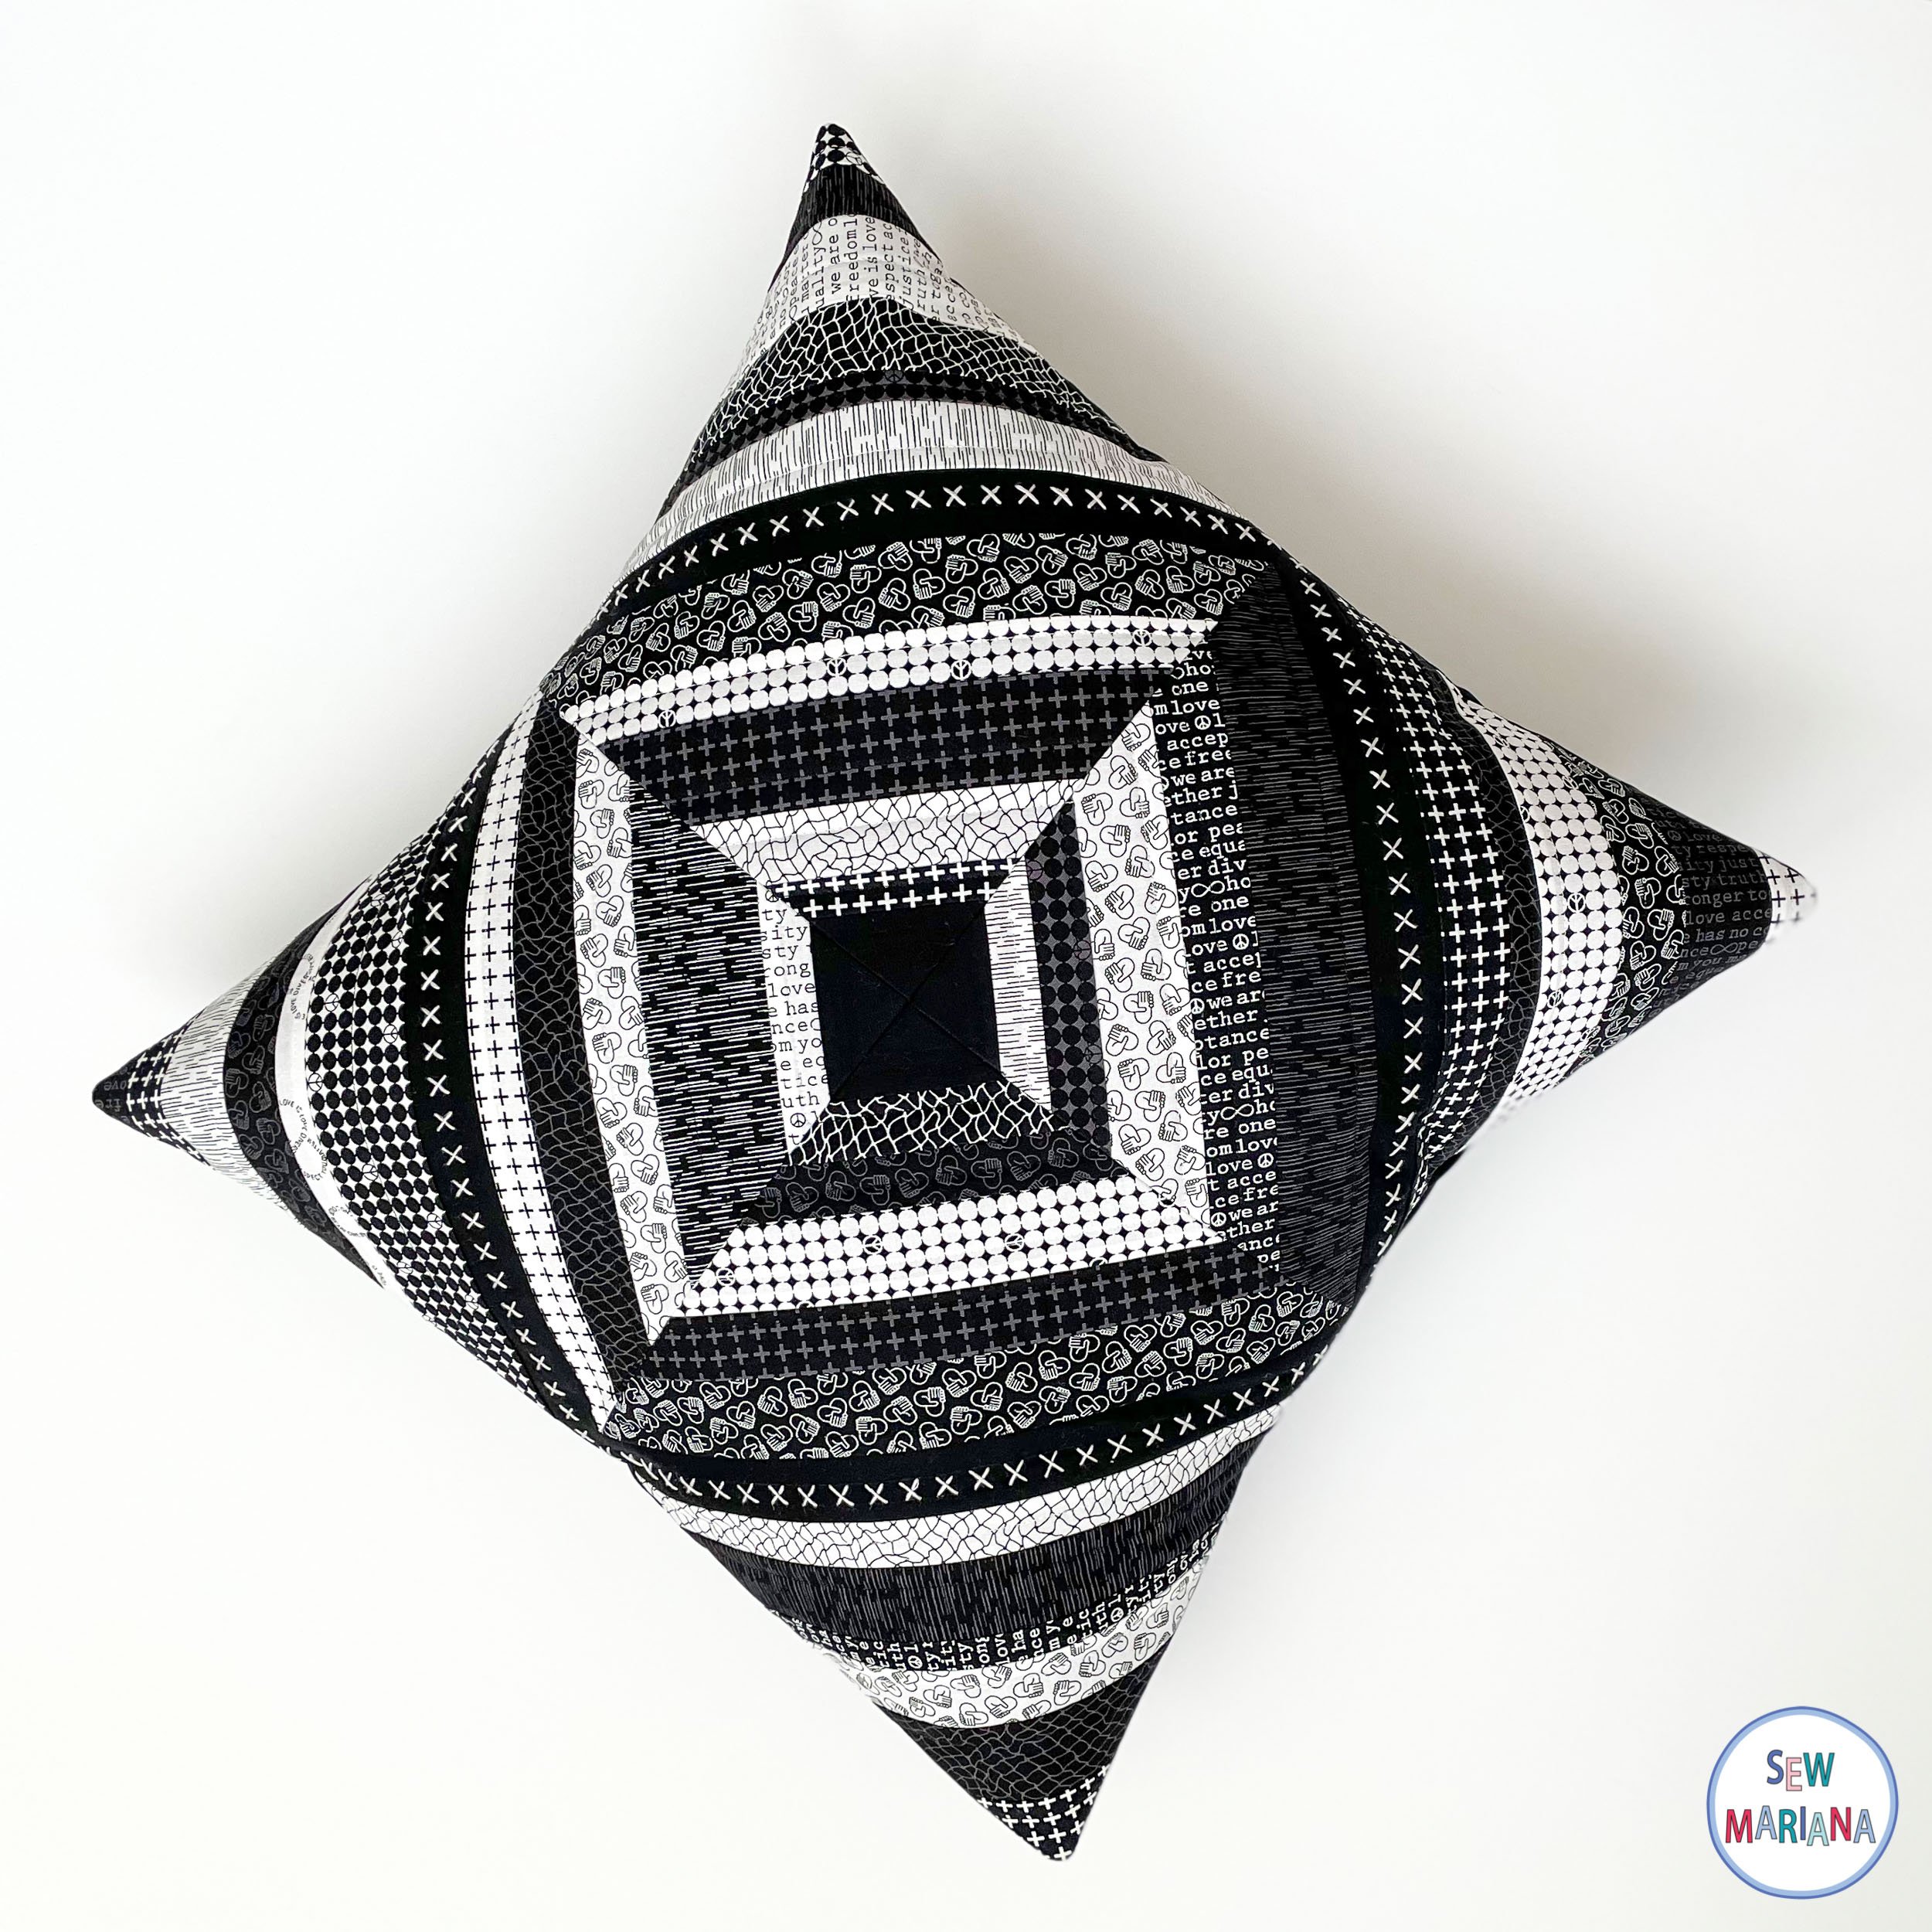
Scraps beware! It’s time we empty those bins, push up our sleeves, and make something no one will believe is the product of leftovers. As this Graydations collection shows, grayscale fabrics can be used for more than just accents or backgrounds, they can give any project an extra elegant kick.
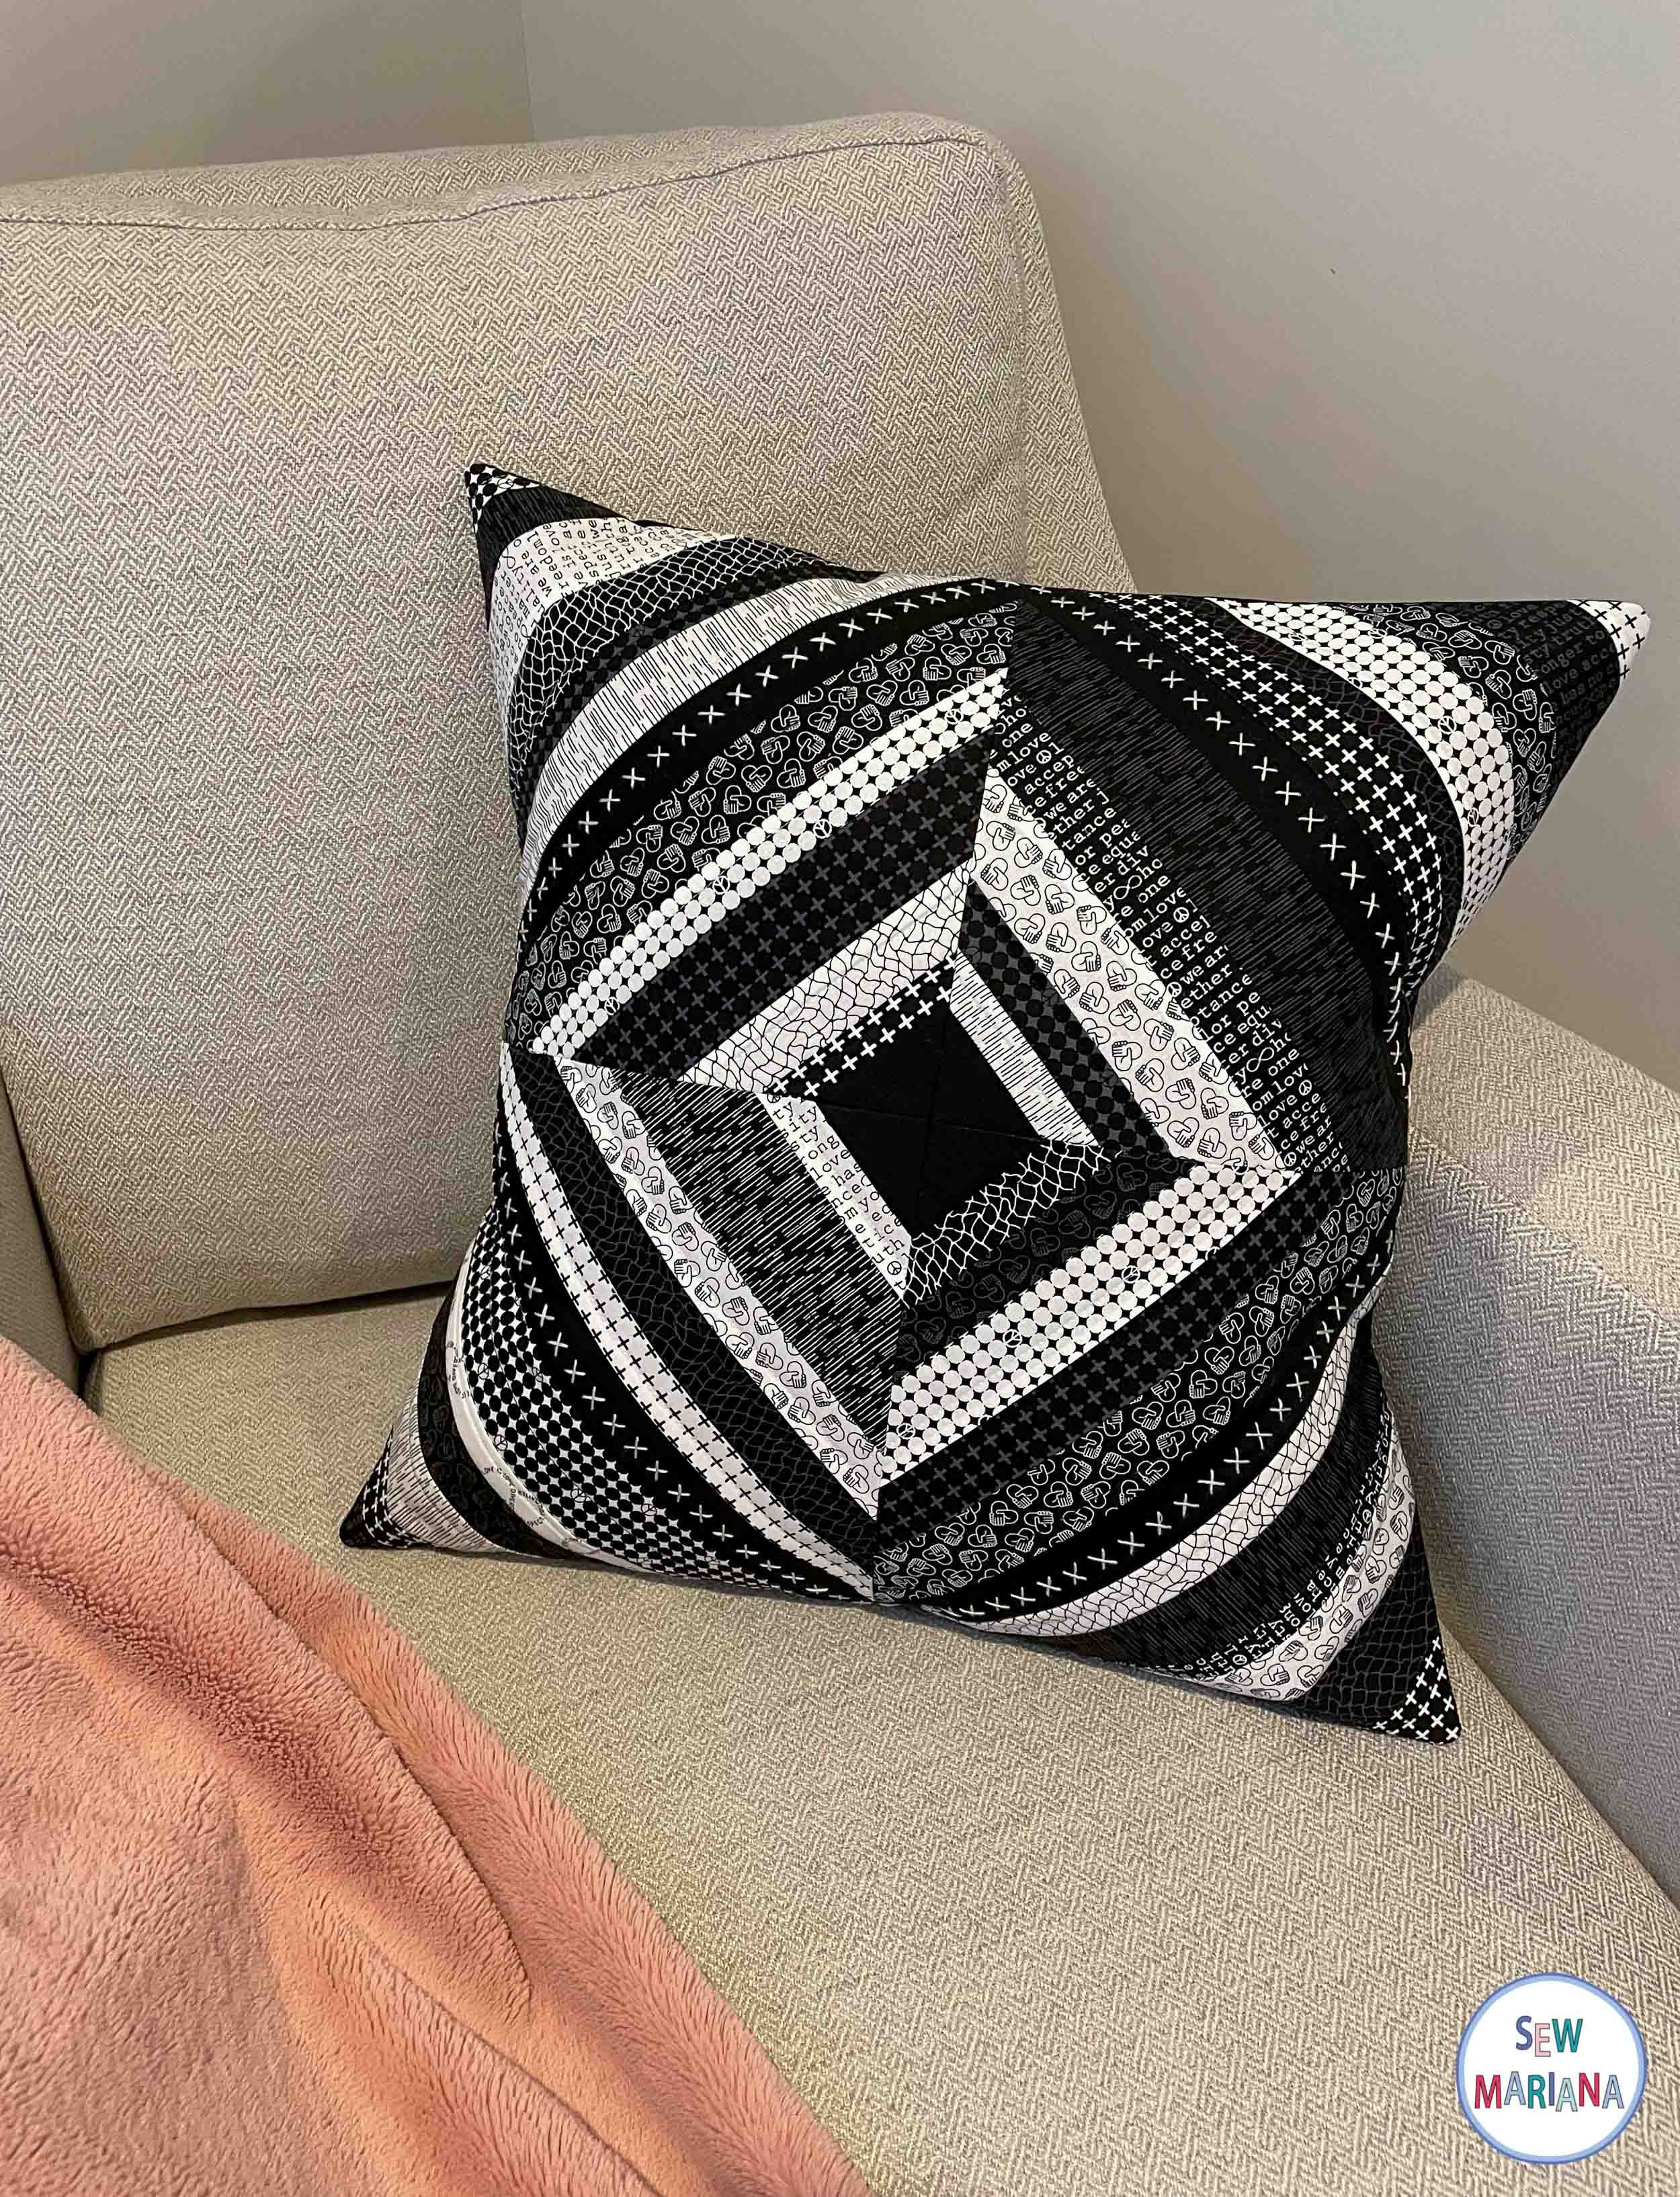
Though I made this into a pillow to spruce up my lounge, if you’ve got one too many cushions already, you can finish this as a wall hanging or table topper. Heck, you can even use it as a basis for a whole quilt. The best part of this pattern isn’t just that it gives a bunch of different designs a chance to shine, but that it’s easy despite the sophisticated look. Forgiving composition, no matching points, and made with anything you have on hand. Enjoy!

MATERIALS
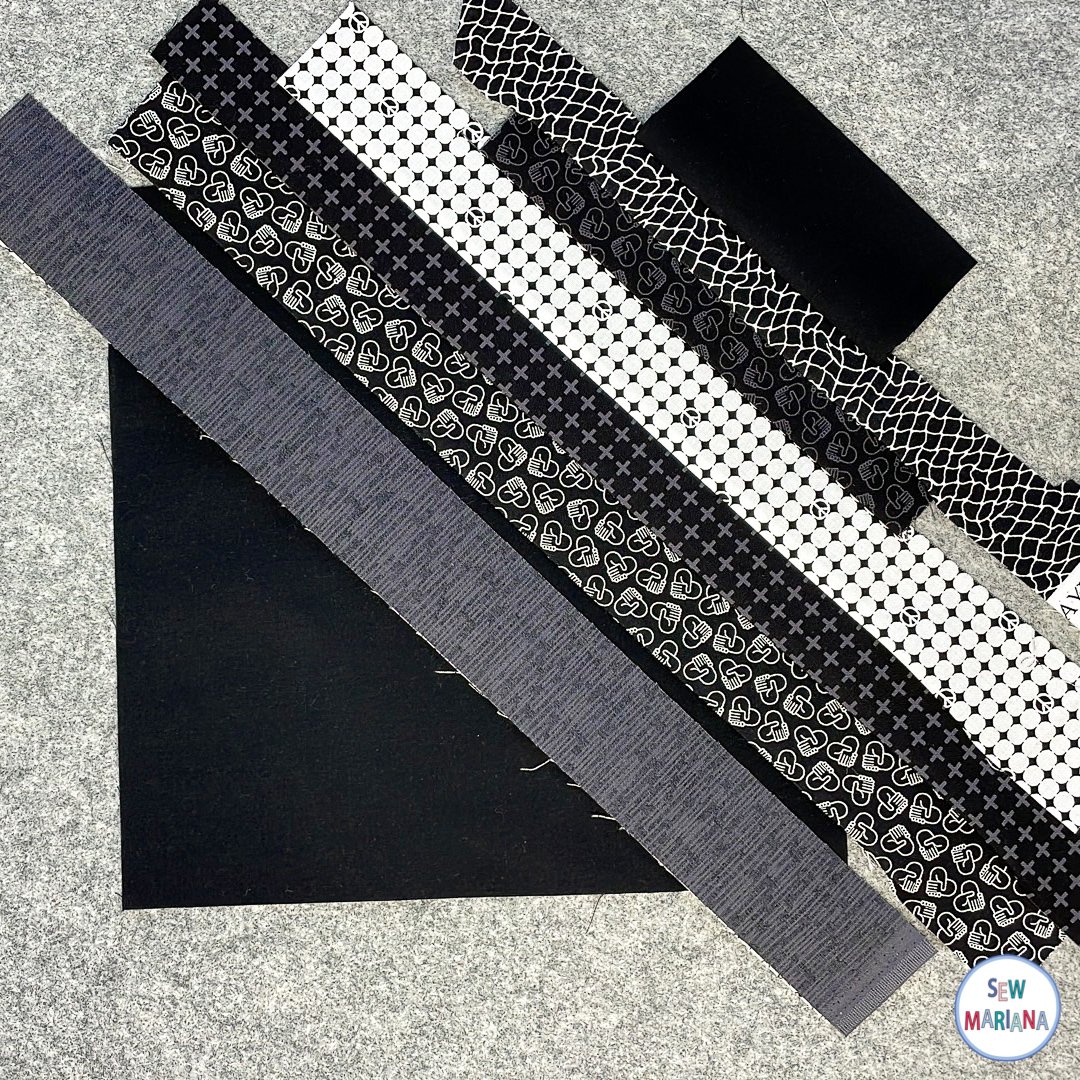
Scraps, at least 1” wide. You’ll need at least eight that are 15” long.
Four 10” squares of a base fabric.
A piece of batting 23” square.
3/4 yard of quilting cotton for the backing.
A pillow form 20” square.
A marking tool, ruler, rotary cutter, etc.
NOTE: Michael Miller Fabrics provided the fabrics for this project. I used Cotton Couture in black as my base fabric and also for the back. All the scraps are from the Graydations line.

BEFORE YOU START
Cut the strips in various widths. I cut mine between 1” and 2” wide.The length needs to be 1” longer than the area you are covering. You can cut them to size as you go. The longest ones will be 15” long.
Press all the strips really well.

STEP 1
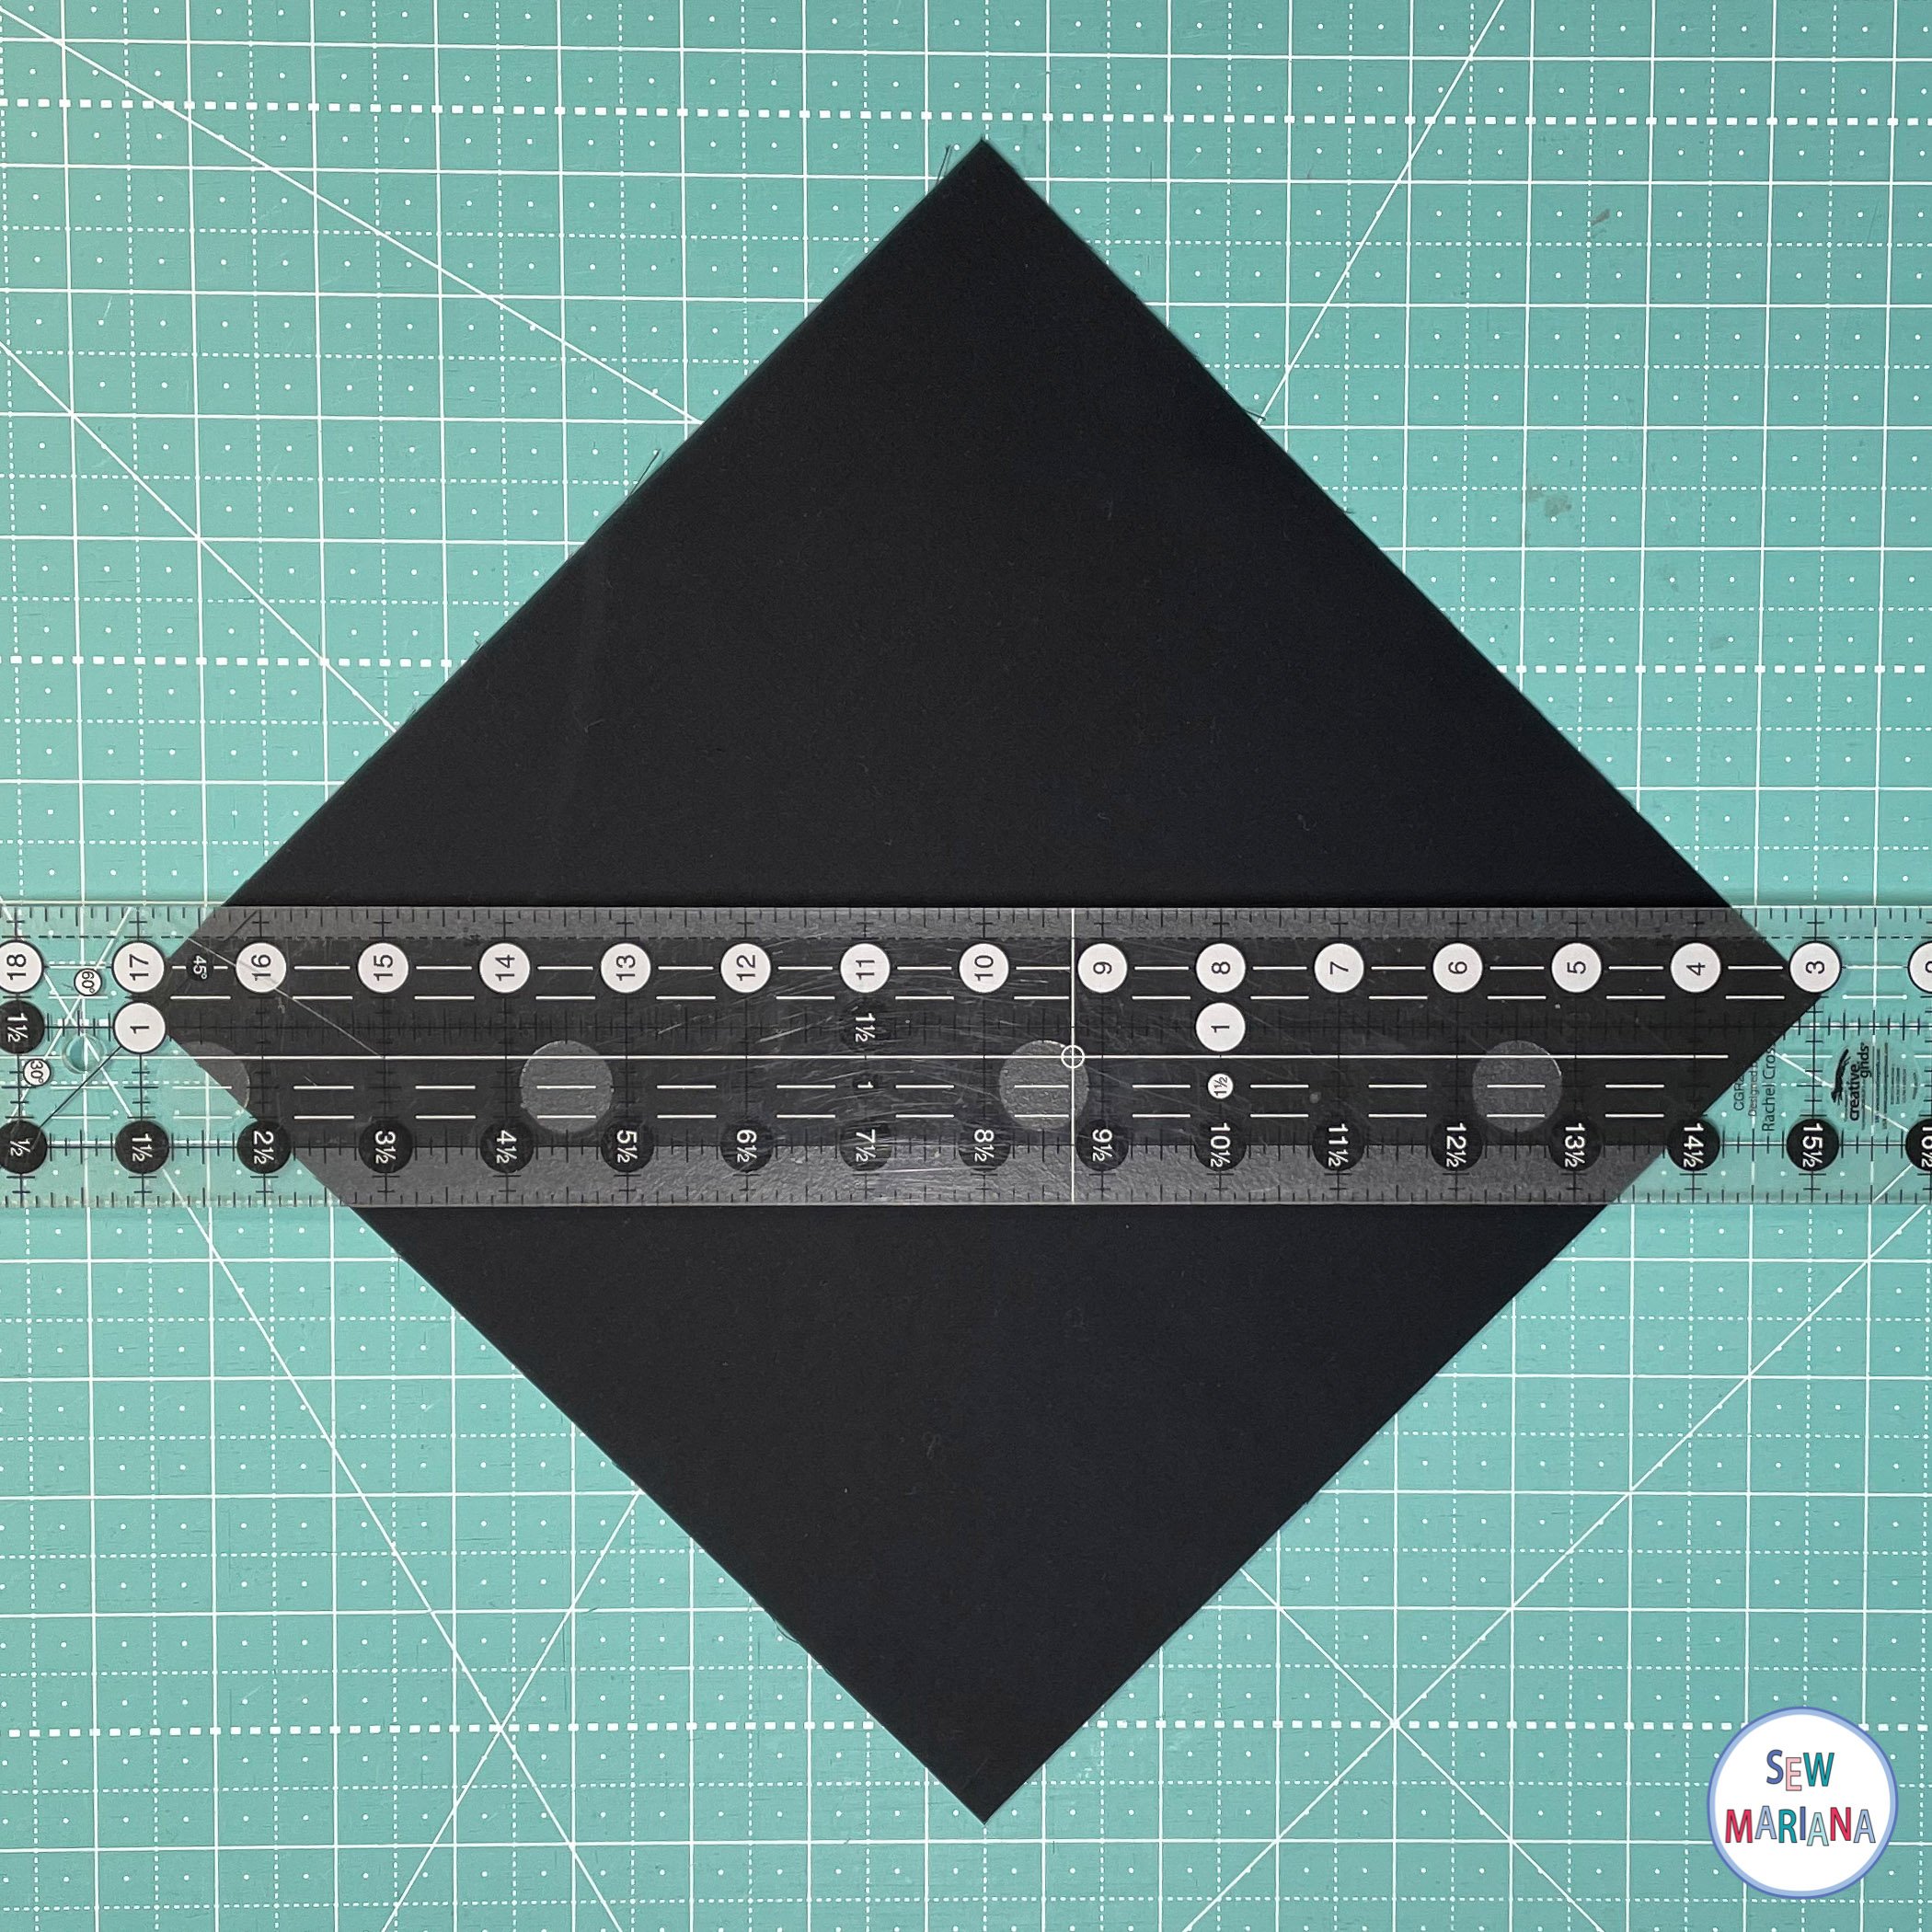
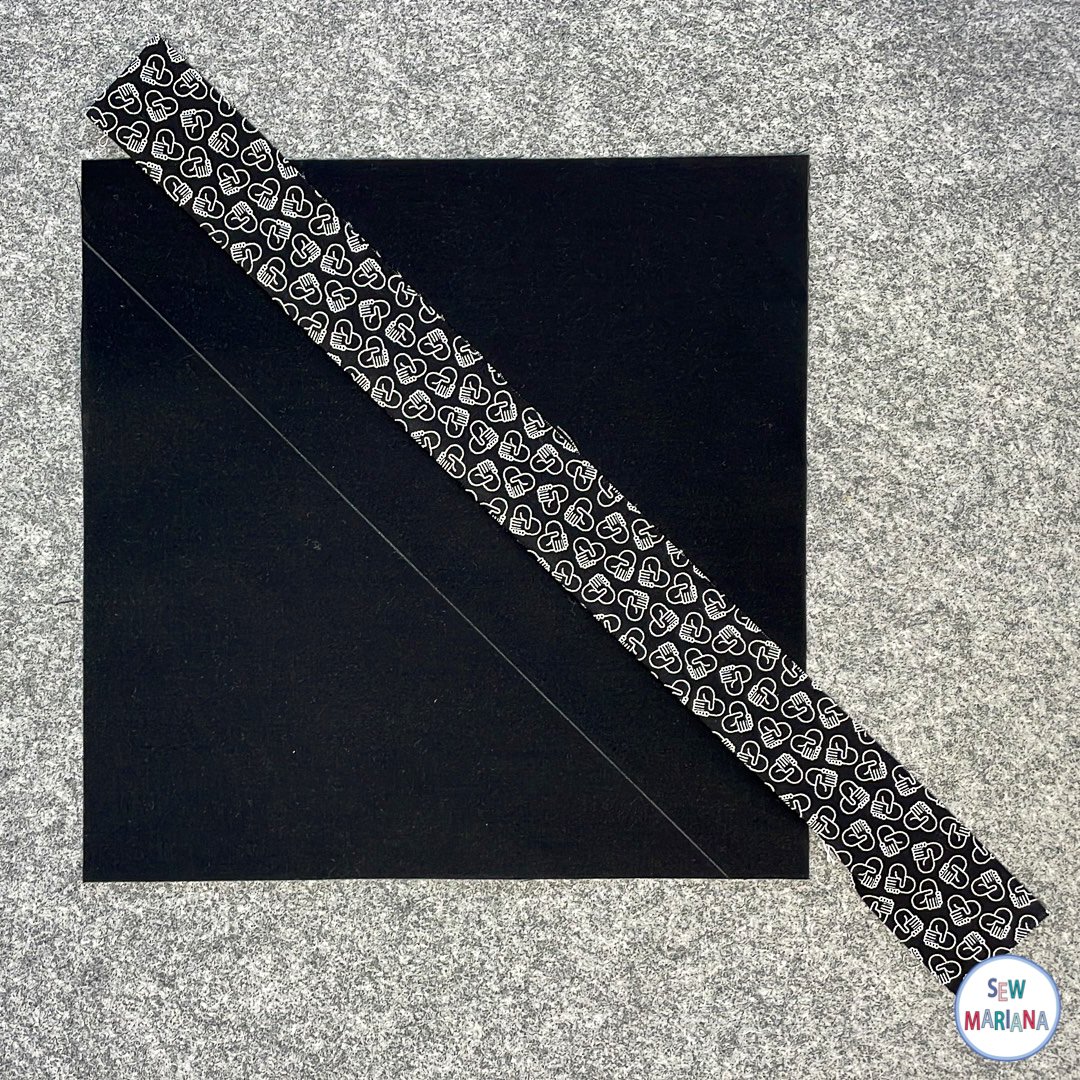
Find the diagonal from corner to corner on the base squares. Draw a line 3/4” to either side of the diagonal.

STEP 2
The first strip needs to be at least 15” long. Place the strip right side down lining up the right long side of the strip with the right drawn line on the base square. Sew in place with a 1/4” seam allowance and press out.


STEP 3
Line up a second strip right sides together with the one you just sew. Stitch in place and press out.


STEP 4
Repeat the same process with strips of different widths until you have reached the corner of the block.
Optional: I saw a black solid strip last on one corner of each block to create the black center square in the finished top. To do this: measure 2” from one corner to either side, draw a line and saw the last strip aligned with the drawn line).


STEP 5
Now repeat the process on the other side of the base square. Grab another strip at least 15” long and place it right side down lining up the left long side of the strip with the left drawn line. Sew in place and press out.


STEP 6
Continue adding the strips in the same manner, varying the widths and making sure the length is at least 1” longer than the area you are covering.

STEP 7
Keep going until you have covered the corner.


STEP 8
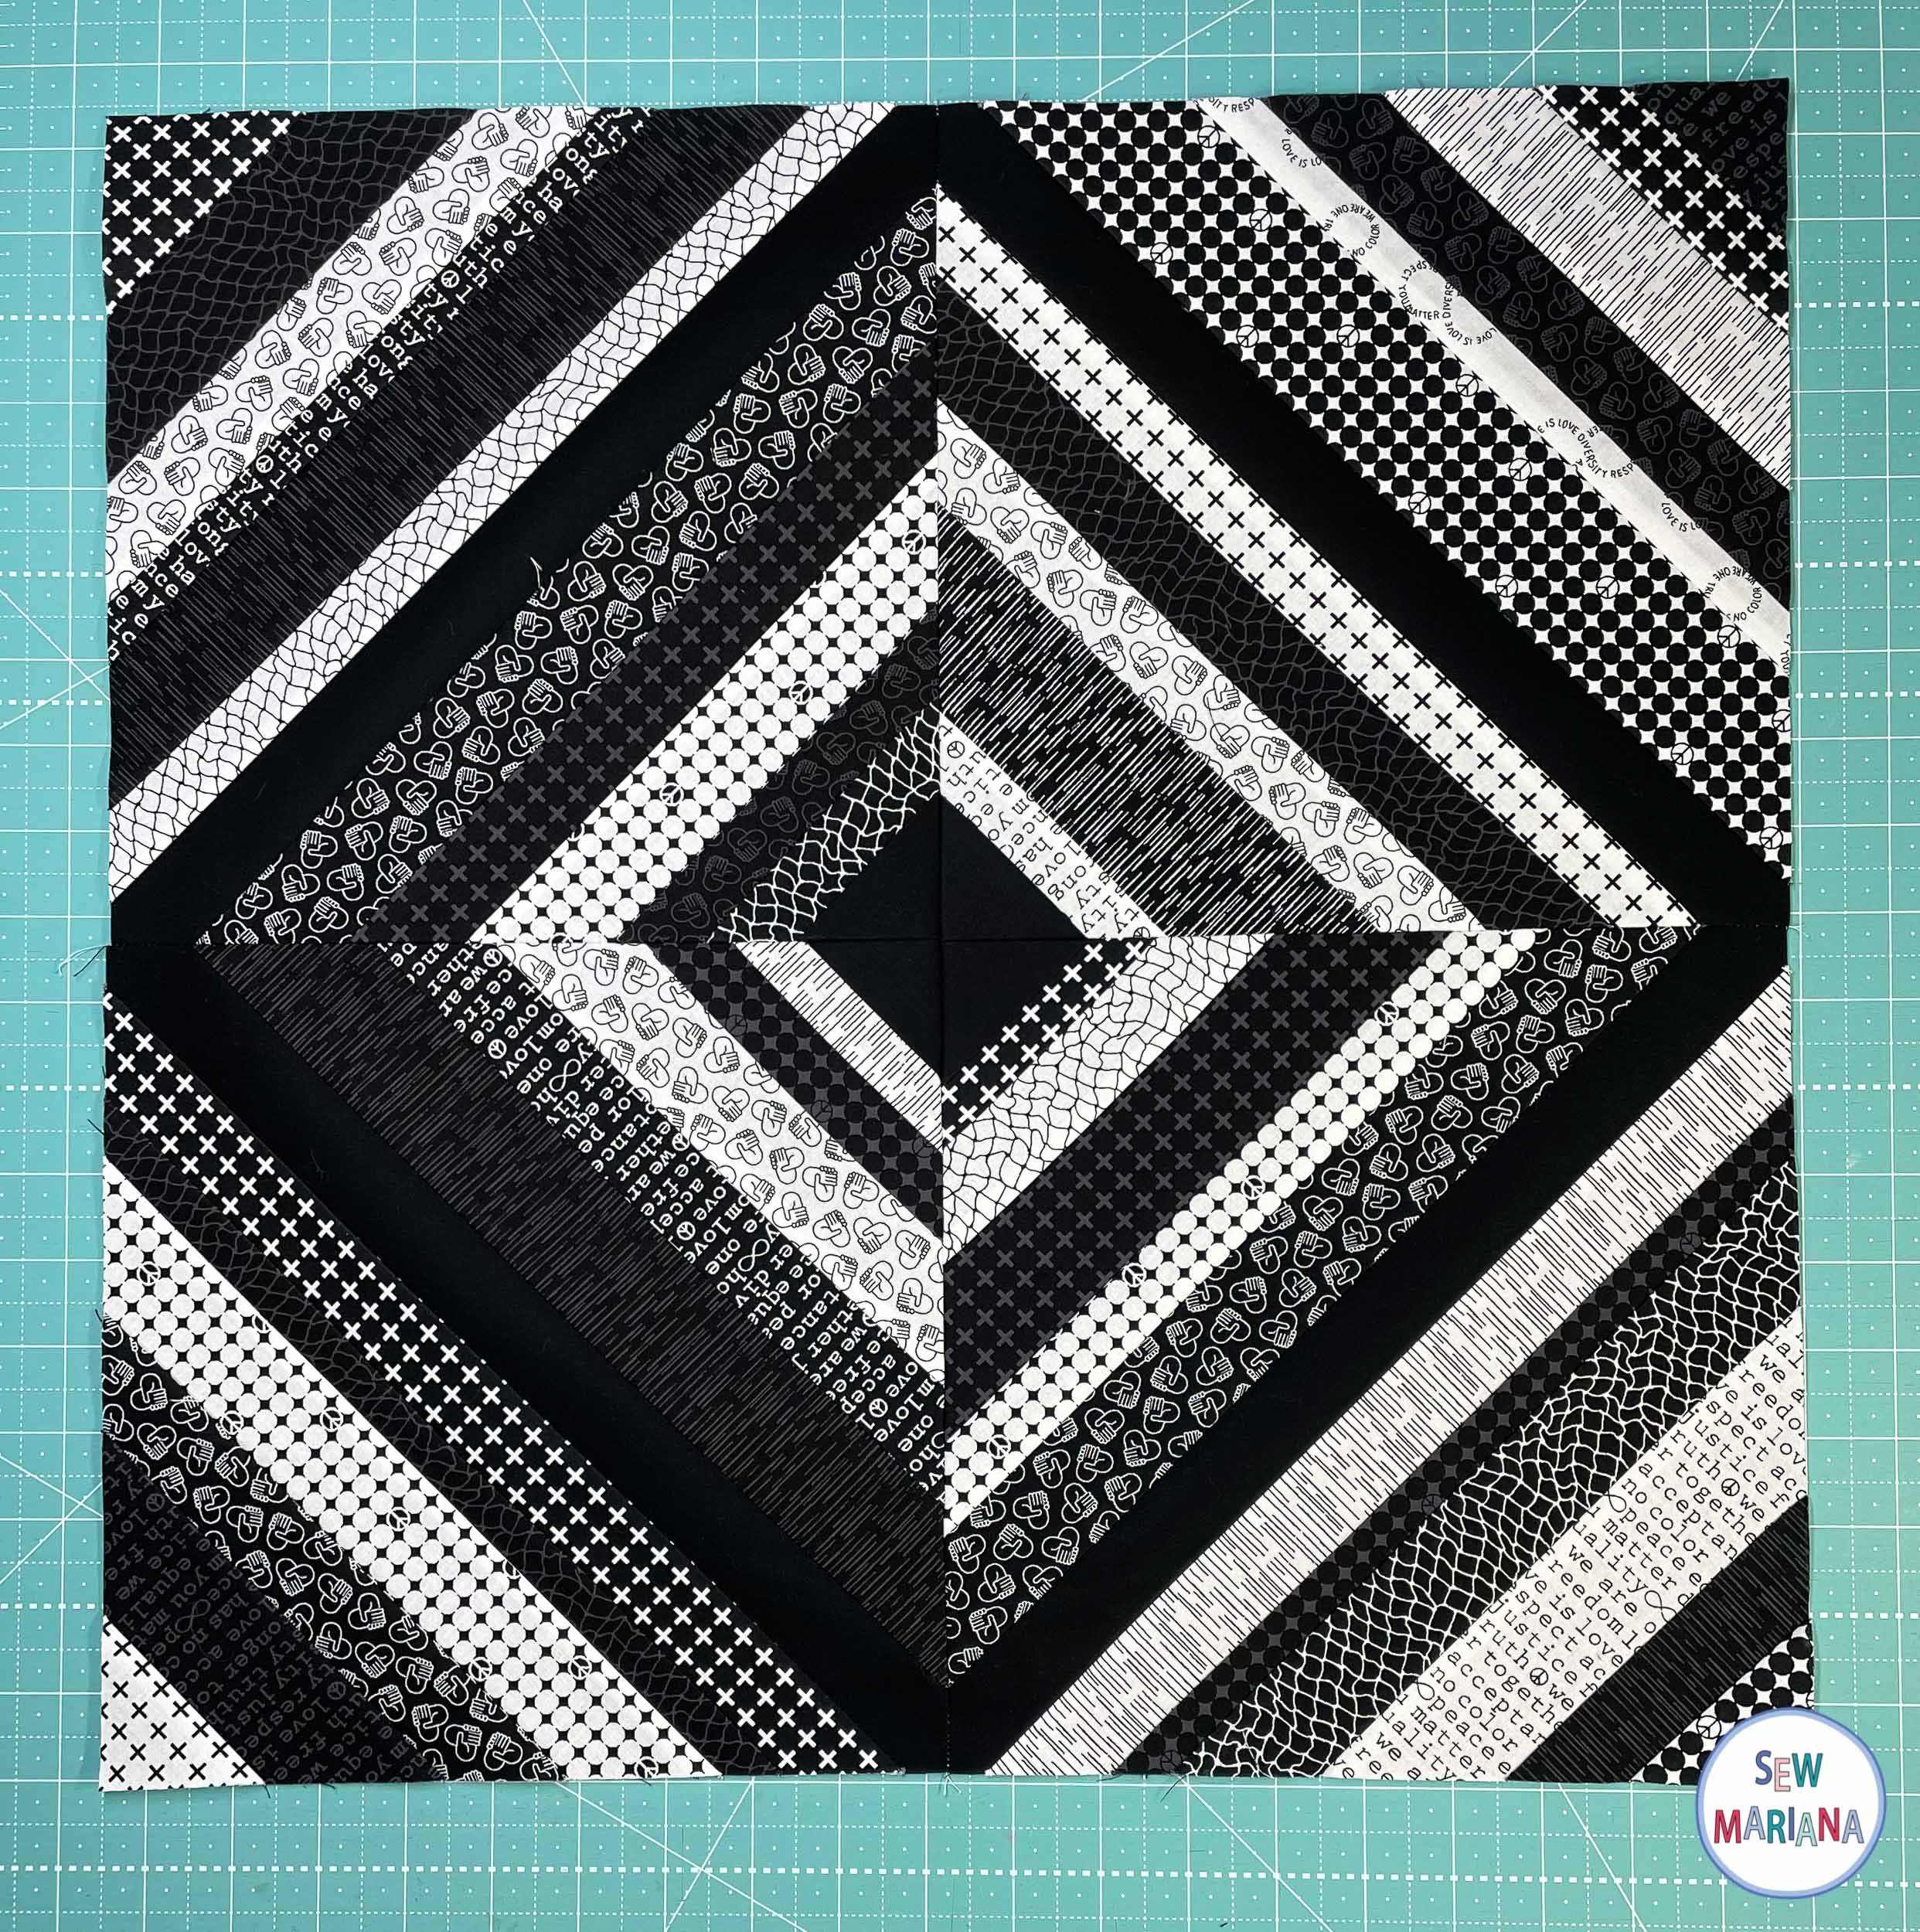
Turn the block over and trim to the size of the base square. And your block is done!


STEP 9
Start over with another base square. Repeat to make four blocks.

STEP 10
Sew the blocks in pairs making sure the diagonal lines are mirrored. Press the seam open. Then sew the two rows together being careful with the placement. (Refer to the picture). Press the seam open.
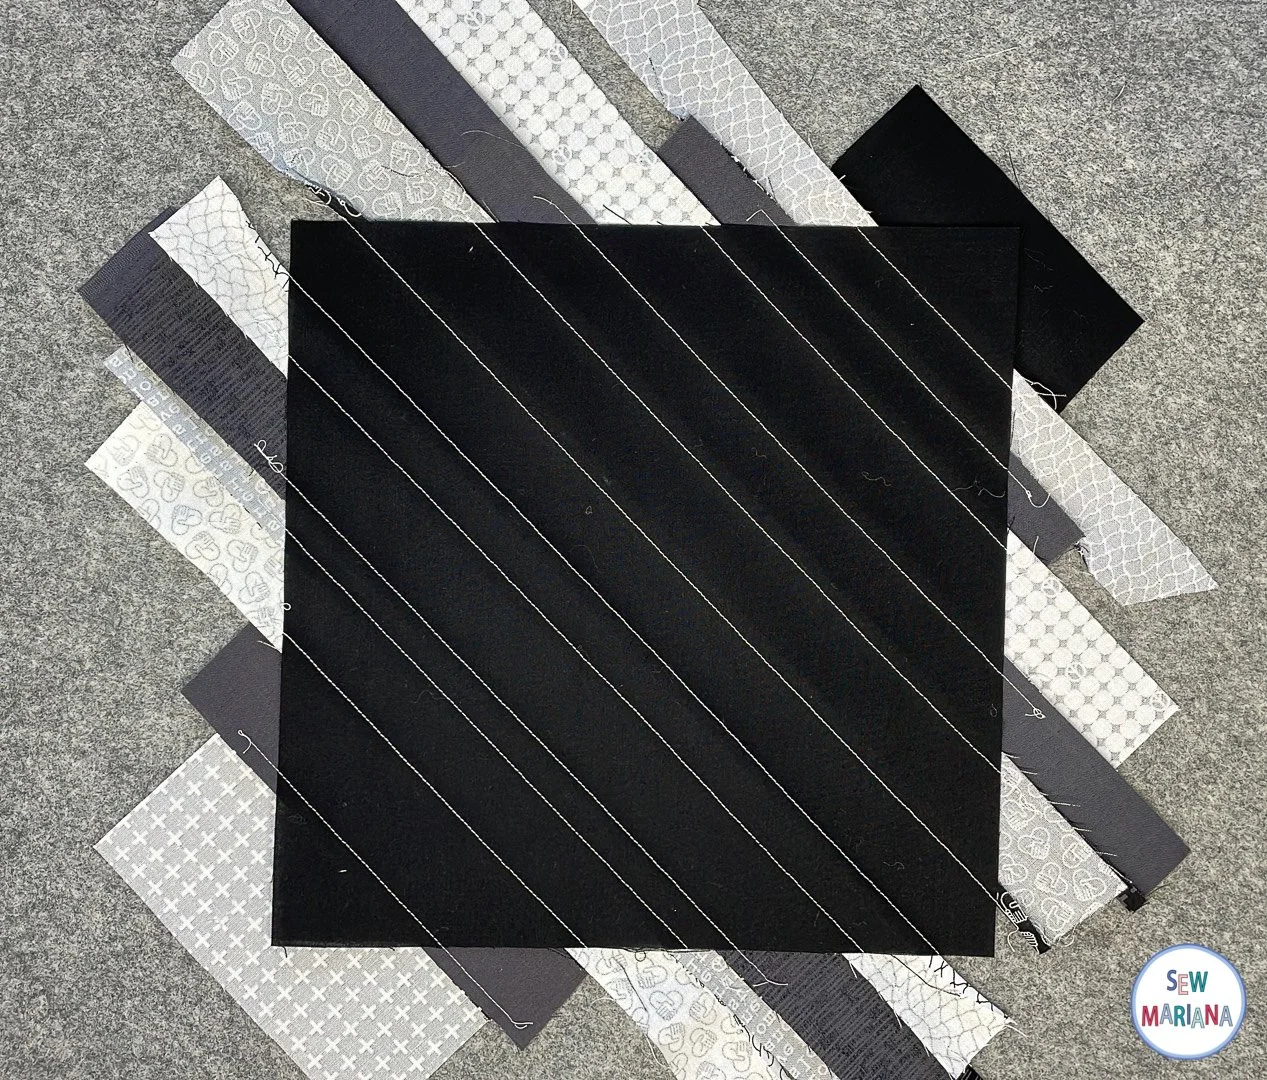
STEP 11
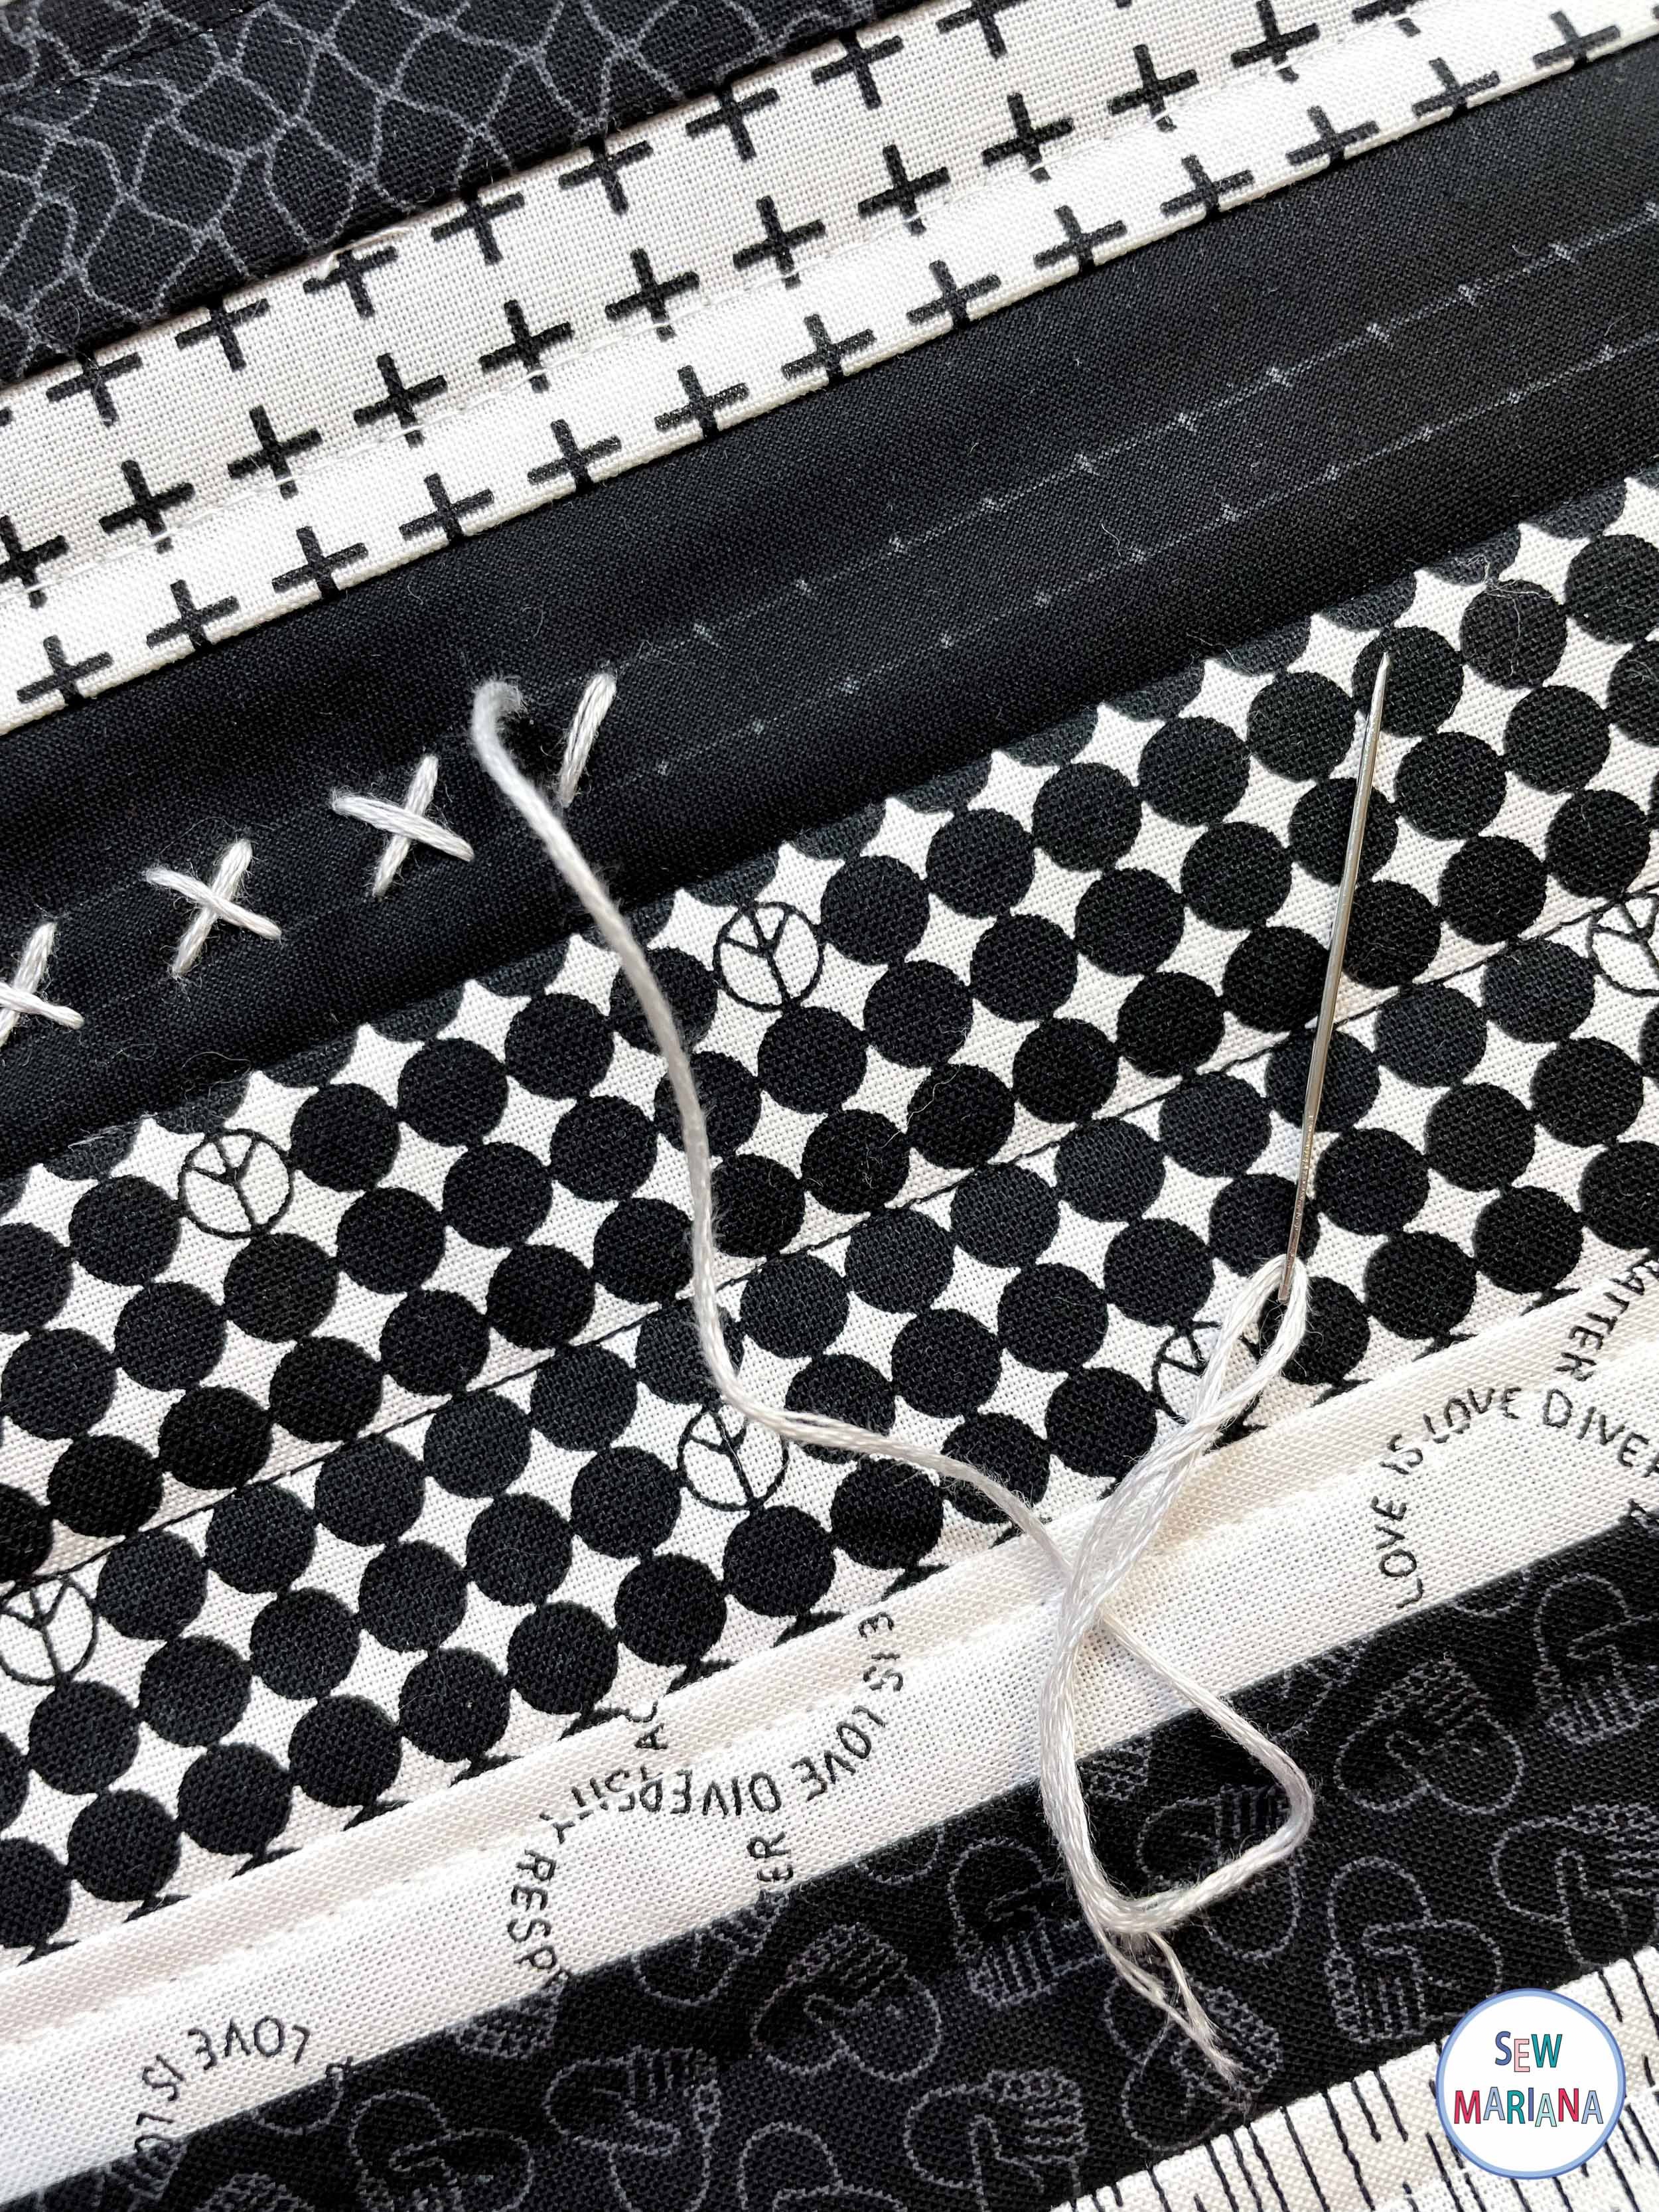
Layer the batting and finished top right side up and quilt. I did parallel lines by machine, alternating between black and white thread. Then I added a row of hand stitching as a finishing touch.


STEP 12
Trim the batting and your quilt top is ready!

STEP 13
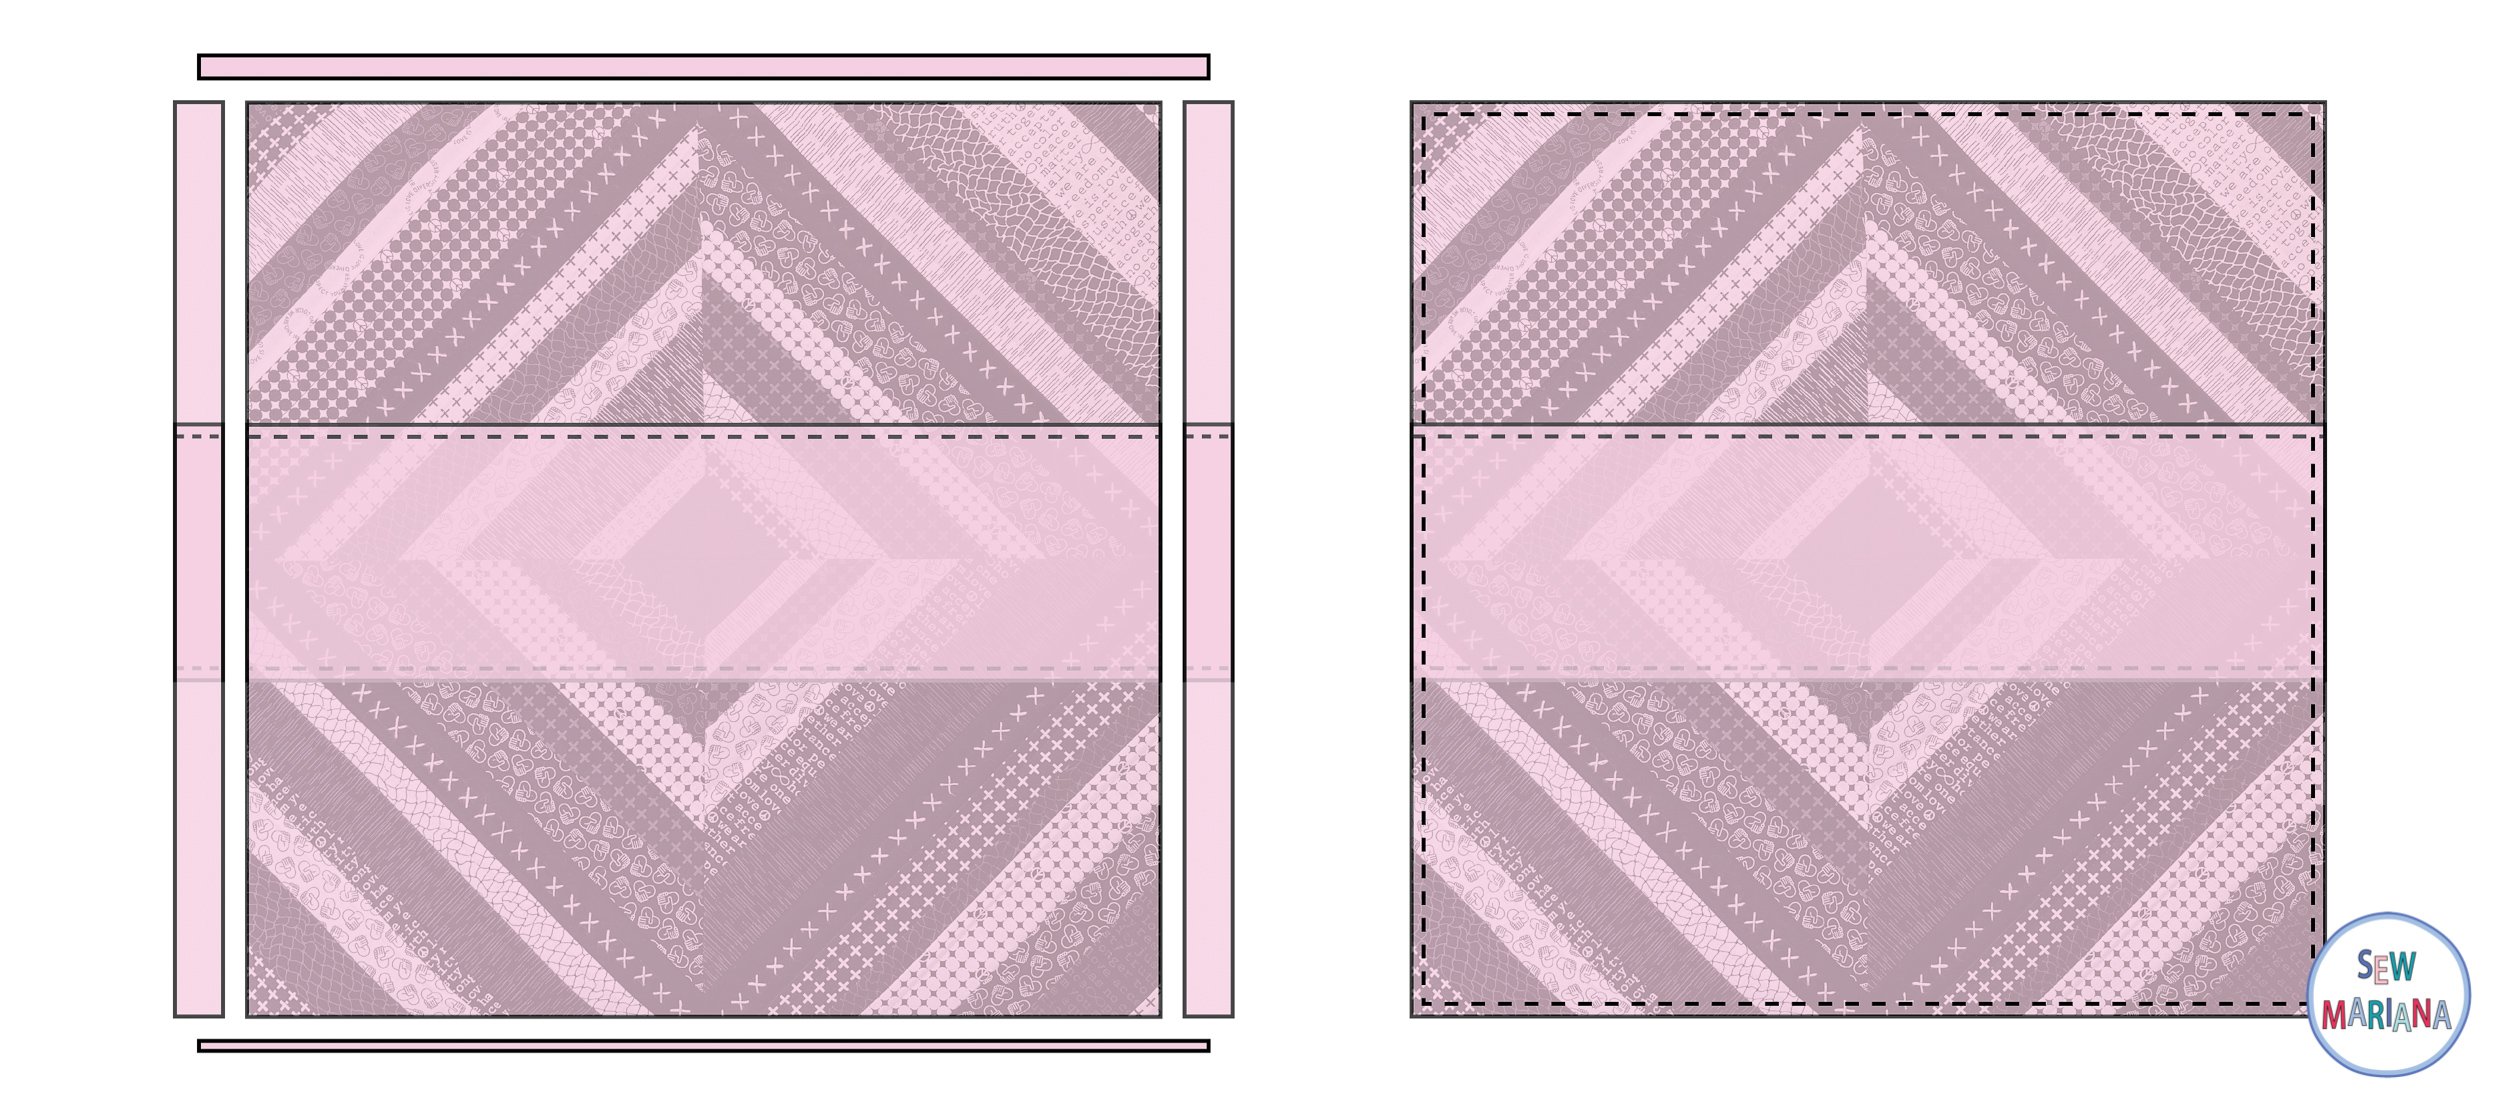
Cut the backing fabric into two 21” x 25” rectangles. Fold in half so they are 21” x 12 ½”. Sew a scant ¼” seam from the fold line. (I’m showing it in pink for so you can see better).

STEP 14
Place the quilt top right side up and one backing piece on the top half following the diagram. Make sure the fold is aligned with the quilt top. Then place the bottom backing piece. There will be an overlap of approx. 5”.

STEP 15
Cut the excess backing on the four sides and clip or pin in place. Sew a ¼” seam all around, backstitching at the beginning and at the end.
STEP 16
Turn the pillow cover right side out. Poke the corners out and press really well.
And that’s it! You didn’t have to match points and it looks so perfect. That’s a win on my book!
Happy quilting!