Scrappy Acorn Quilt Block Tutorial
It is no secret that fall is my very favorite season. From the face-numbing chill to the pair of boots just waiting to be glued to my feet until the pollen comes, Autumn is the time when I pull myself out of my studio to take walks and just… exist outside. That’s probably why I feel more inspired and creative during this season. Think about it! The trees are going through their yearly rebellion, filling our view with a curtain of color. That wonderful mess of fall leaves inspired me to make an acorn using leftovers from my scrappy Whirling Quilt. Since this is a fun and pretty short project, I wrote up a tutorial so you can all enjoy the season as much as I do!

Here we go:
STEP 1. Go grab your scraps! You’ll need 28 squares 1 3/4" x 1 3/4".

You’ll also need:
A scrap for the stalk that’s 2 1/4" square.
A scrap at least 9 1/2” x 8” for the acorn’s base. (A layer cake square is perfect for this one!).
One fat quarter for the background and borders.
If you want to make it into a mini quilt, you’ll also need:
A piece of batting measuring 17” x 19”.
A backing fabric measuring 17” x 19”.
Two strips 2 1/2" x WOF for binding.

TIP: Starch all your fabric. This really helps with accuracy, especially when working with small pieces. If you don’t like to starch, just skip this step but still make sure to iron all your pieces really well.
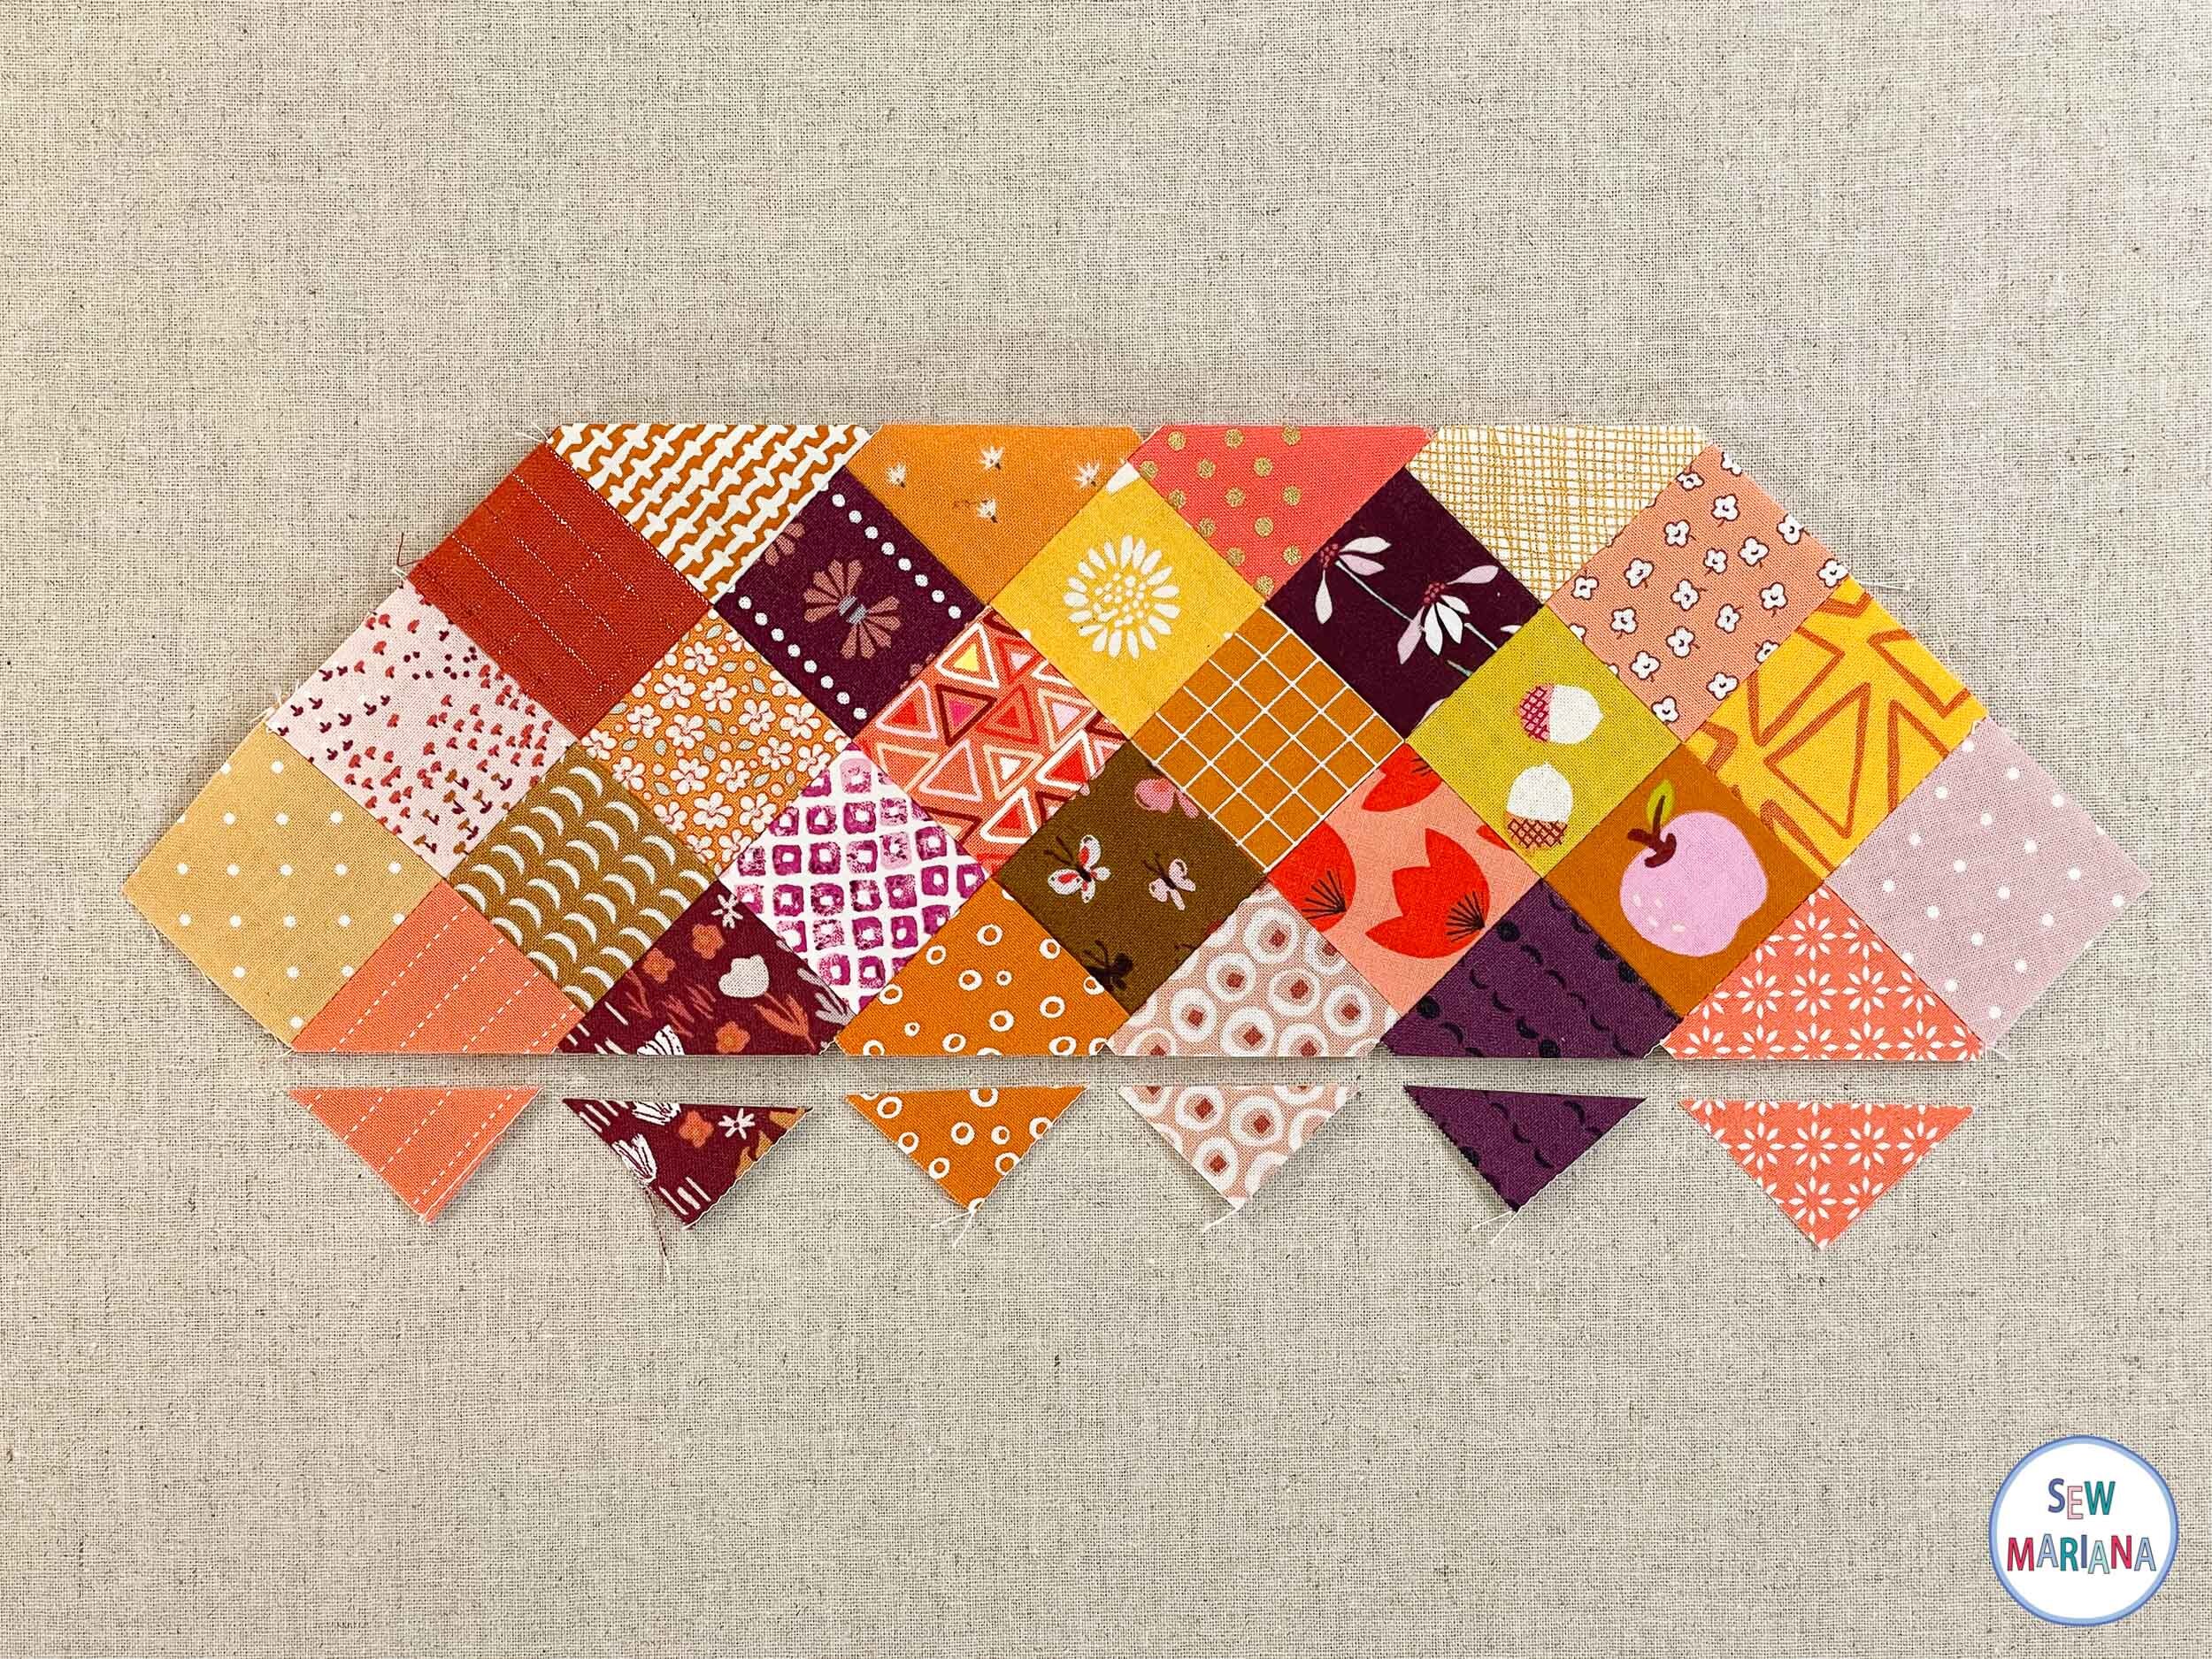
STEP 2. Place your squares as shown. Then sew them into rows pressing in the direction of the arrows.


STEP 3. Sew the rows together. This time, press the seams open.


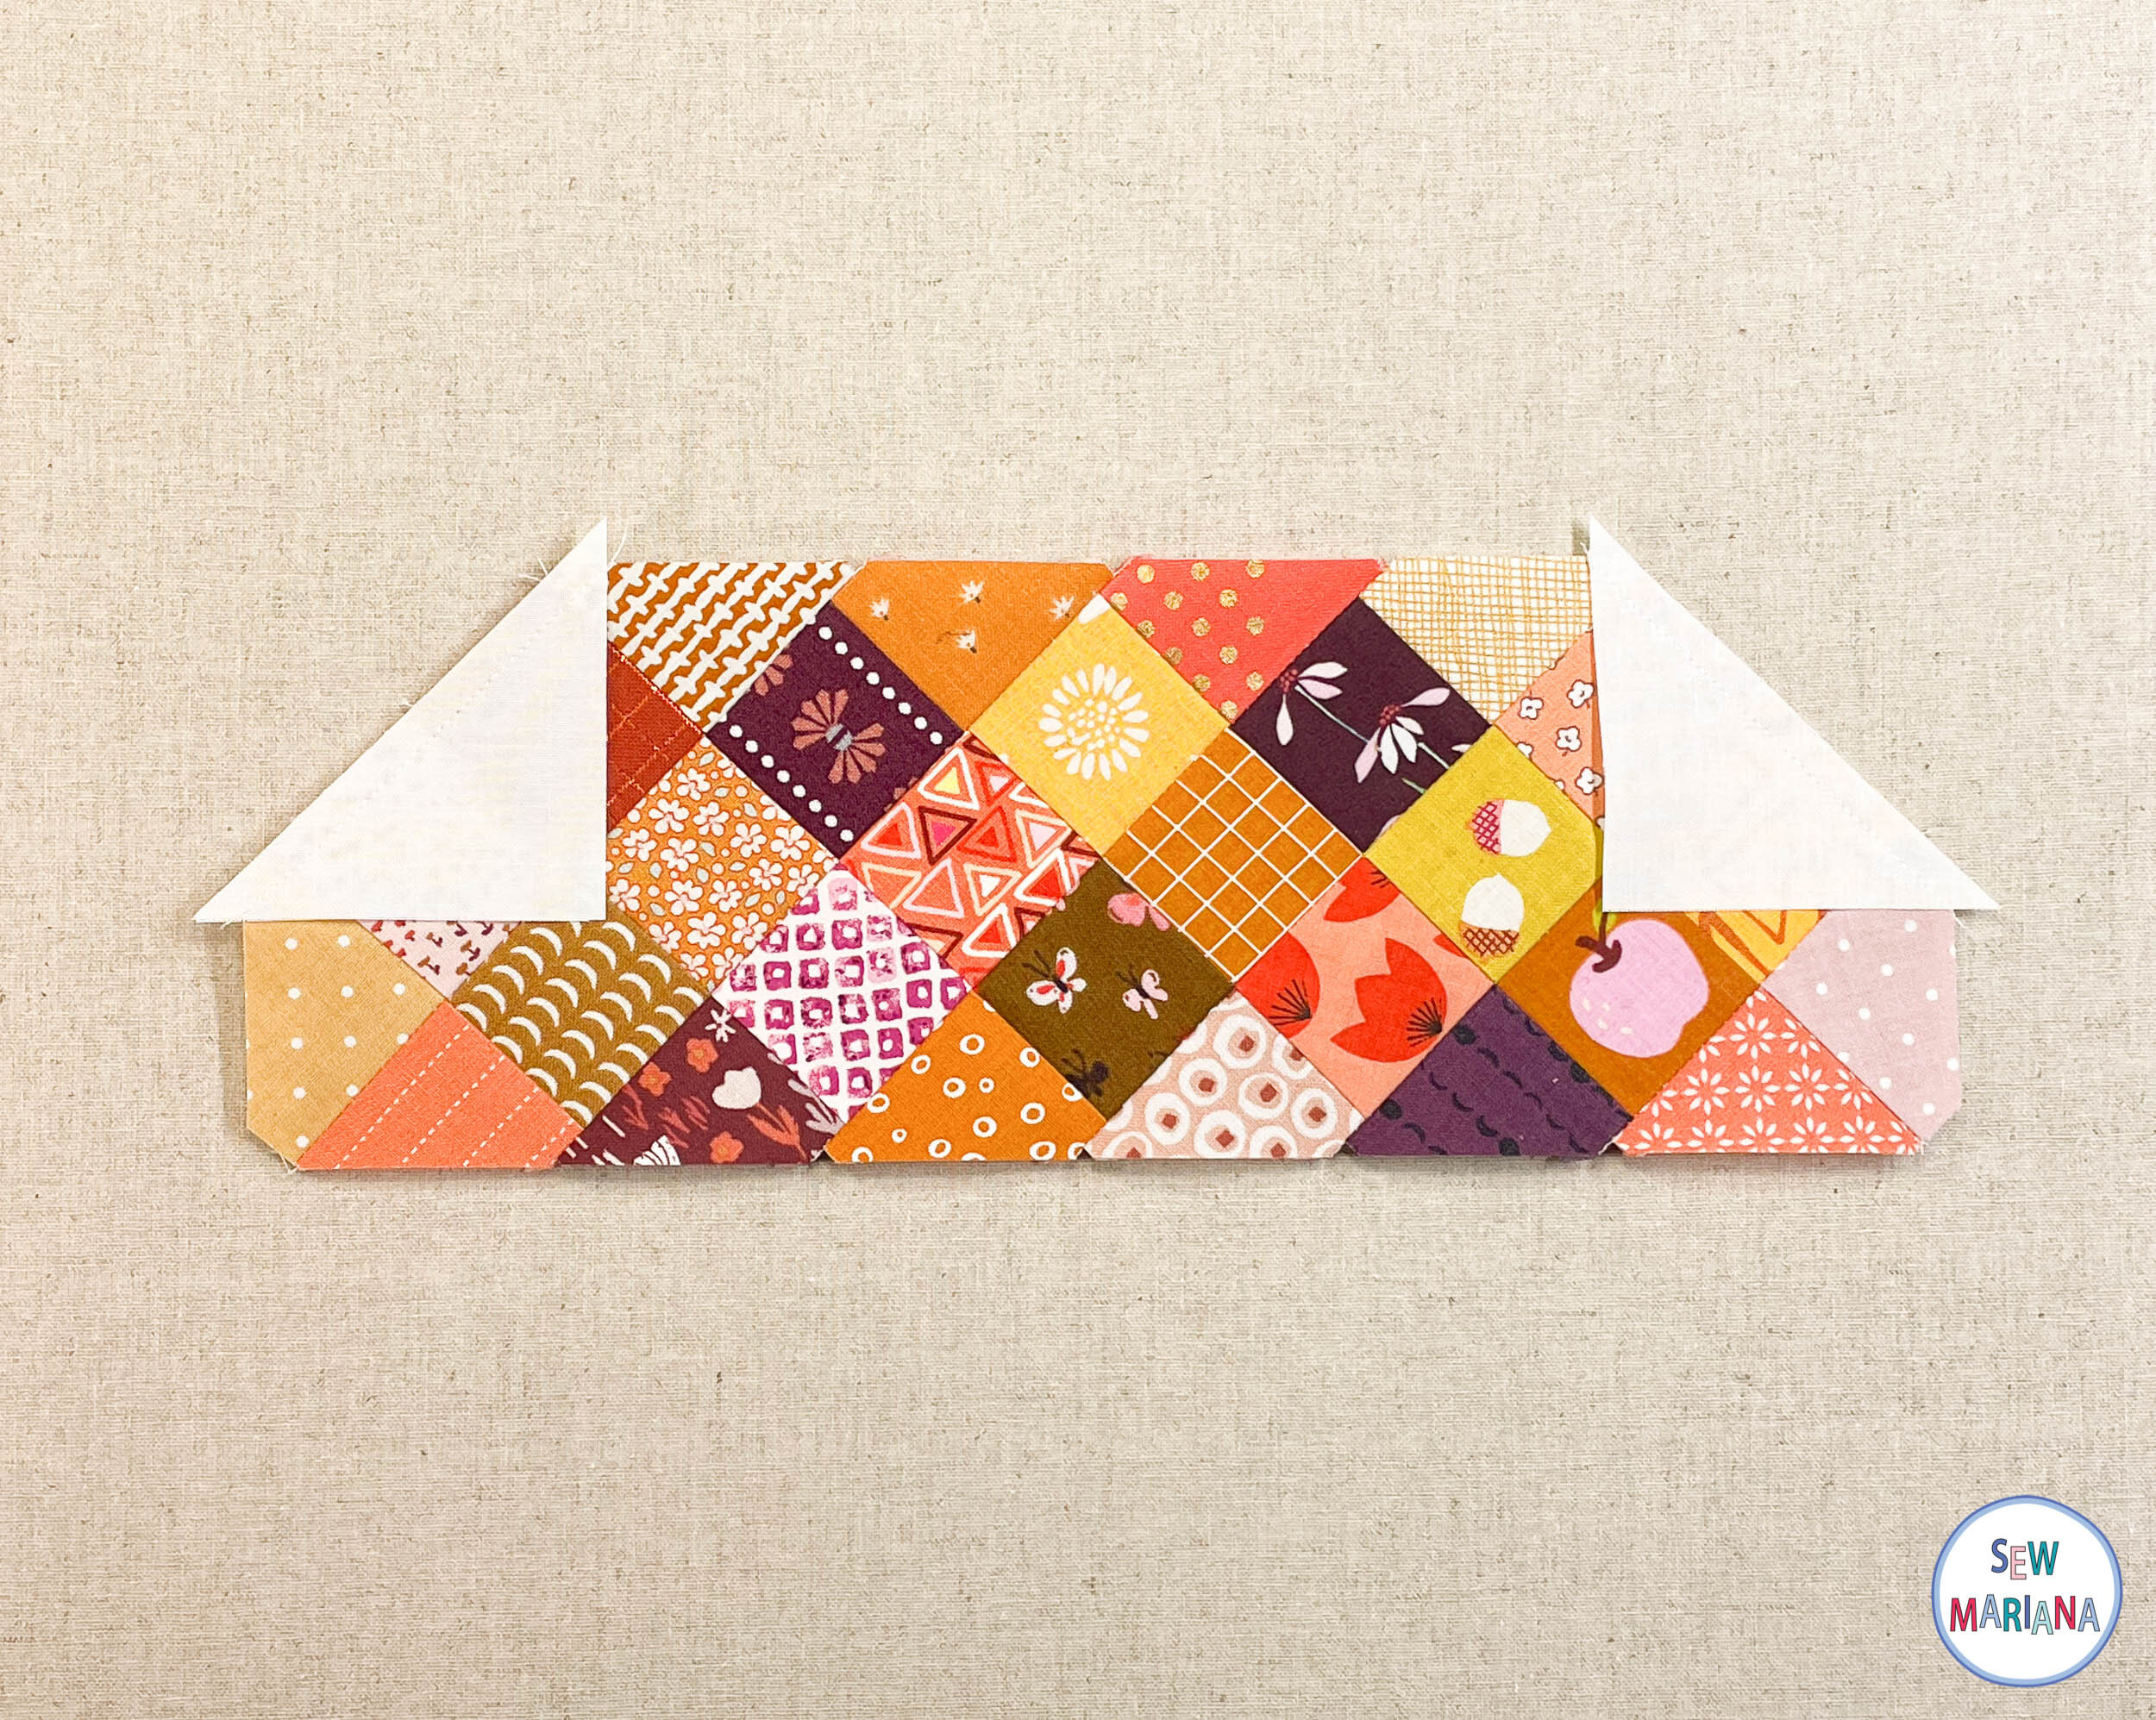
STEP 4. Trim 1/4" away from the points at the top.


STEP 5. Then trim 1/4" away from the points at the bottom.

STEP 6. Finally, trim 1/4" away from both sides as shown.


STEP 7. From the background fabric, cut:

STEP 8. Cut the A square on the diagonal. Add one half square triangle to each top corner as shown. Press out.

STEP 9. Draw a diagonal line on the wrong side of the B square and align it to the top left corner of the stalk square. Stitch on the drawn line, trim 1/4” away from the seam and press out.


STEP 10. Add a C rectangle to each side. Press out.


STEP 11. Assemble the acorn top unit and the stalk unit. Press the seam open.


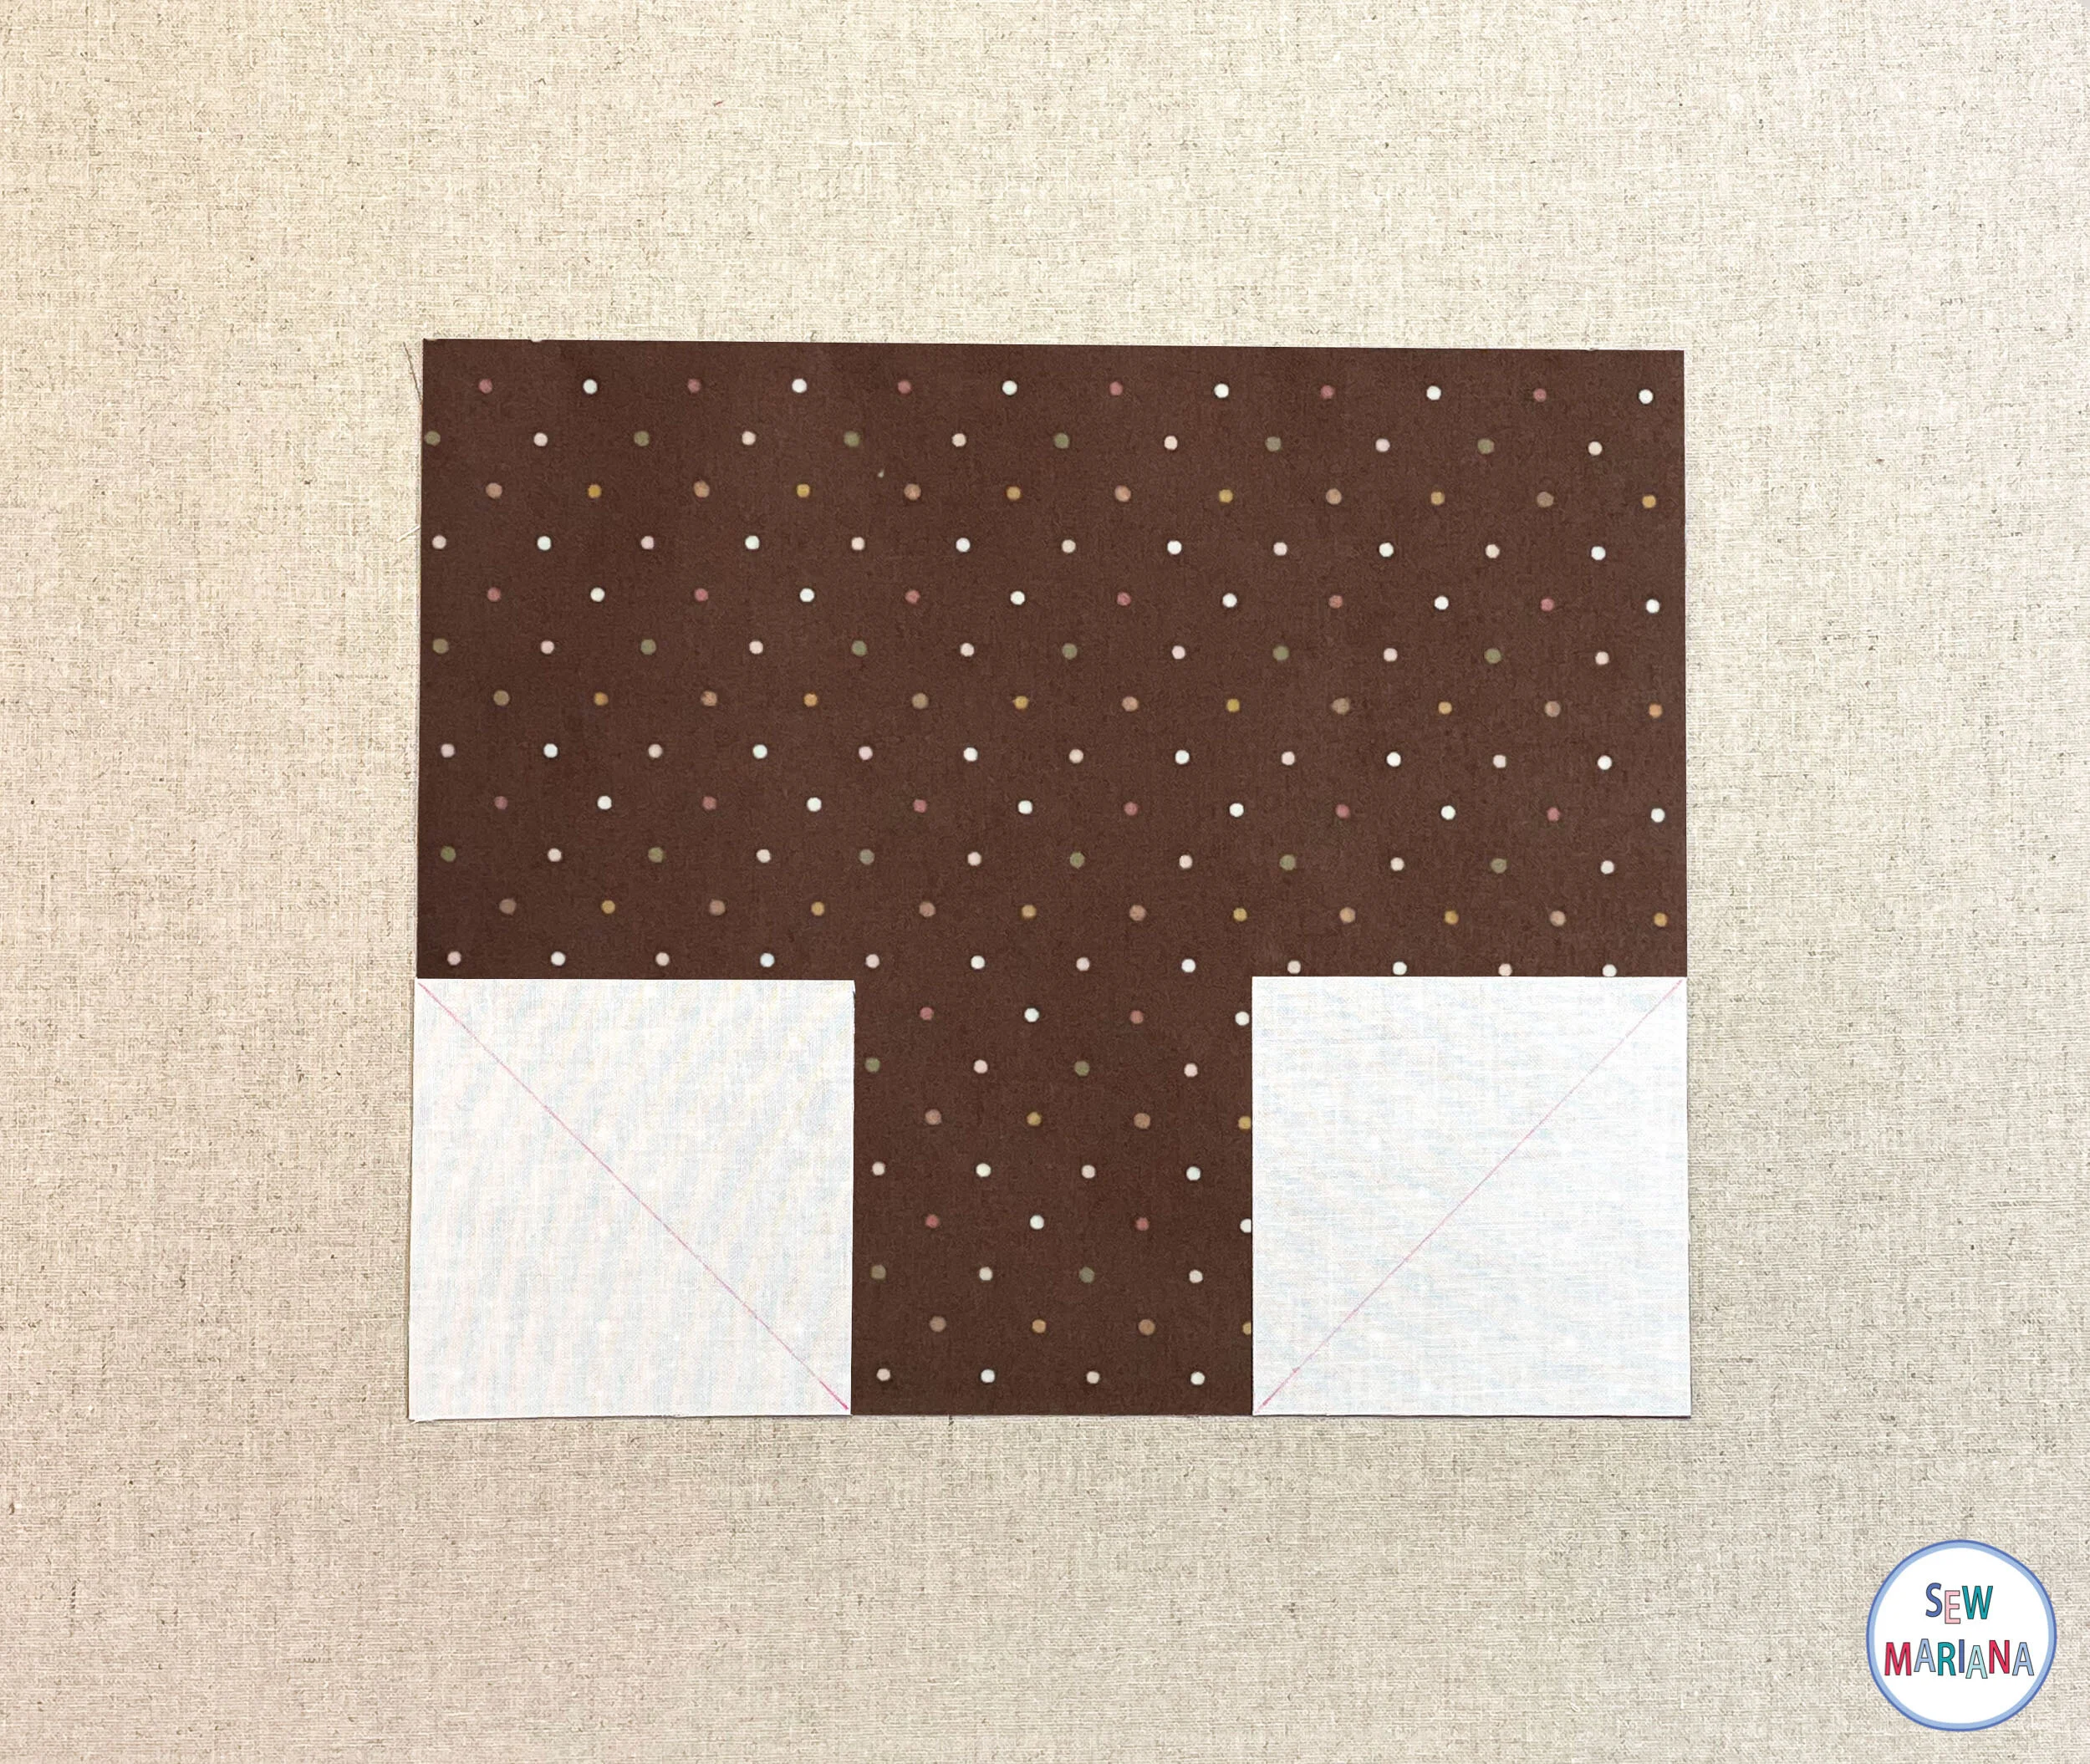
STEP 12. Draw a diagonal line on the wrong side of the D squares and align them to the bottom corners of the acorn base. Stitch on the drawn line, trim 1/4” away from the seam and press out.

STEP 13. Add an E rectangle to each side. Press out.


STEP 14. Assemble the top and the bottom of the acorn. Press the seam open.


STEP 15. Add the vertical borders (F rectangles) and finally the top and bottom borders (G rectangles). Press out.


Your acorn block is ready!
Now, if you want to make it into a mini quilt or pillow, use the batting, binding, and backing fabrics. I decided to quilt small squares in the background and diagonal lines in the base of the acorn.


This acorn might become a pillow down the road, but I haven’t decided yet! I’ll keep you posted, and I hope you’ll keep me posted if you make this by tagging @sewmariana and using #smacornquiltblock .
Happy quilting!