Hexagons Coasters Tutorial
As much as I love a giant, hefty quilt to throw on during this cold weather, big projects like that are hard. They take a lot of time and heavy lifting. And we never want quilting to feel like a chore, so it’s nice to mix it up and make something small and colorful every once in a while!
These hexie coasters are just the BEST. Not only are they quick to make, but they show off lots of prints, are super pretty, and something I know will be used a lot. (Do any of you have kids who leave glasses of water absolutely everywhere? We call them “puddles”).

Since we’re in the holiday season, these serve as a simple way to add festive flare to your morning coffee or to that little side table you never know what to do with. As an added bonus, these are the perfect gift for just about anybody on your list. We always have a few tricky family members or friends, people who we never know what to gift. But who won’t love some personally made coasters?
Below you’ll find the step-by-step tutorial I’ve put together for you. Consider it an early Christmas gift of my own to you all for being so amazing. To the tutorial!

MATERIALS
To make a set of 6 coasters you will need:
2 strips 4 ½" x 21" from 6 different fabrics for a total of 12 strips.
A piece of fusible fleece (I used Pellon 987F) at least 4 ½" x 34".
The 3-in-1 Hexie ruler (get it HERE) or the hexagon template. (you can download it HERE).
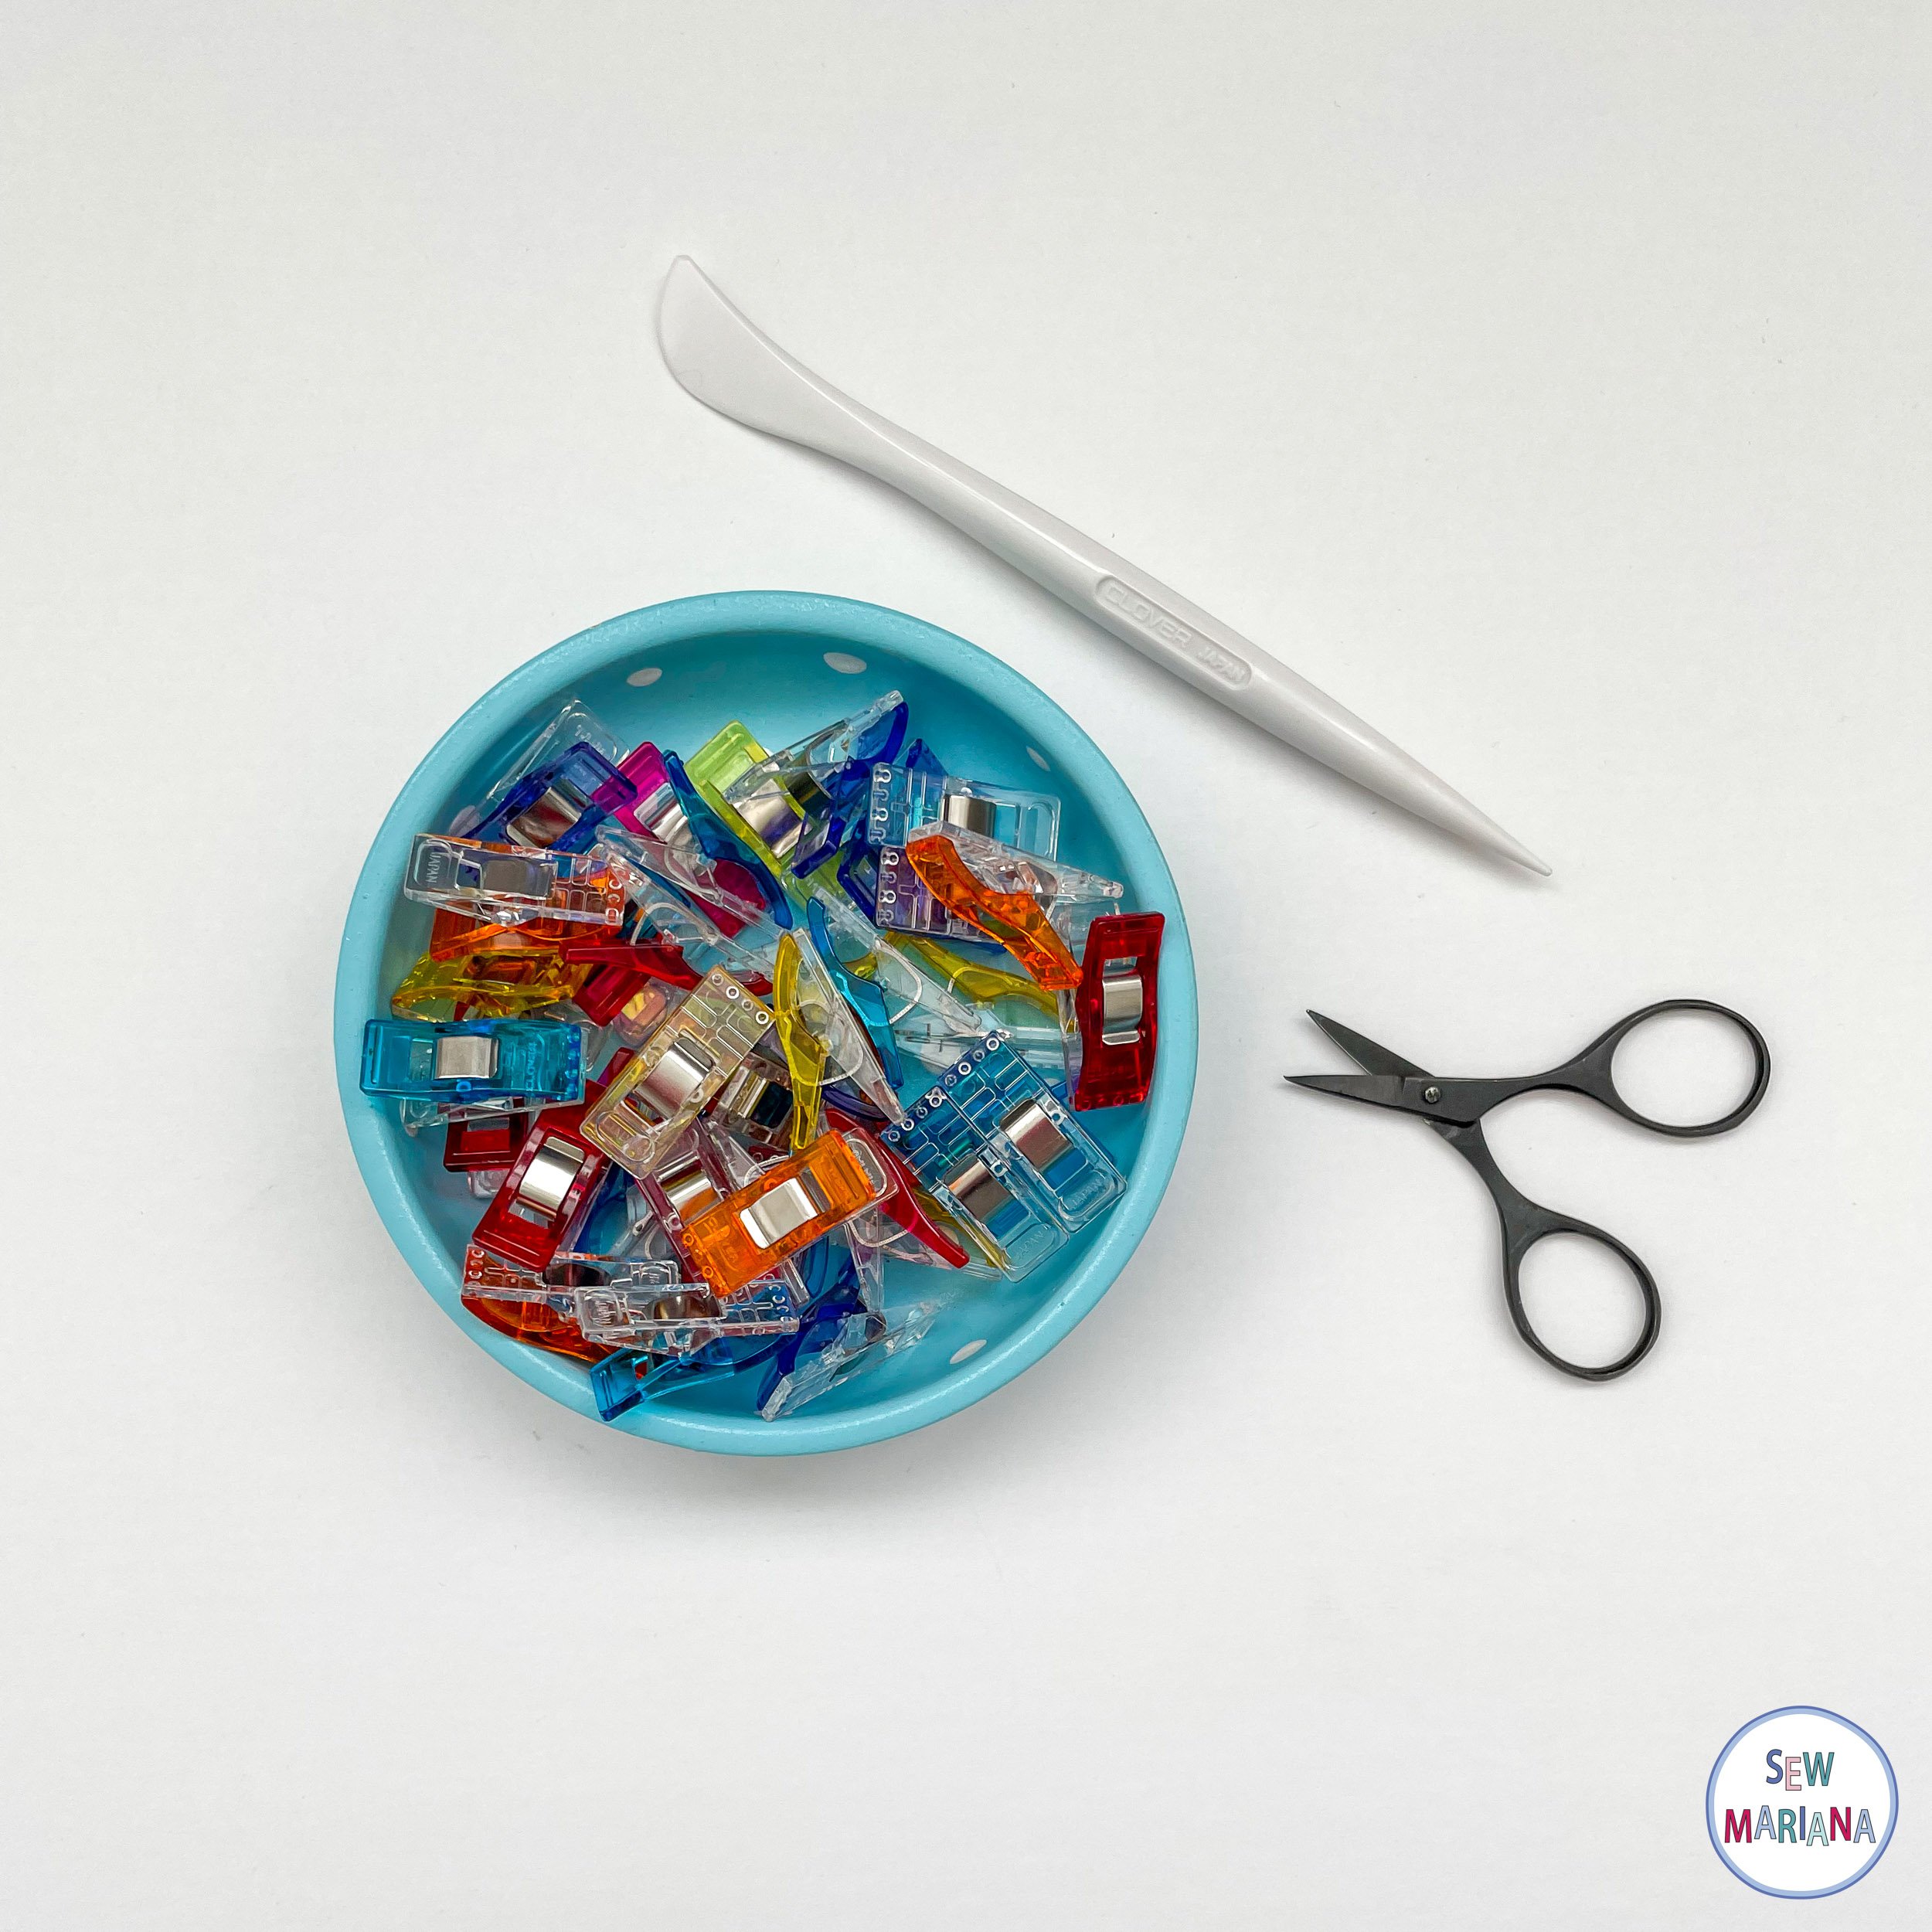
Sewing clips.
Point turner or some tool to push out your points.
Regular quilting supplies: sewing machine, small scissors, thread, etc.

The cutting instructions shown here are using the ruler, but you can cut the hexagons from the downloadable template.
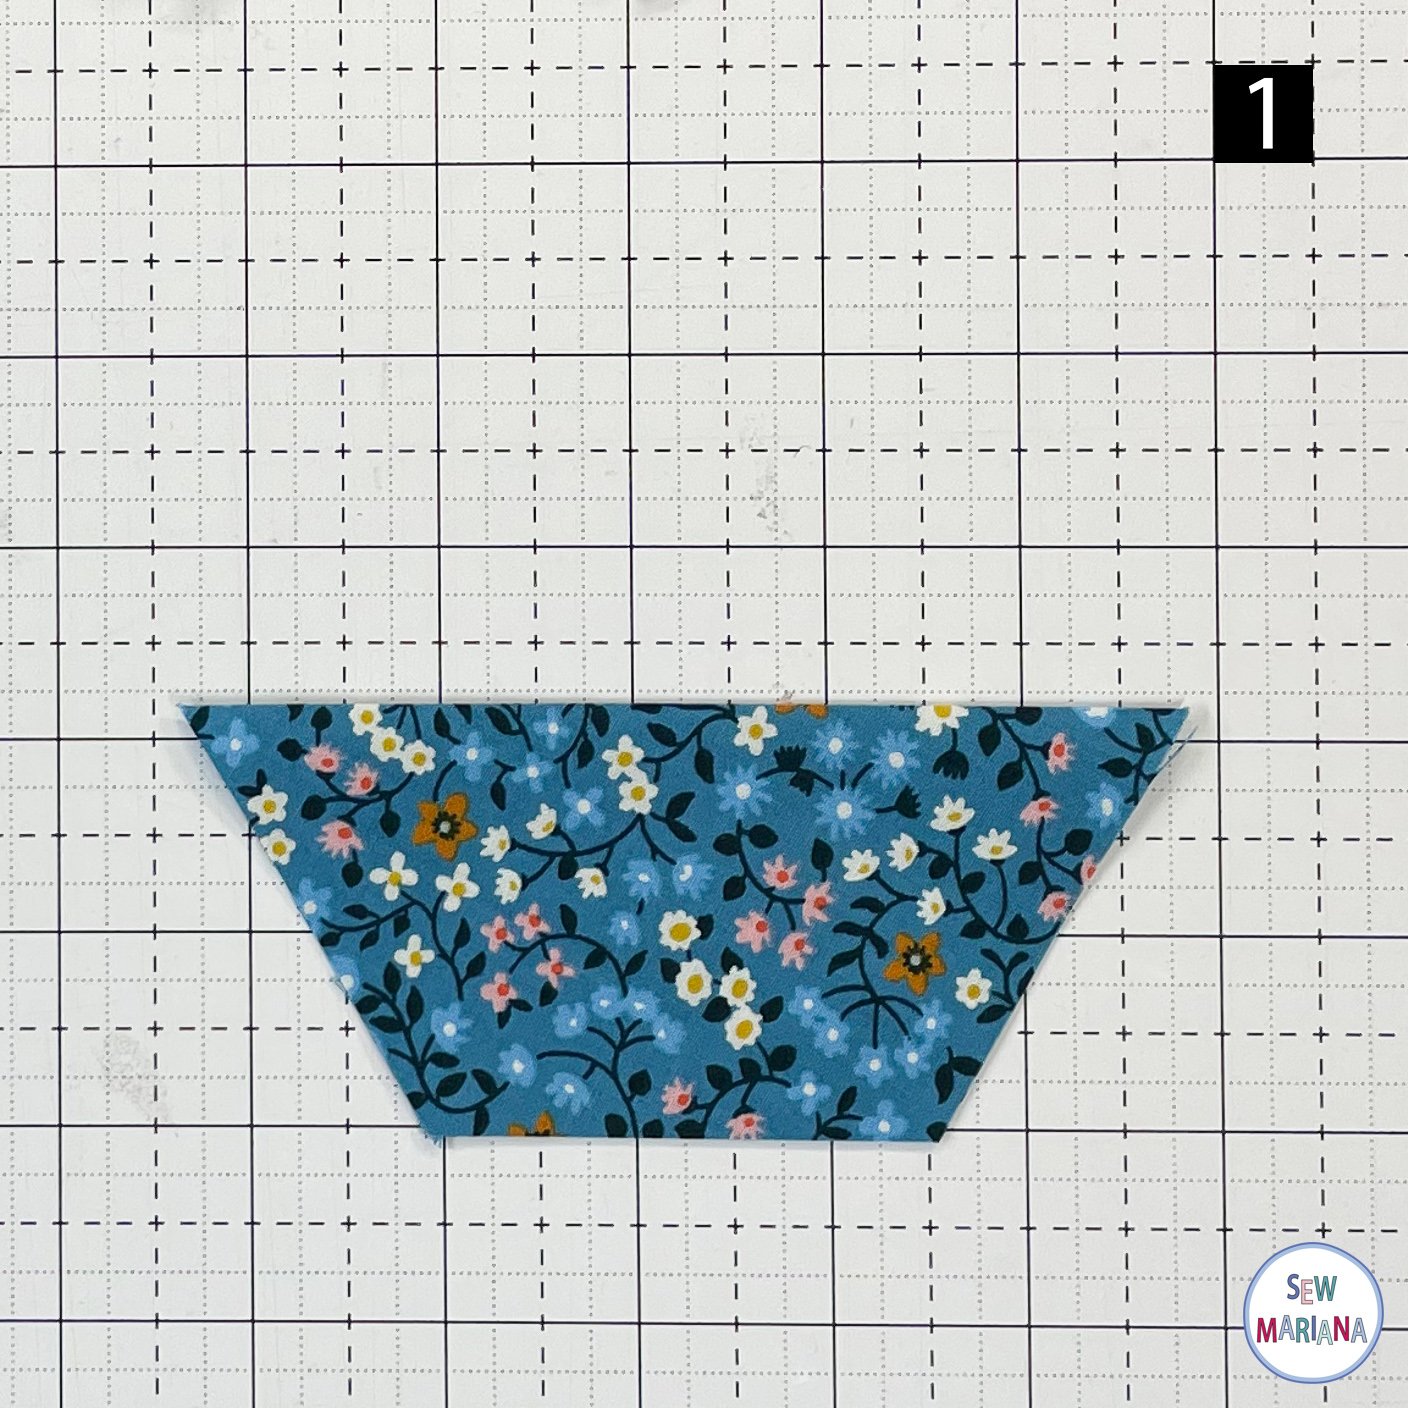
STEP 1
Align the top and bottom of the ruler with the top and bottom of one strip. Cut the right sides.

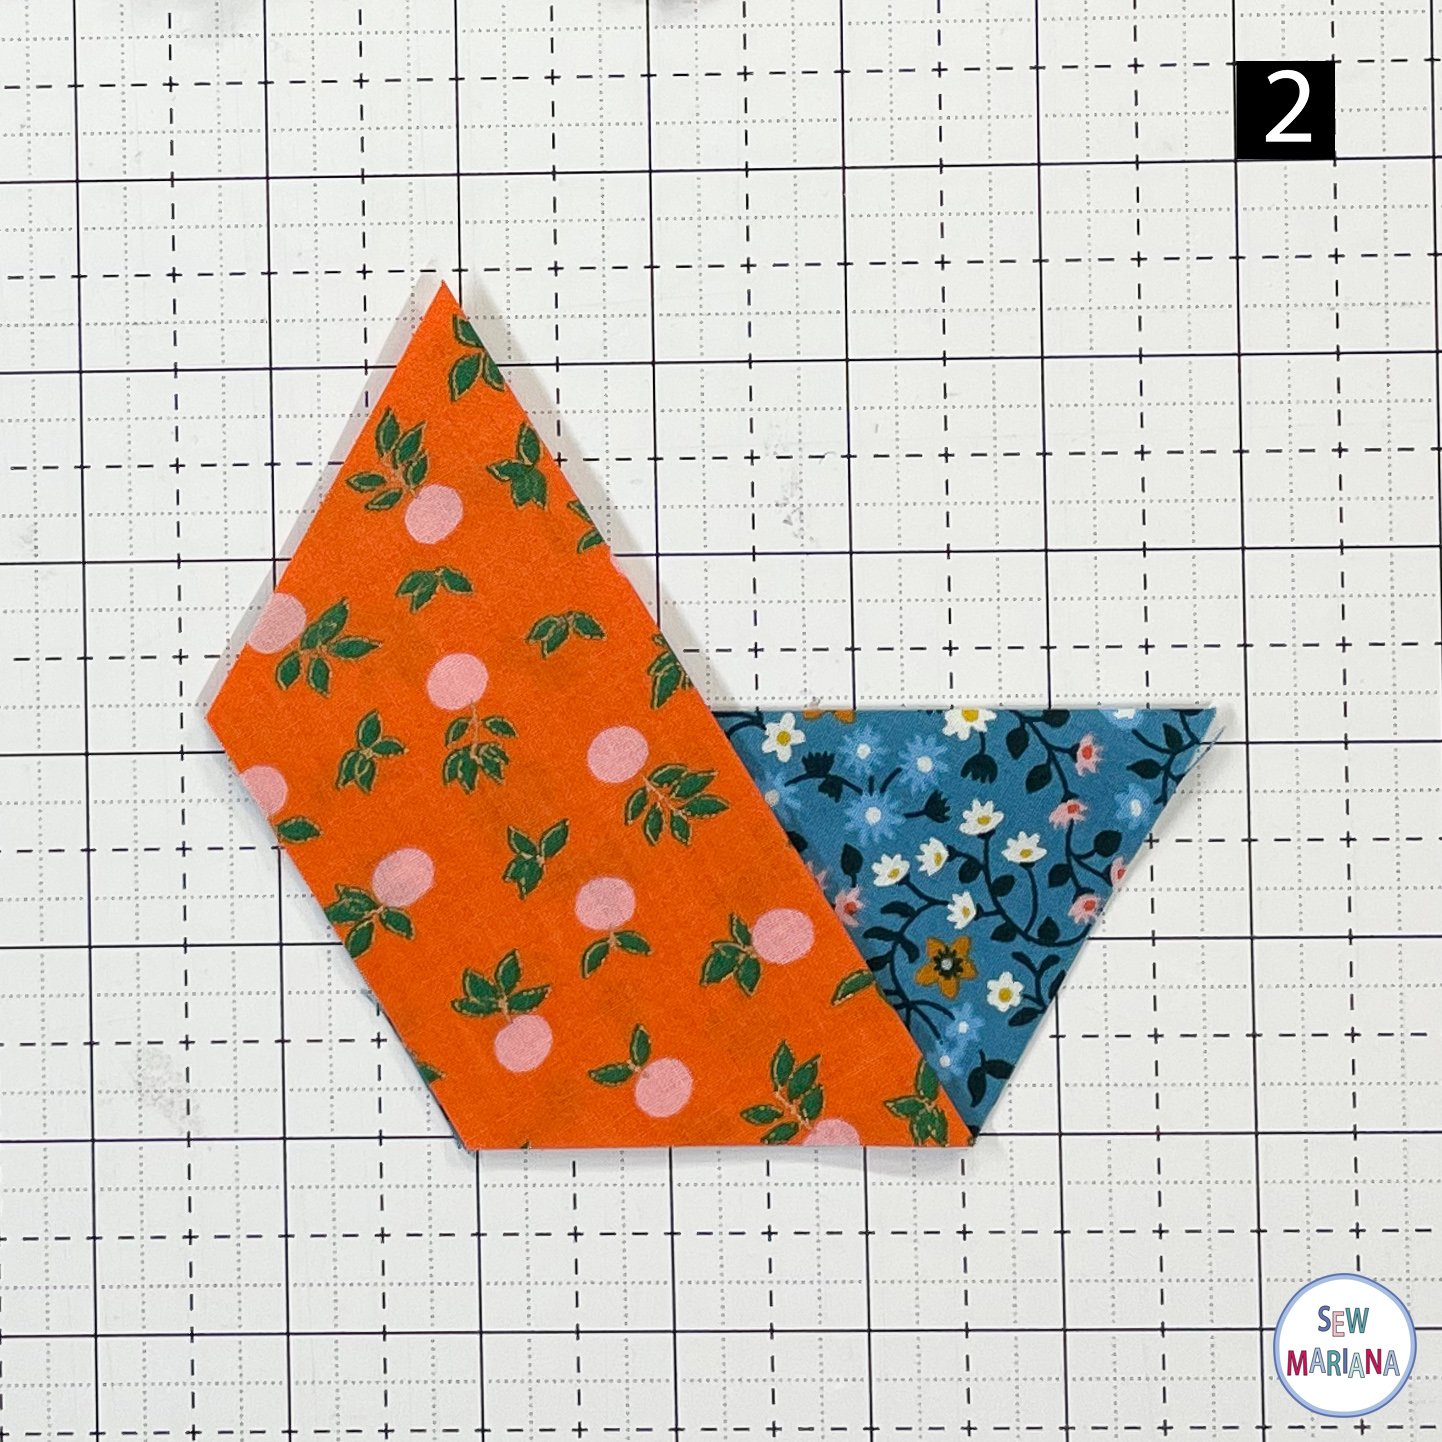
STEP 2
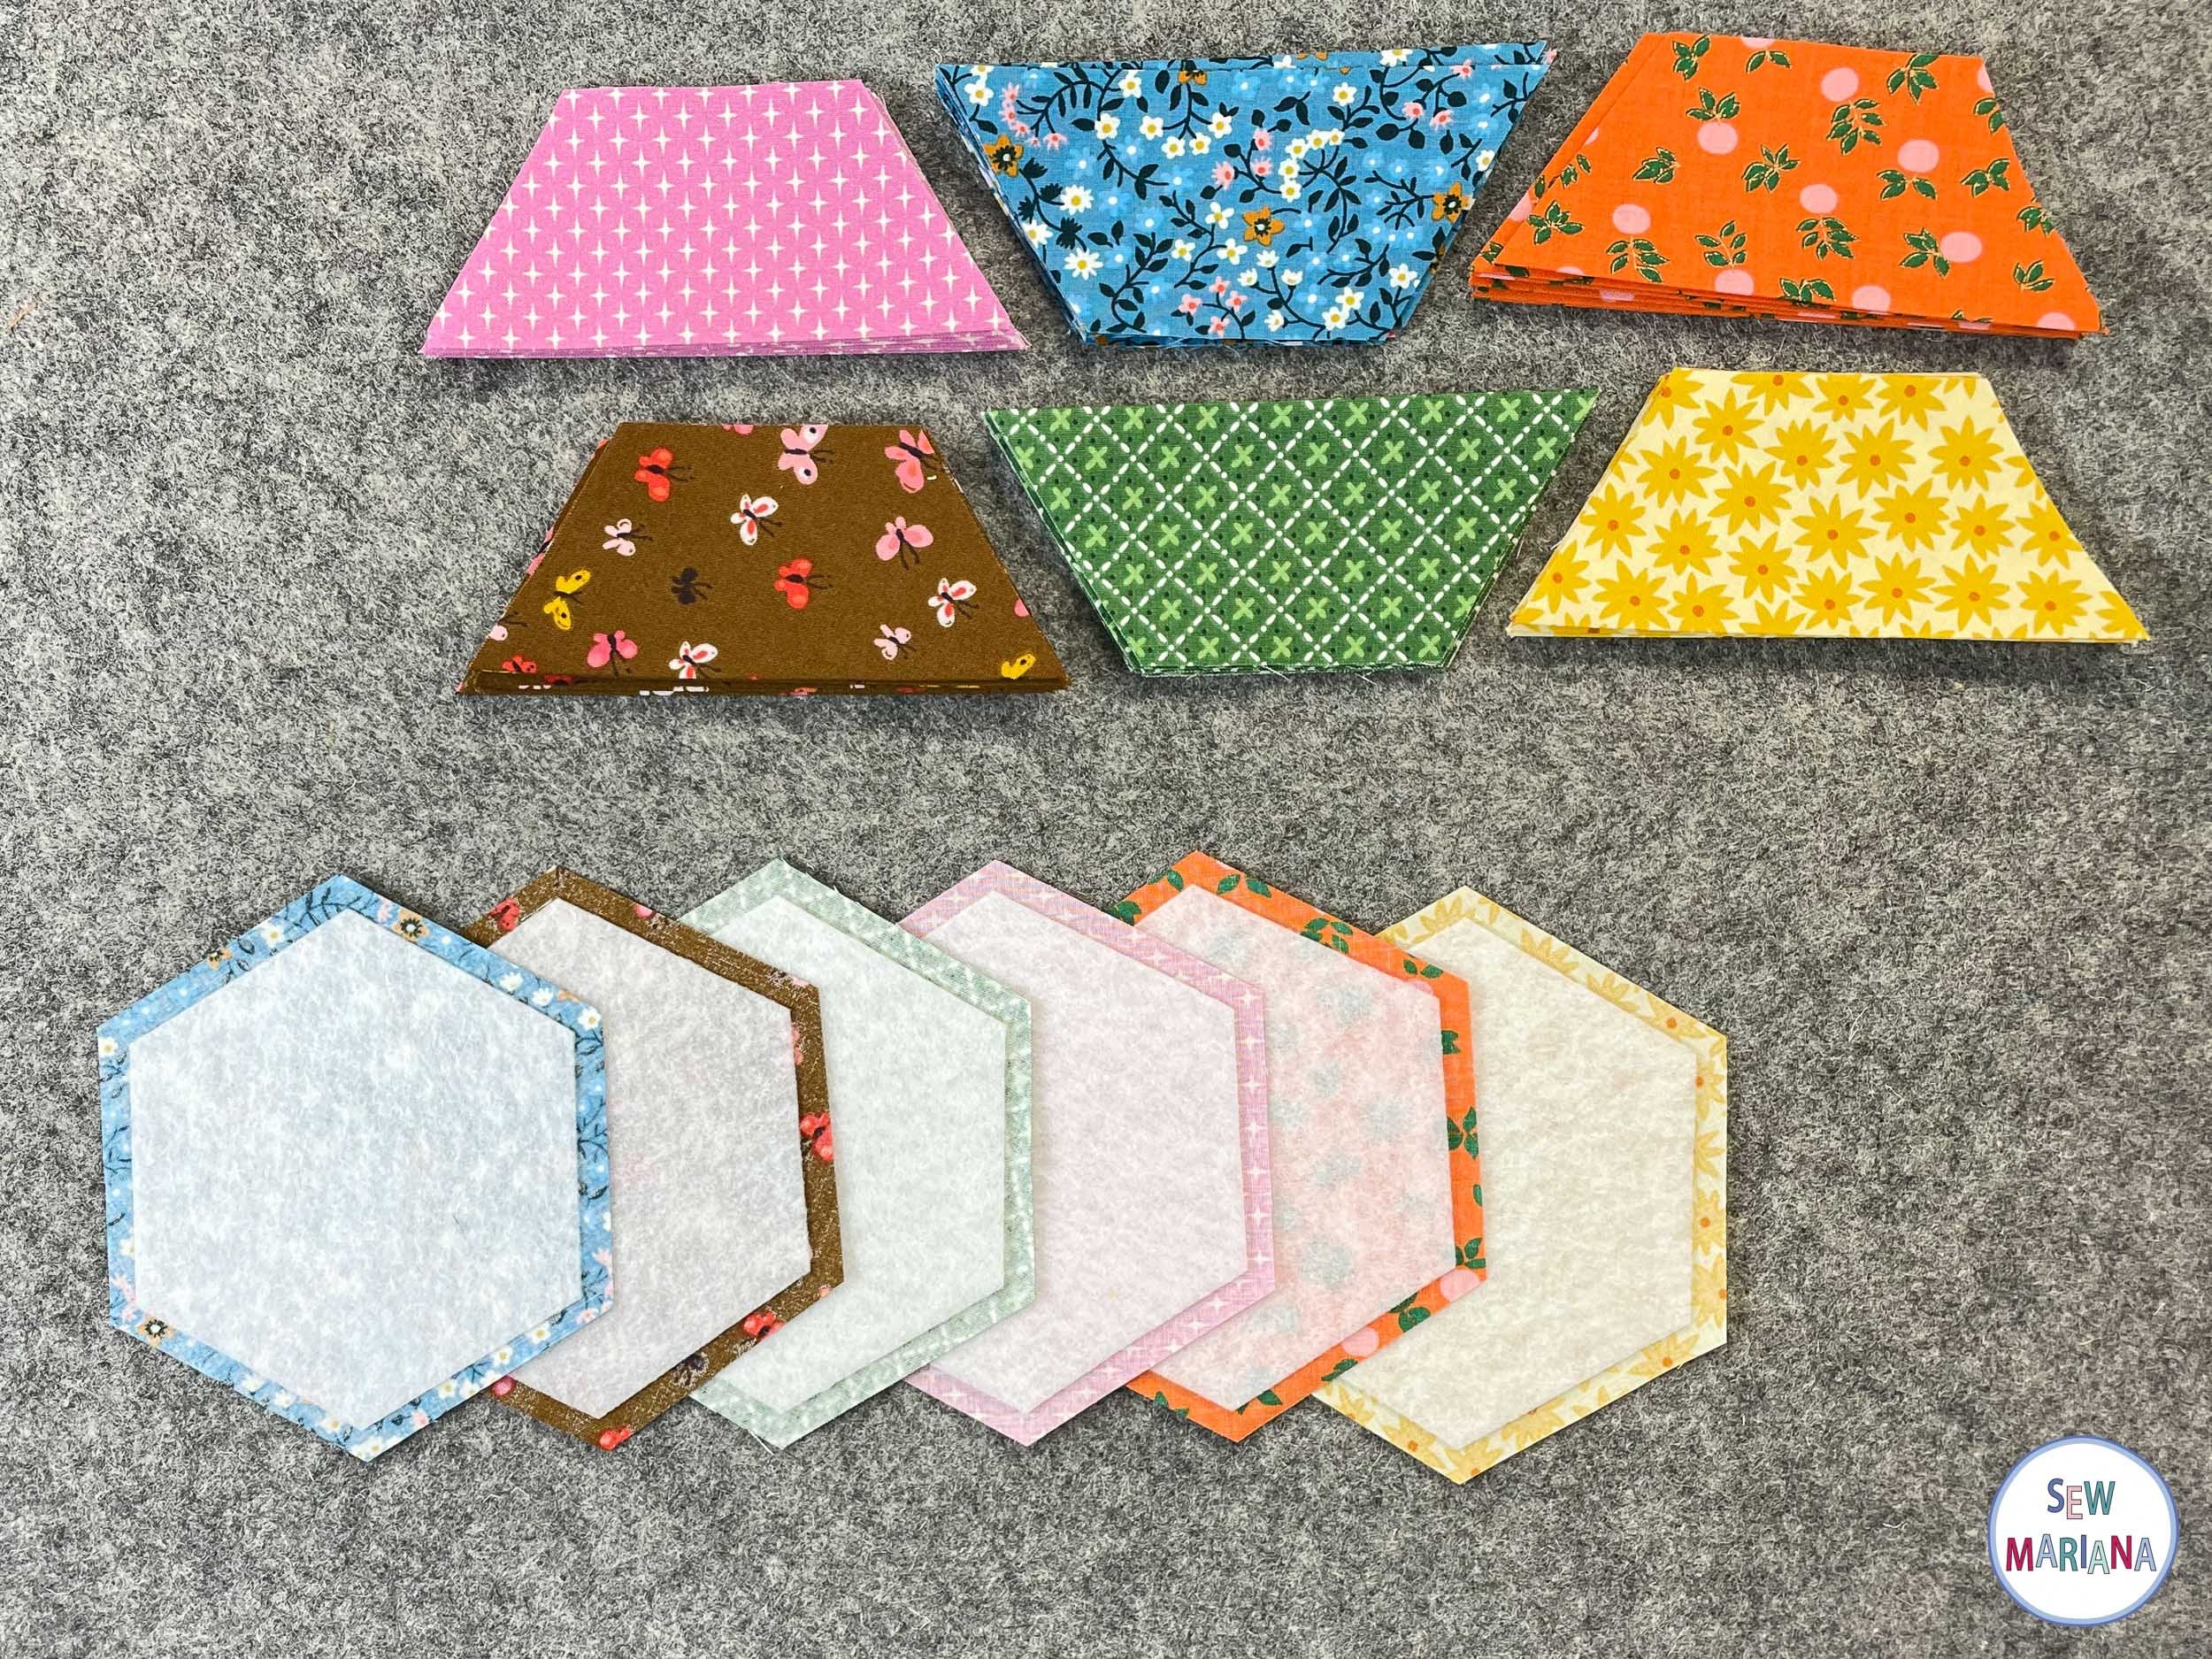
Rotate the cut fabric 180 degrees and cut. Realign the ruler and repeat the same process to cut 7 hexagons from each of the 6 different fabrics for a total of 42 hexagons. (4 hexagons can be cut from a 21" strip and 8 hexagons can be cut from a WOF strip).


STEP 3
From the fusible fleece cut a strip 4 ½" x 34". Then cut 6 hexagons in the same way as before.

STEP 4
Align the 1/4" mark on the ruler with the edge of one side of the hexagon and cut. Repeat on the other 5 sides. This is to reduce the bulk on the seams.


STEP 5
Set aside one hexagon from each print and the fusible pieces.

STEP 6
Fold in half, point to point, 6 hexagons from each different print and press.

STEP 7
To make the back of the coasters, center one fleece hexagon and one unfolded fabric hexagon as shown. Iron in place following the manufacturer directions. Repeat to make a total of six. Set aside.

STEP 8
Follow the images below to assemble the folded hexagons.


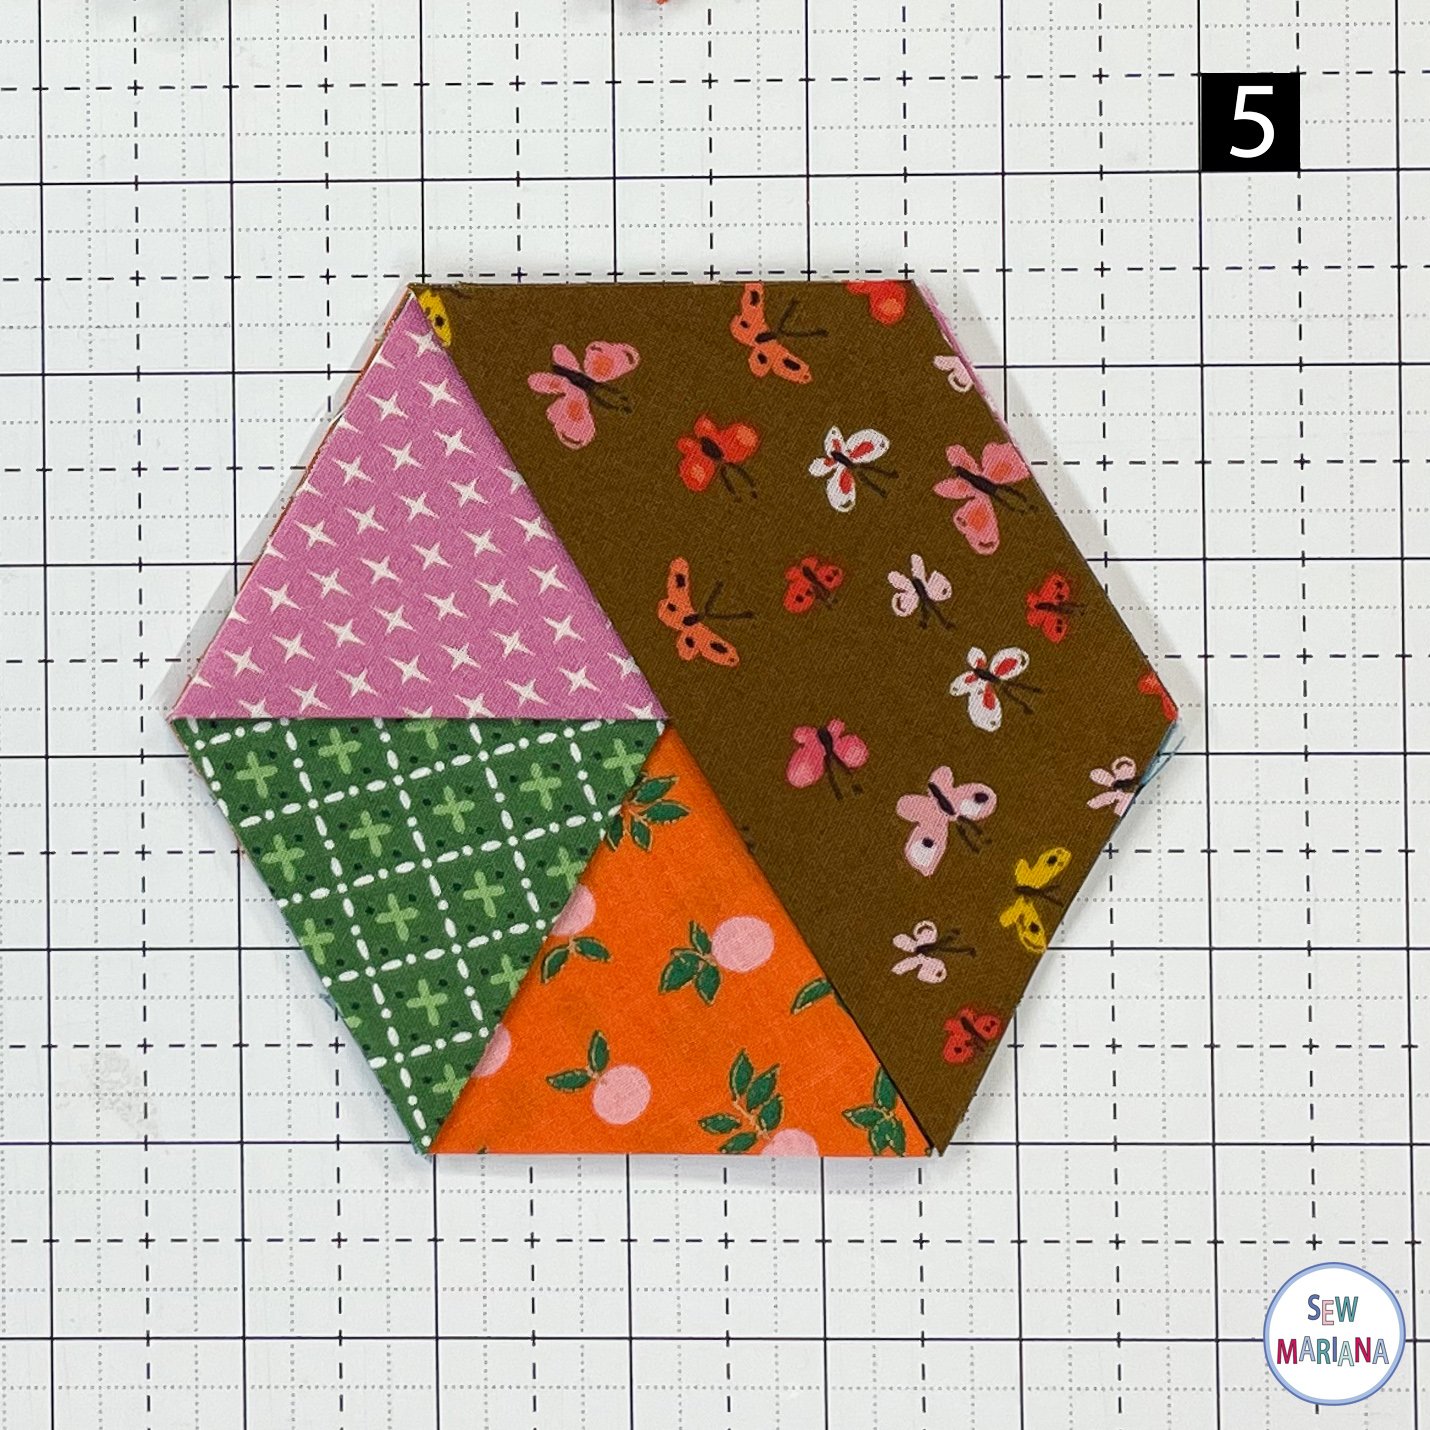
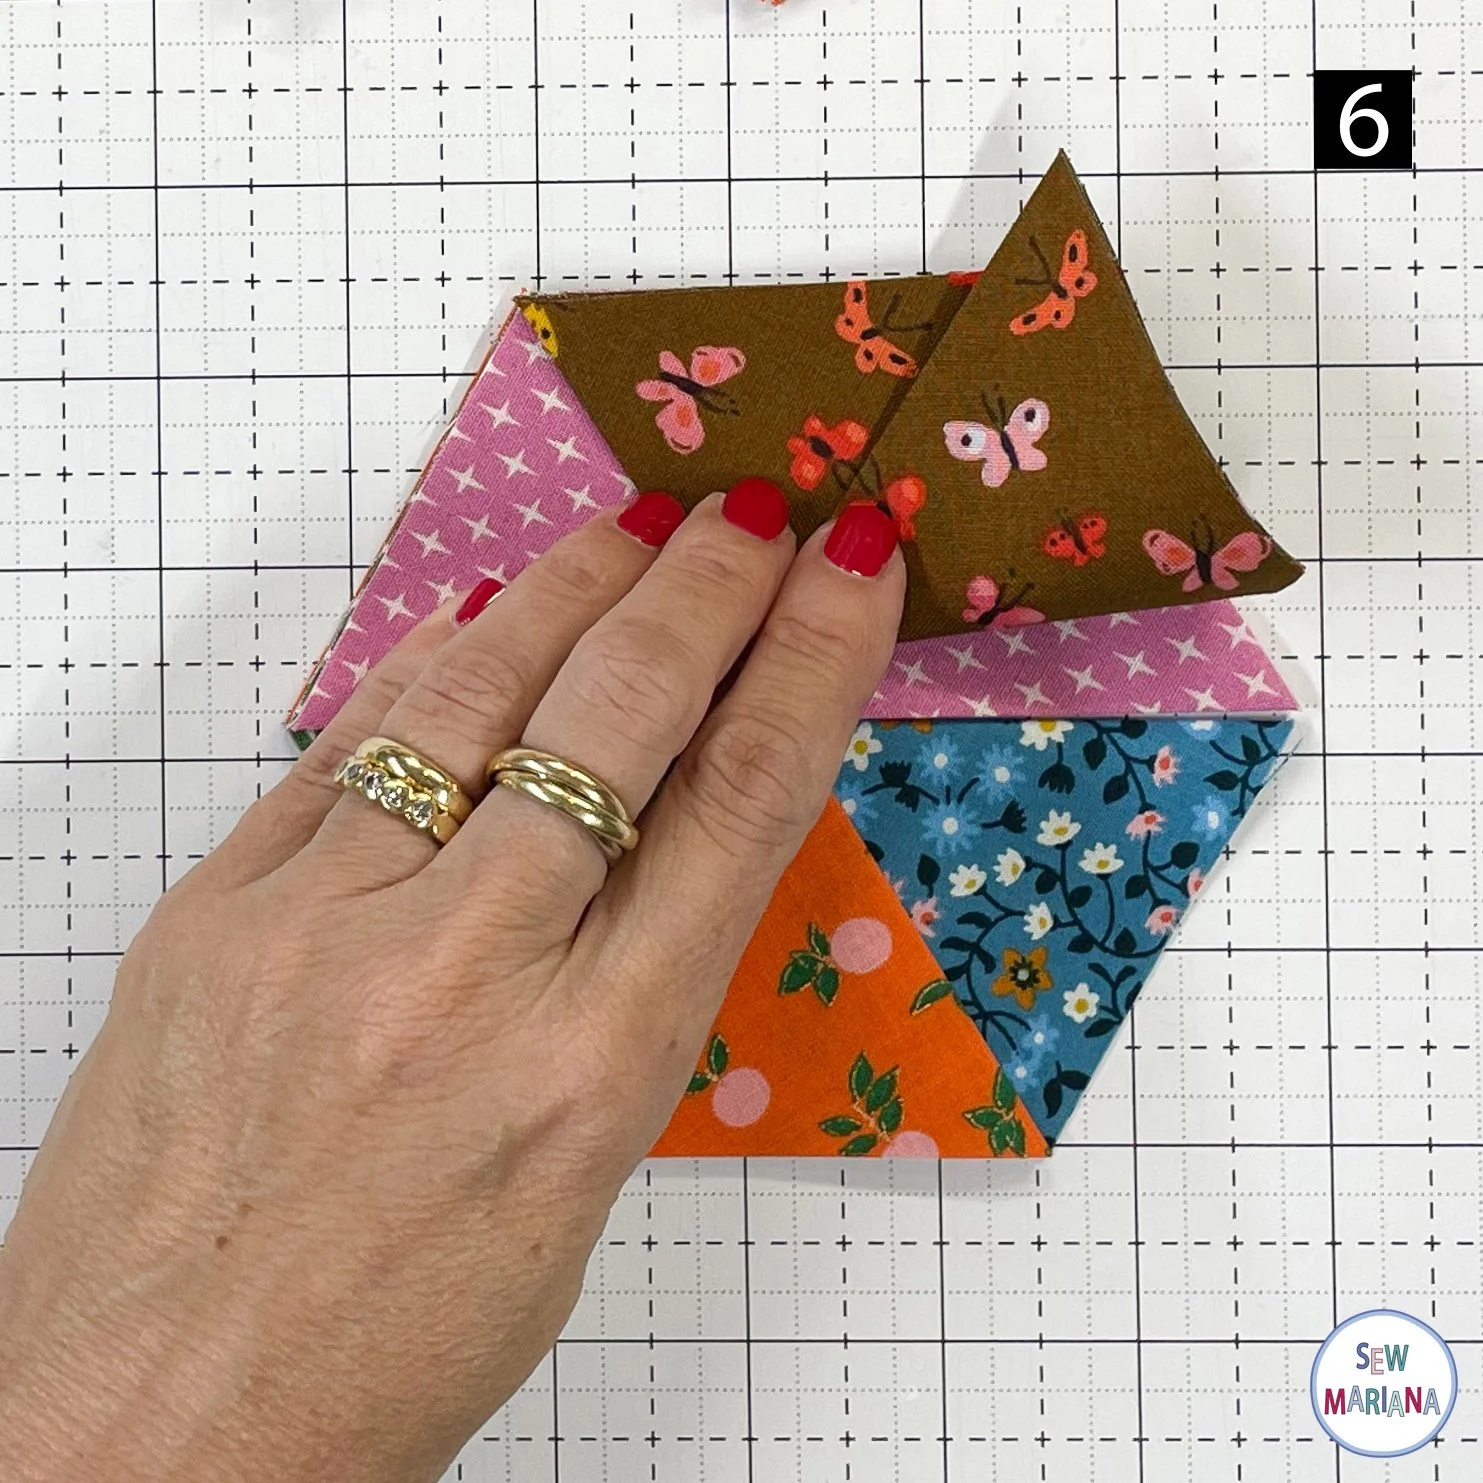
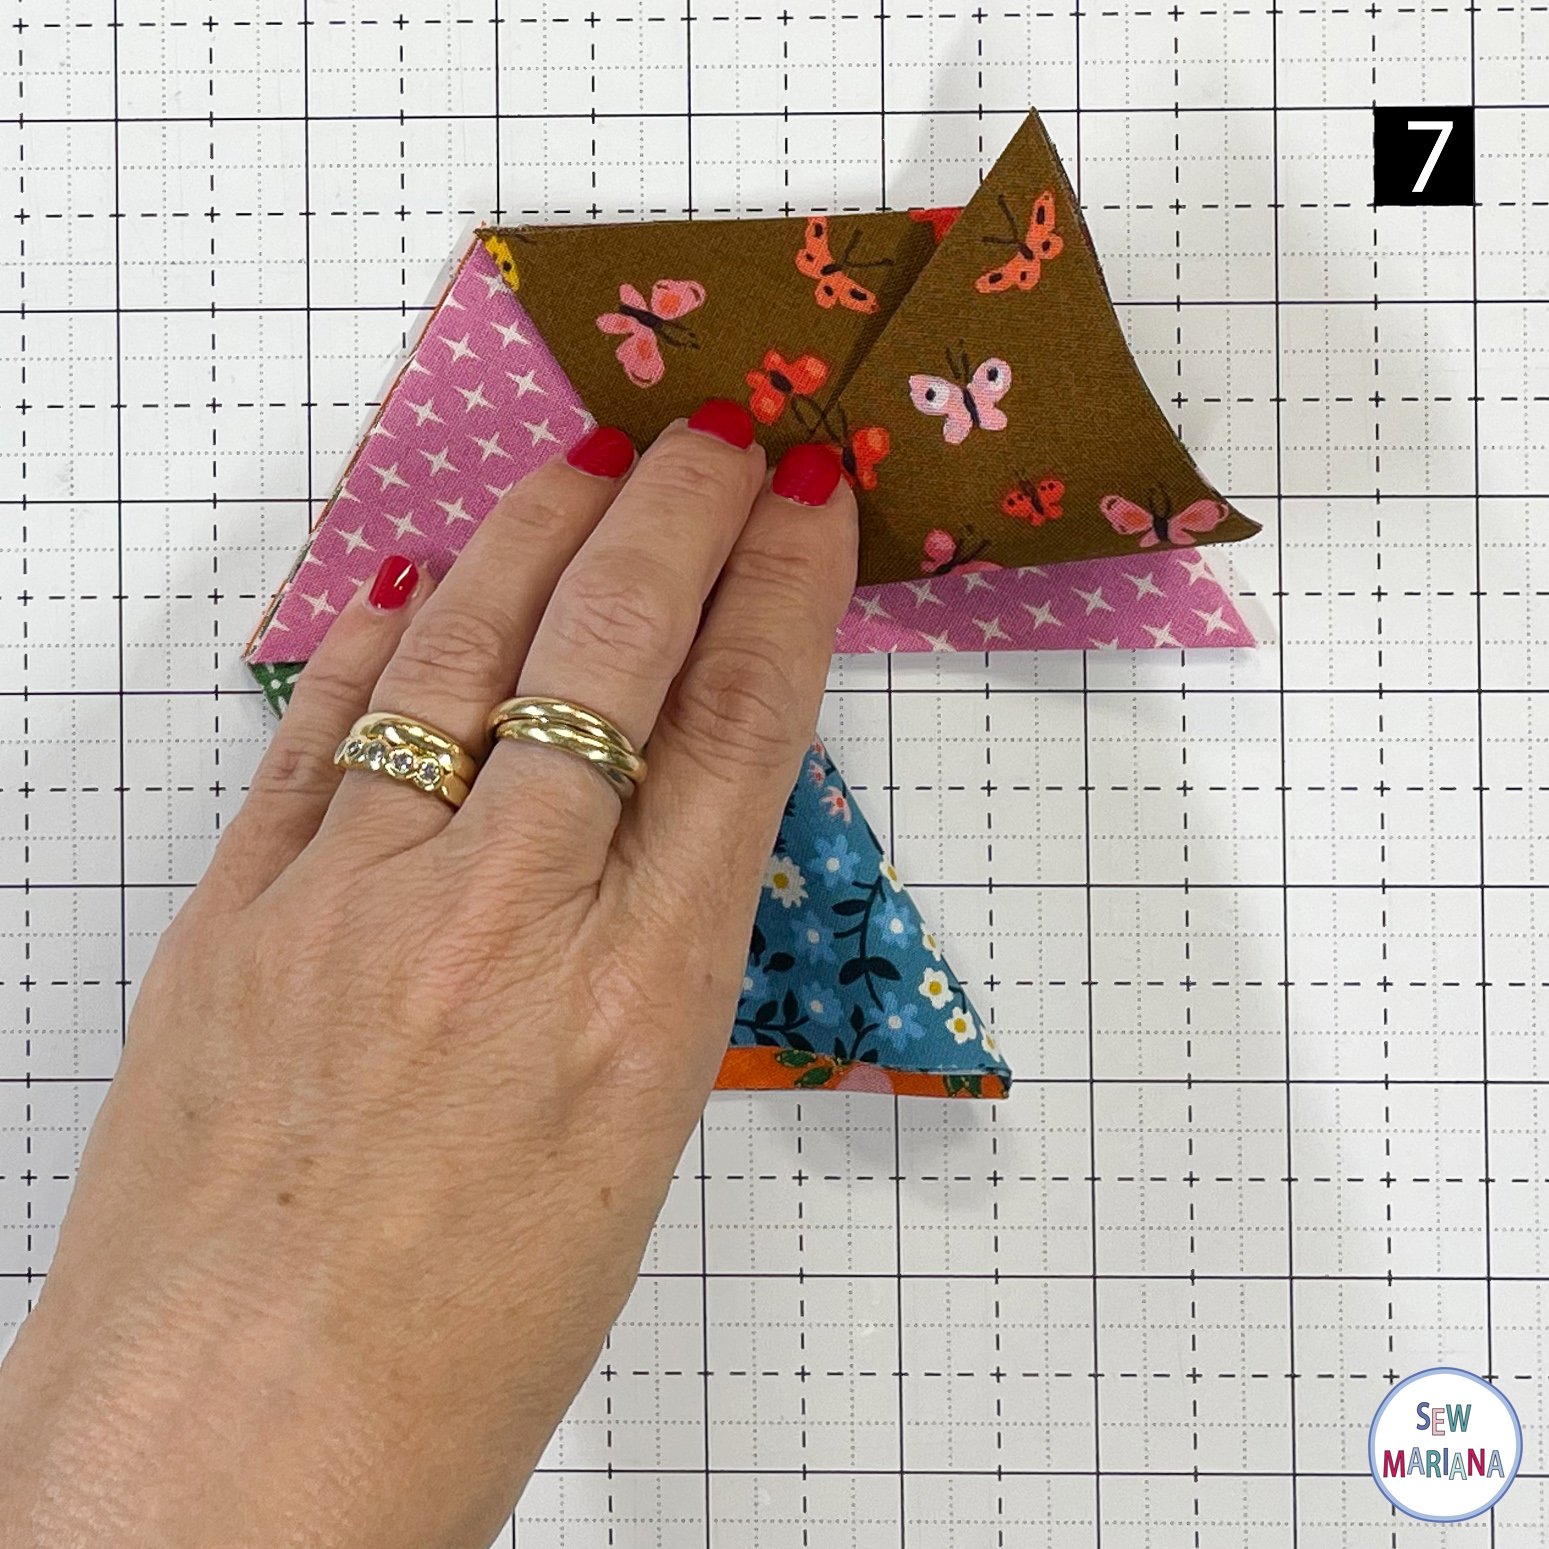
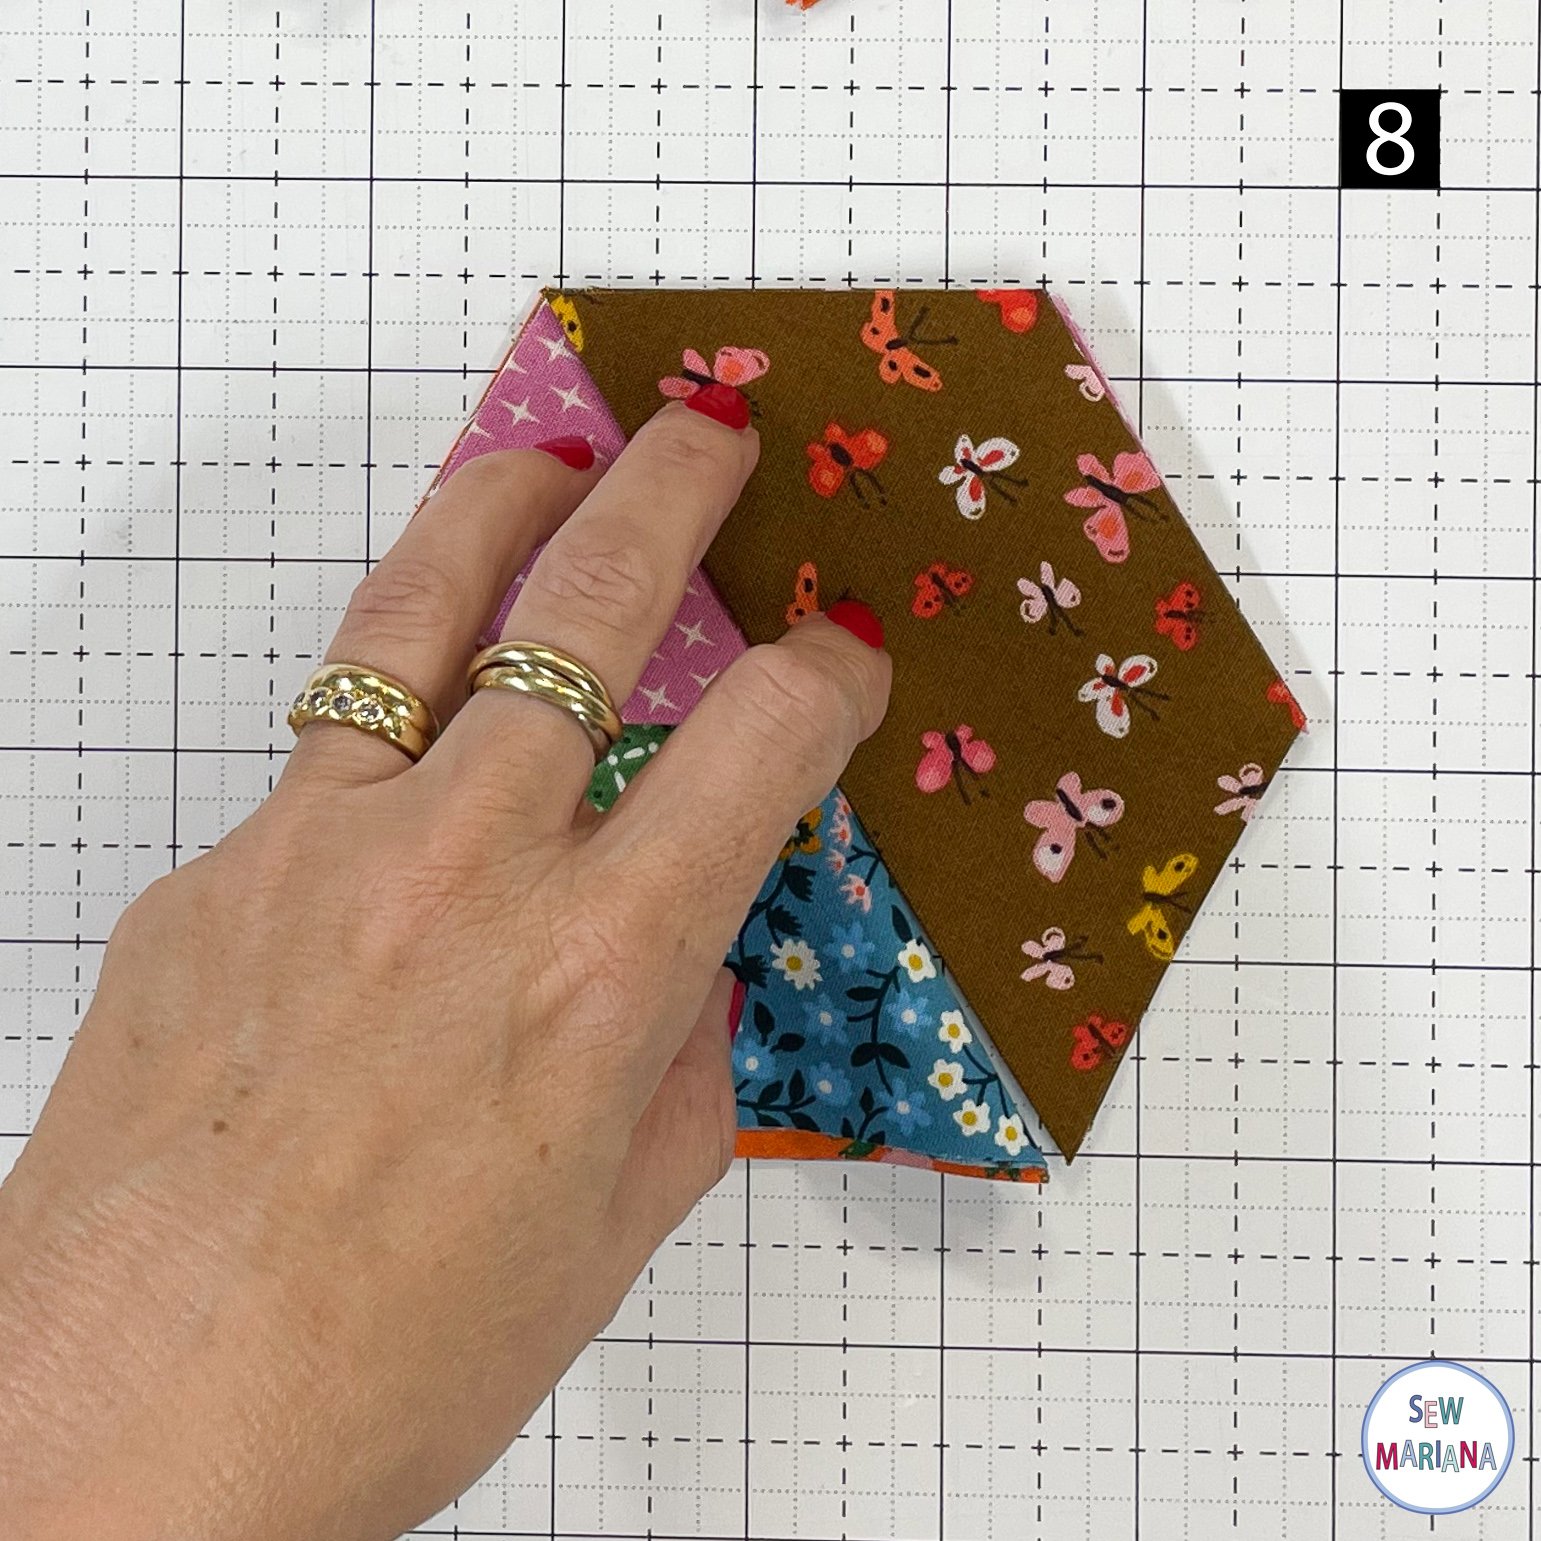
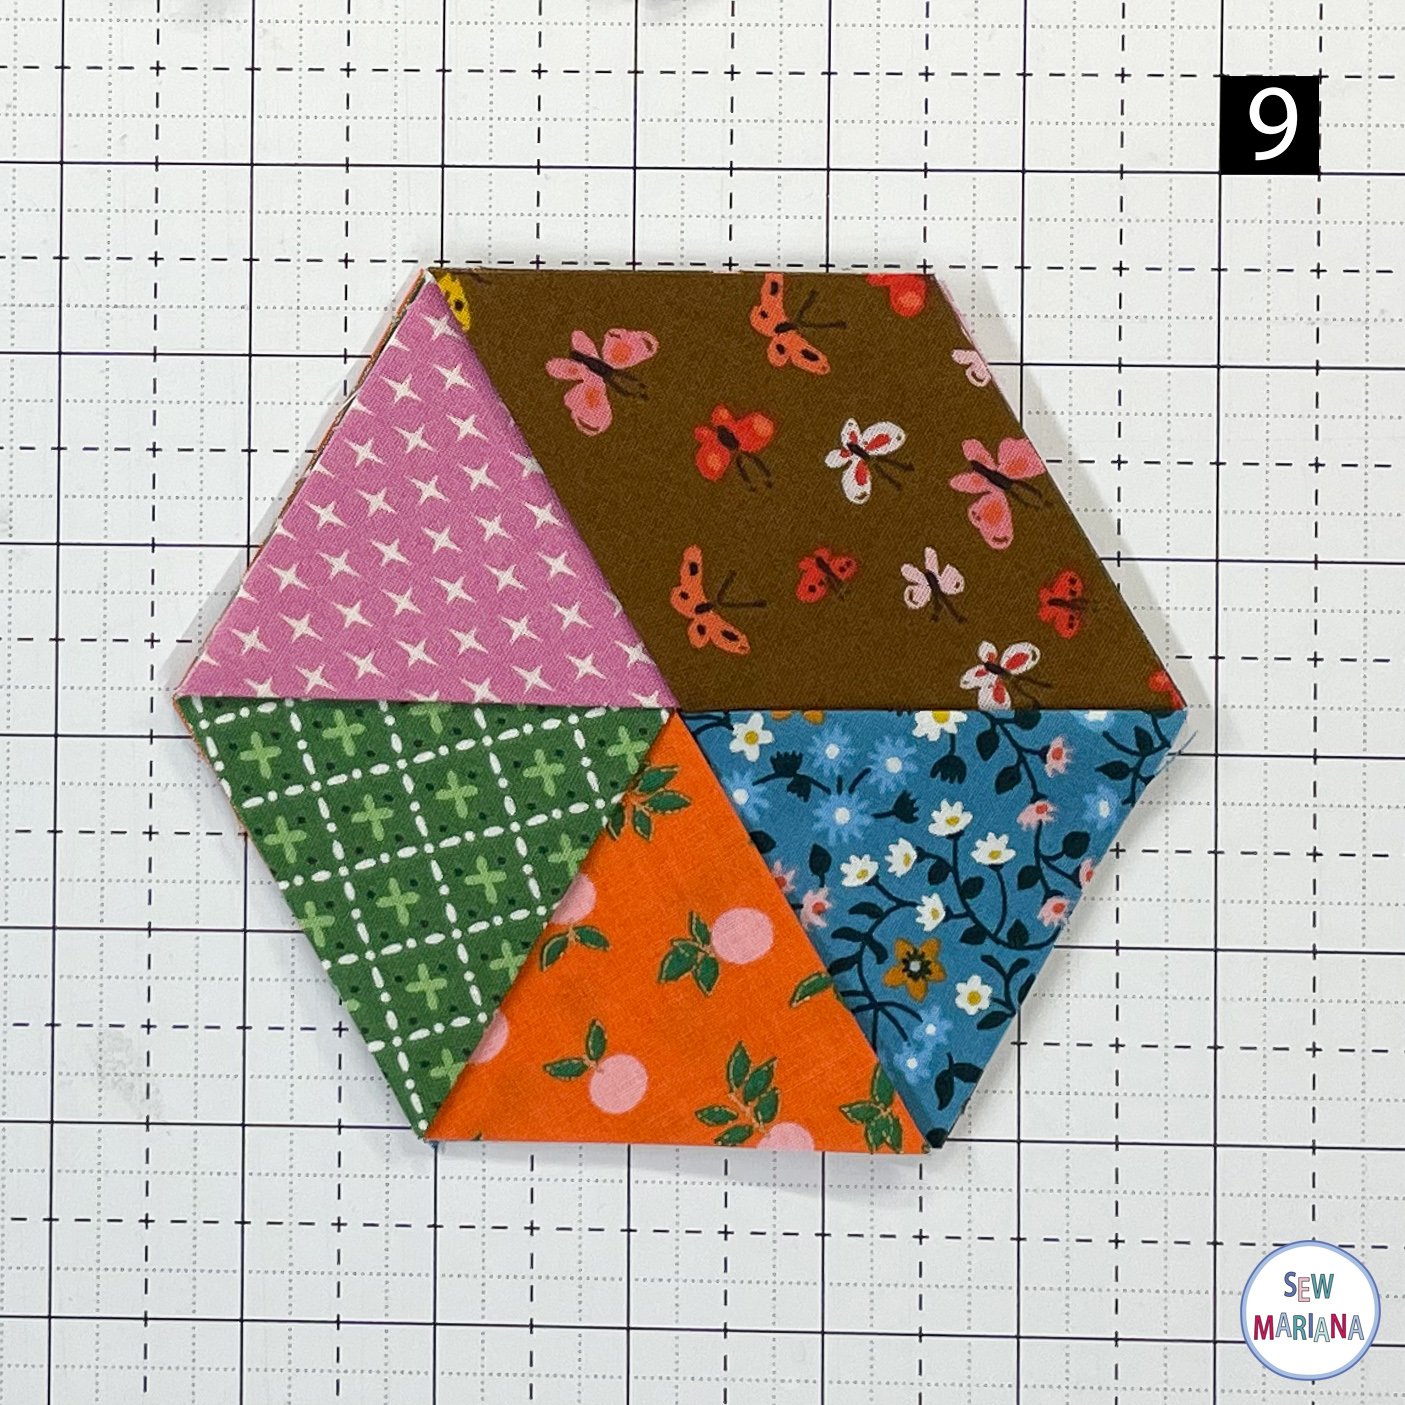
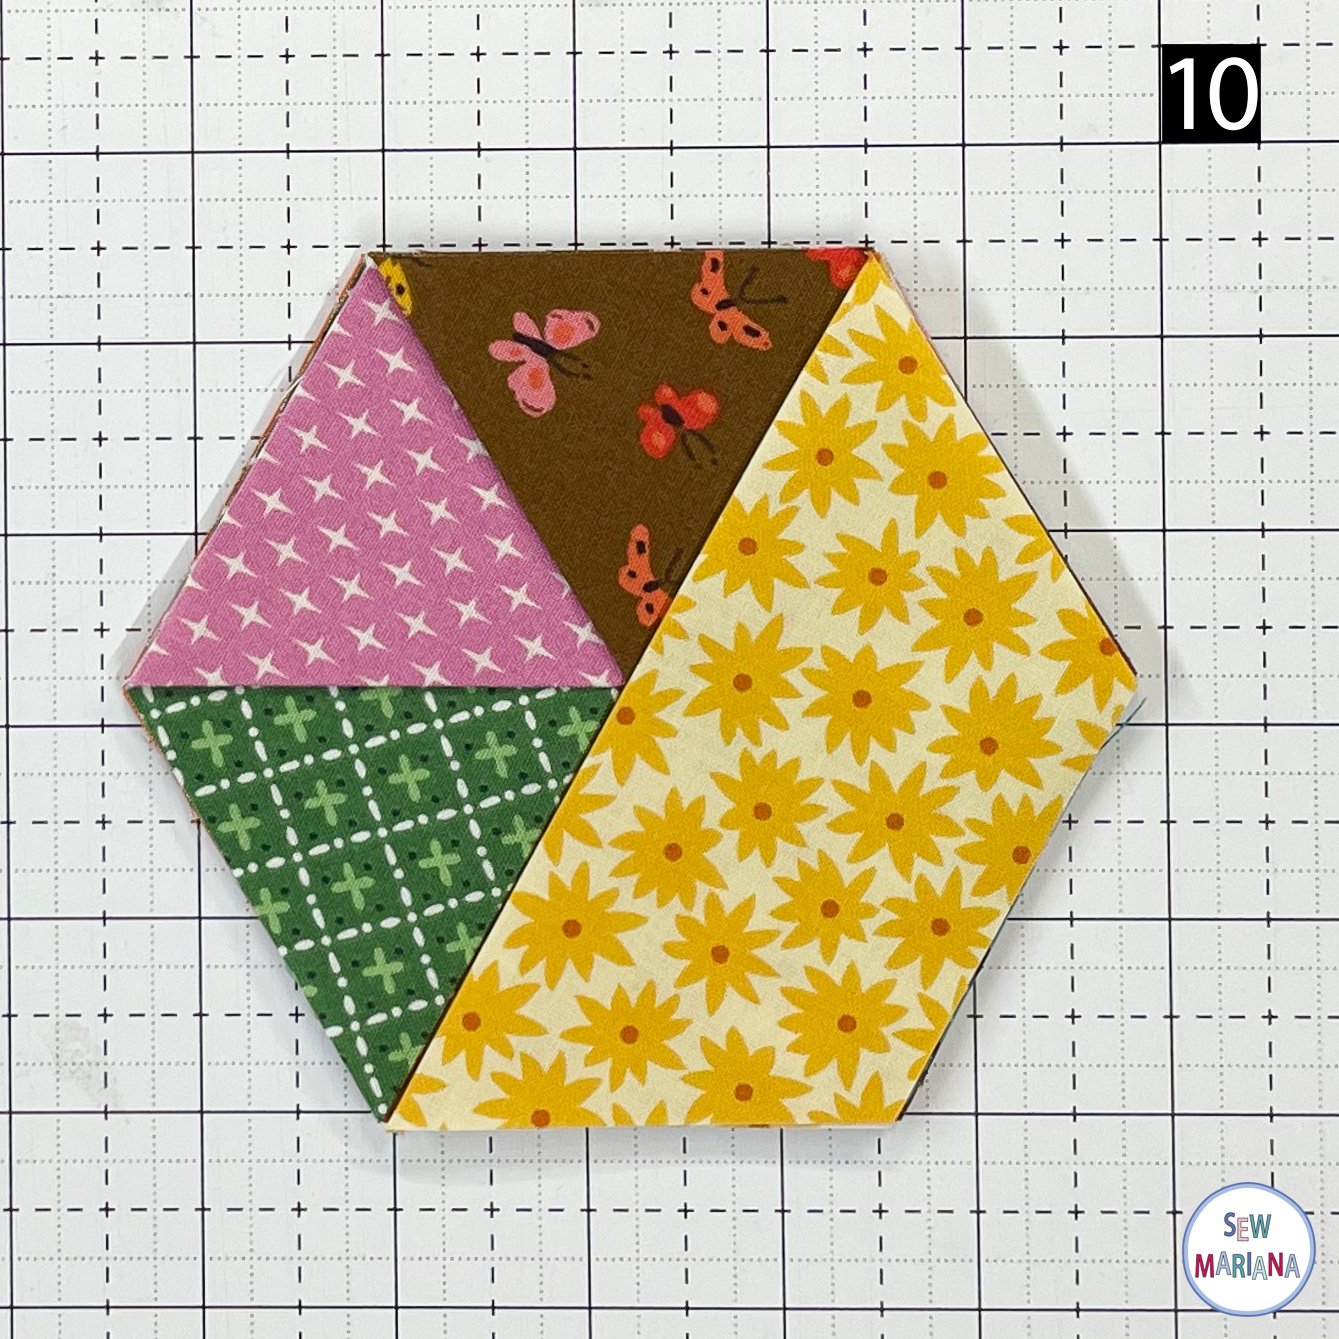
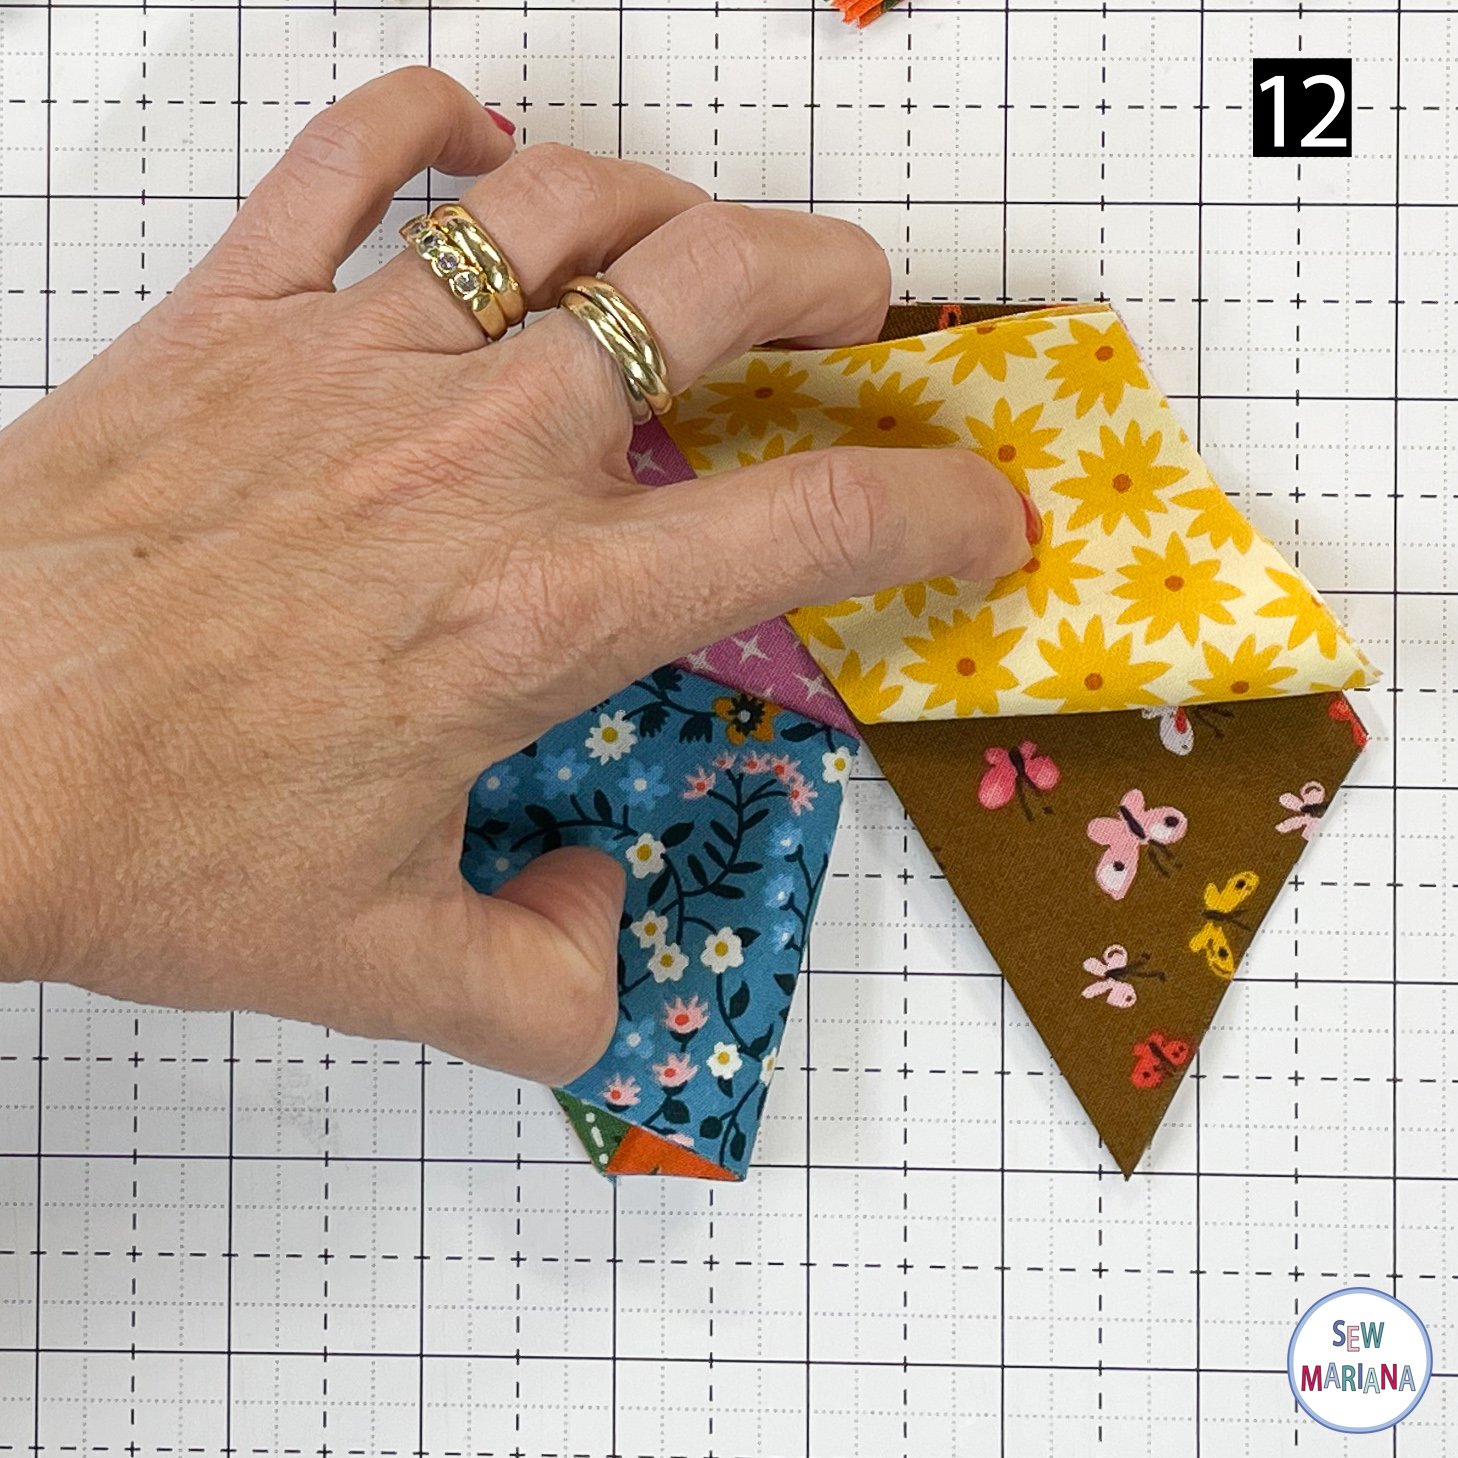
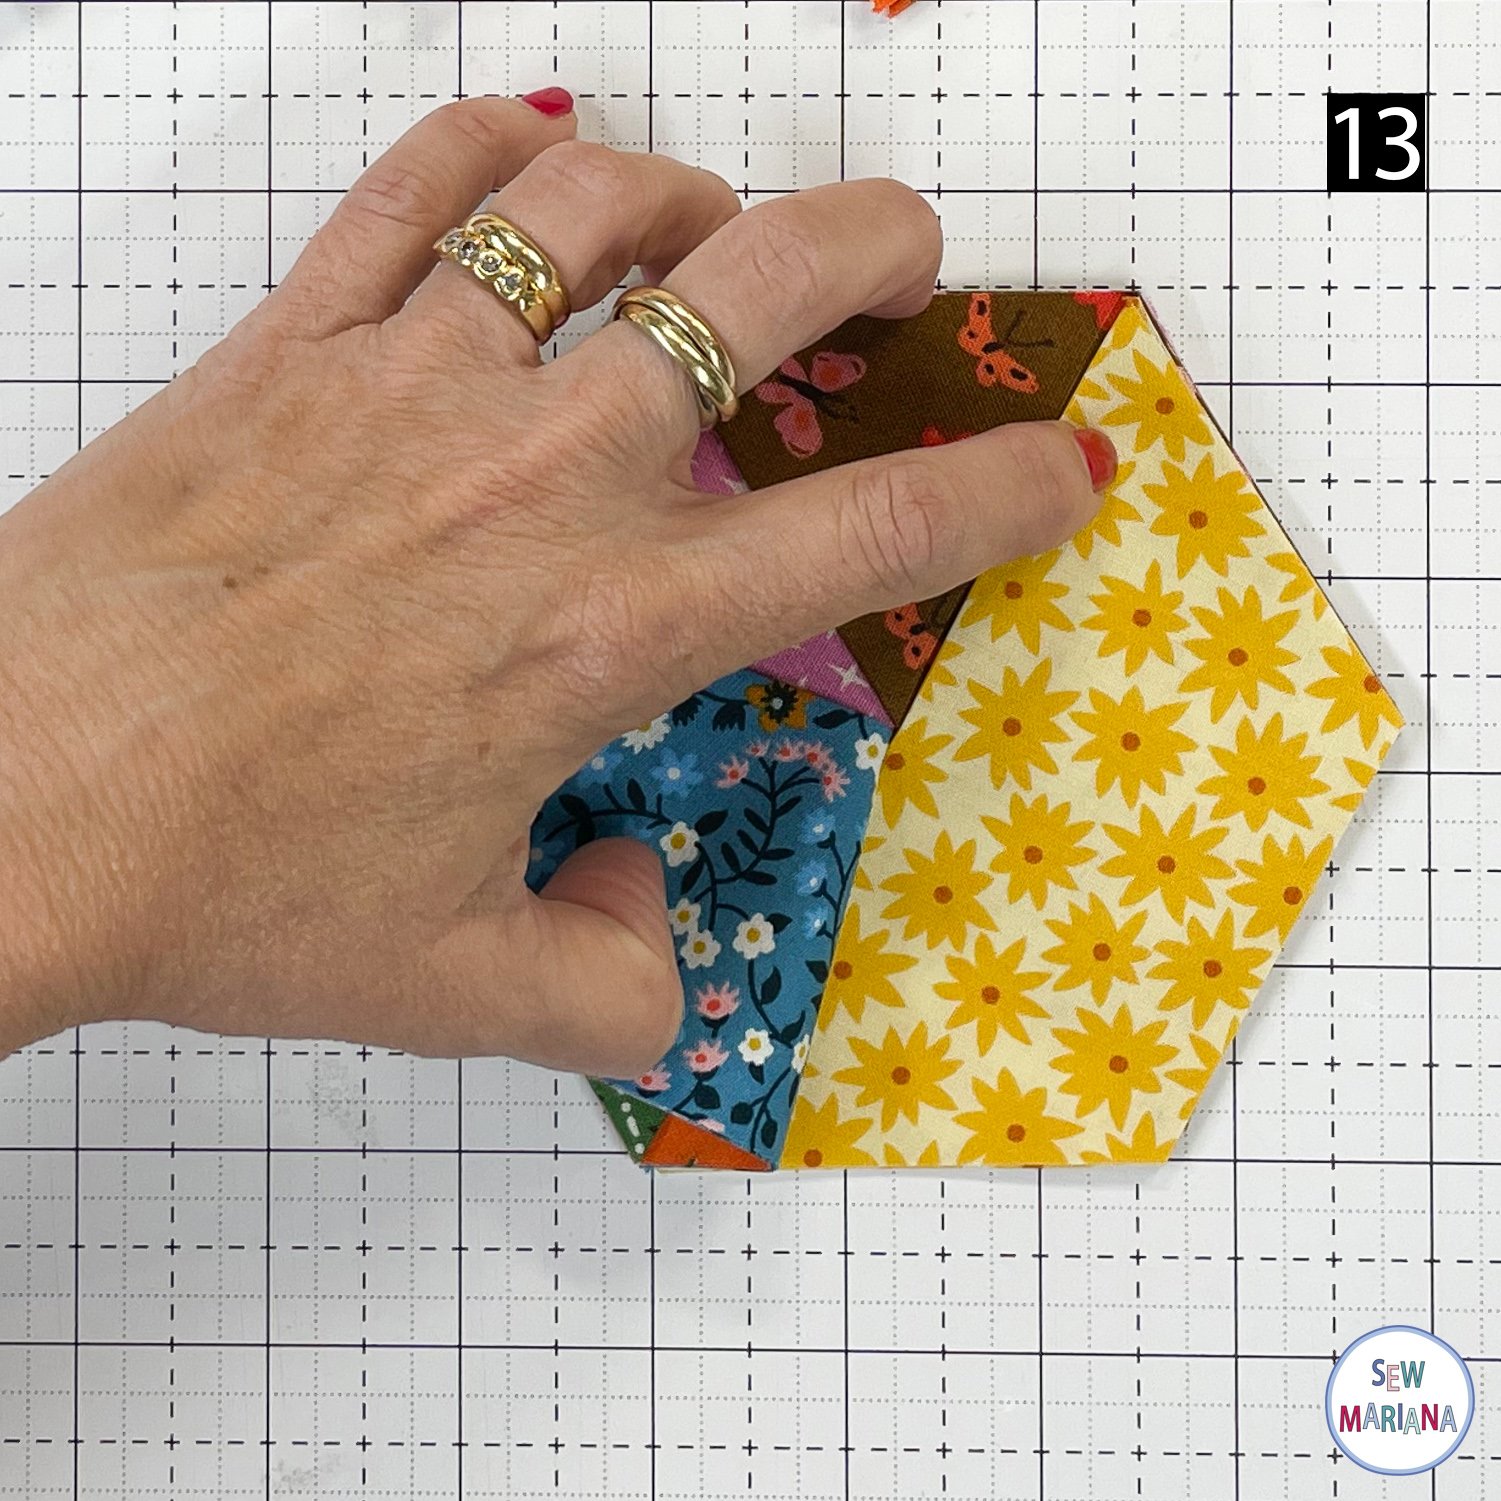
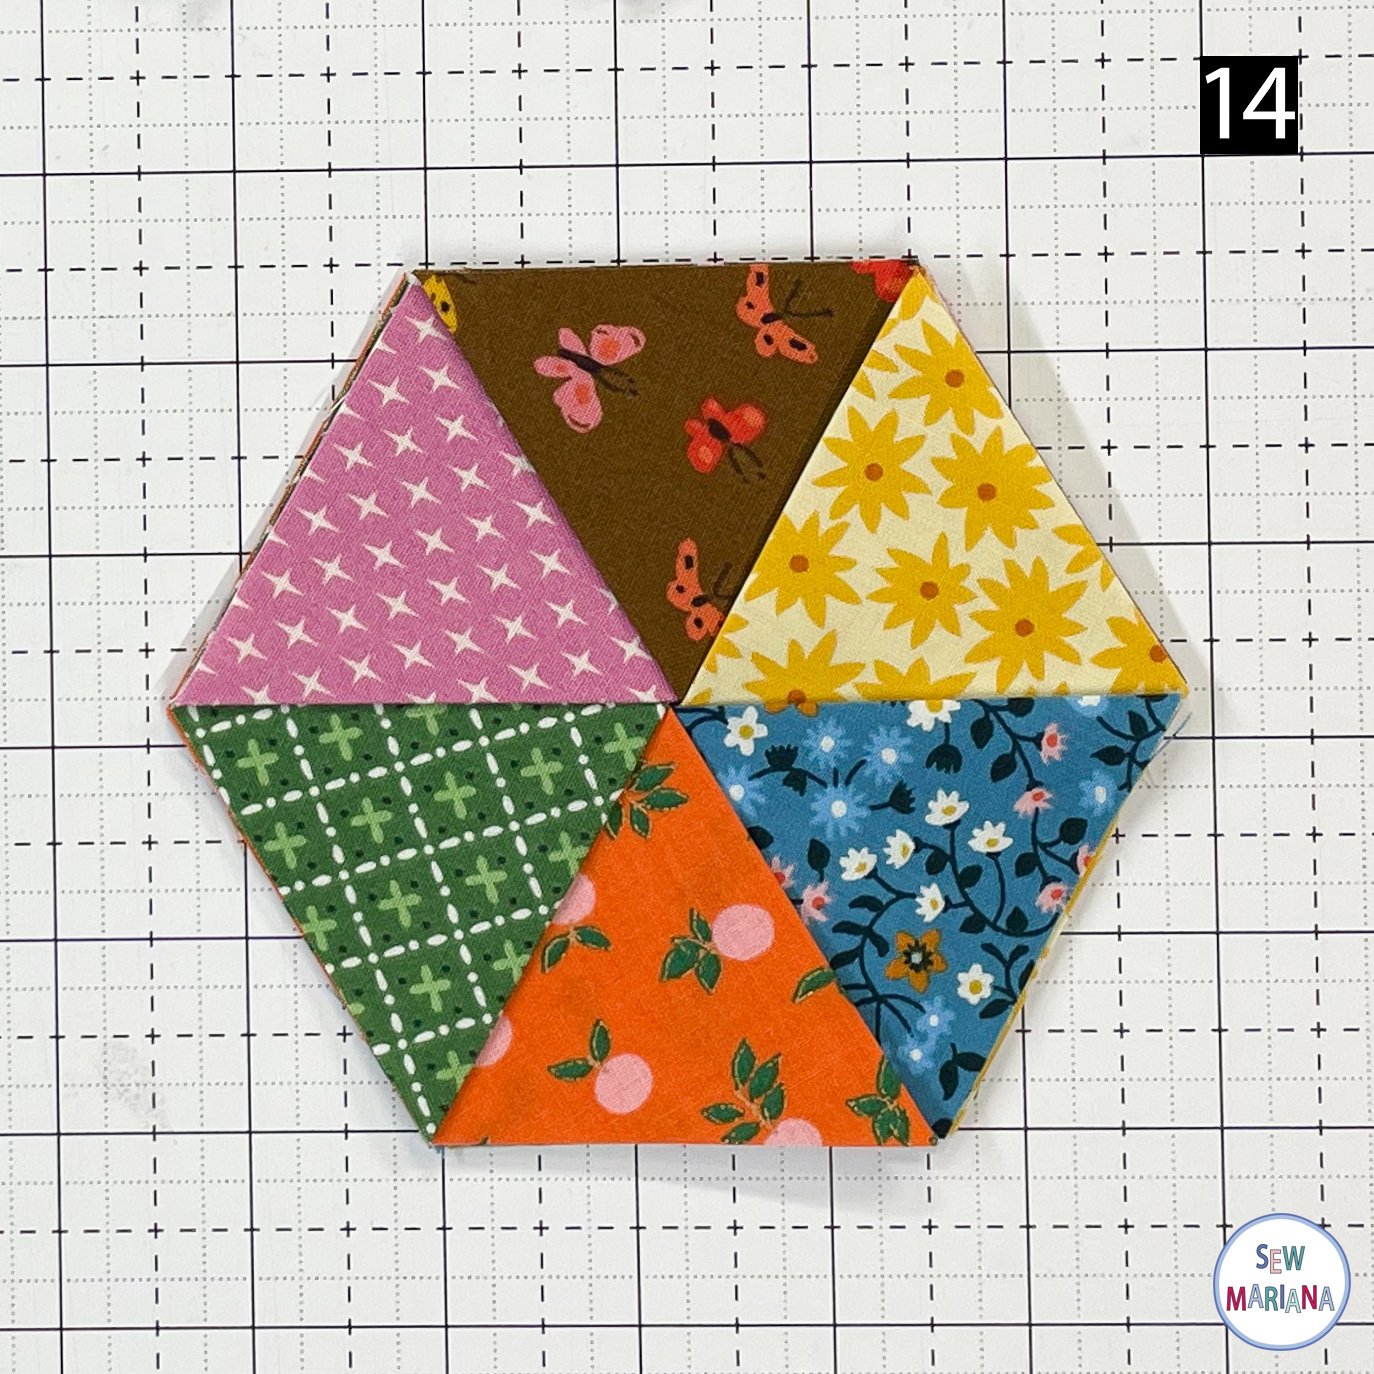
A made a short video to make it easier to follow the layout. (On the video I placed the back hexagon first. You can do it either way).
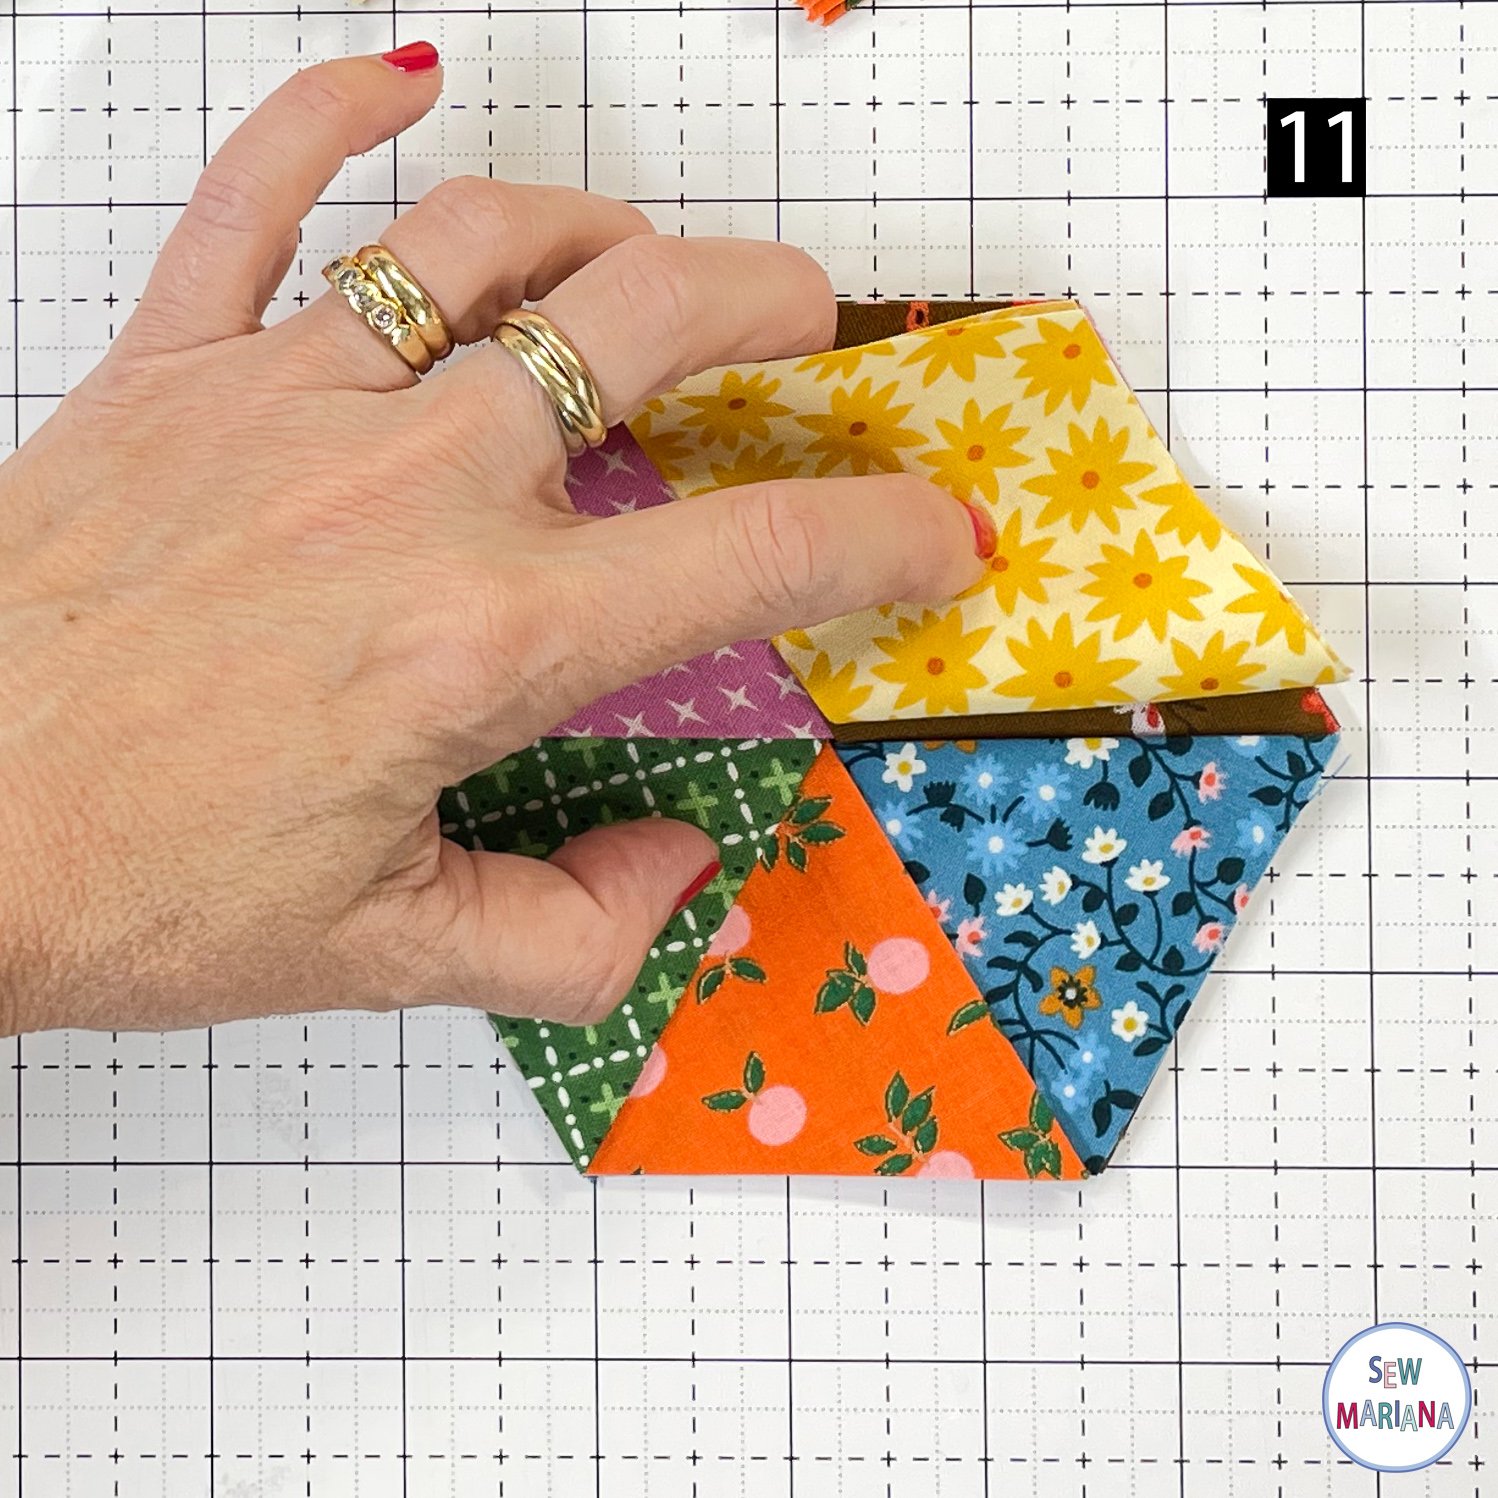
STEP 9
Place one prepared back on top of the assembled hexagon and use the clips to keep in place. Make sure to grab all the layers.


STEP 10
Sew the layers aligning your needle with the edge of the fleece. Back stitch at the beginning and at the end.


STEP 11
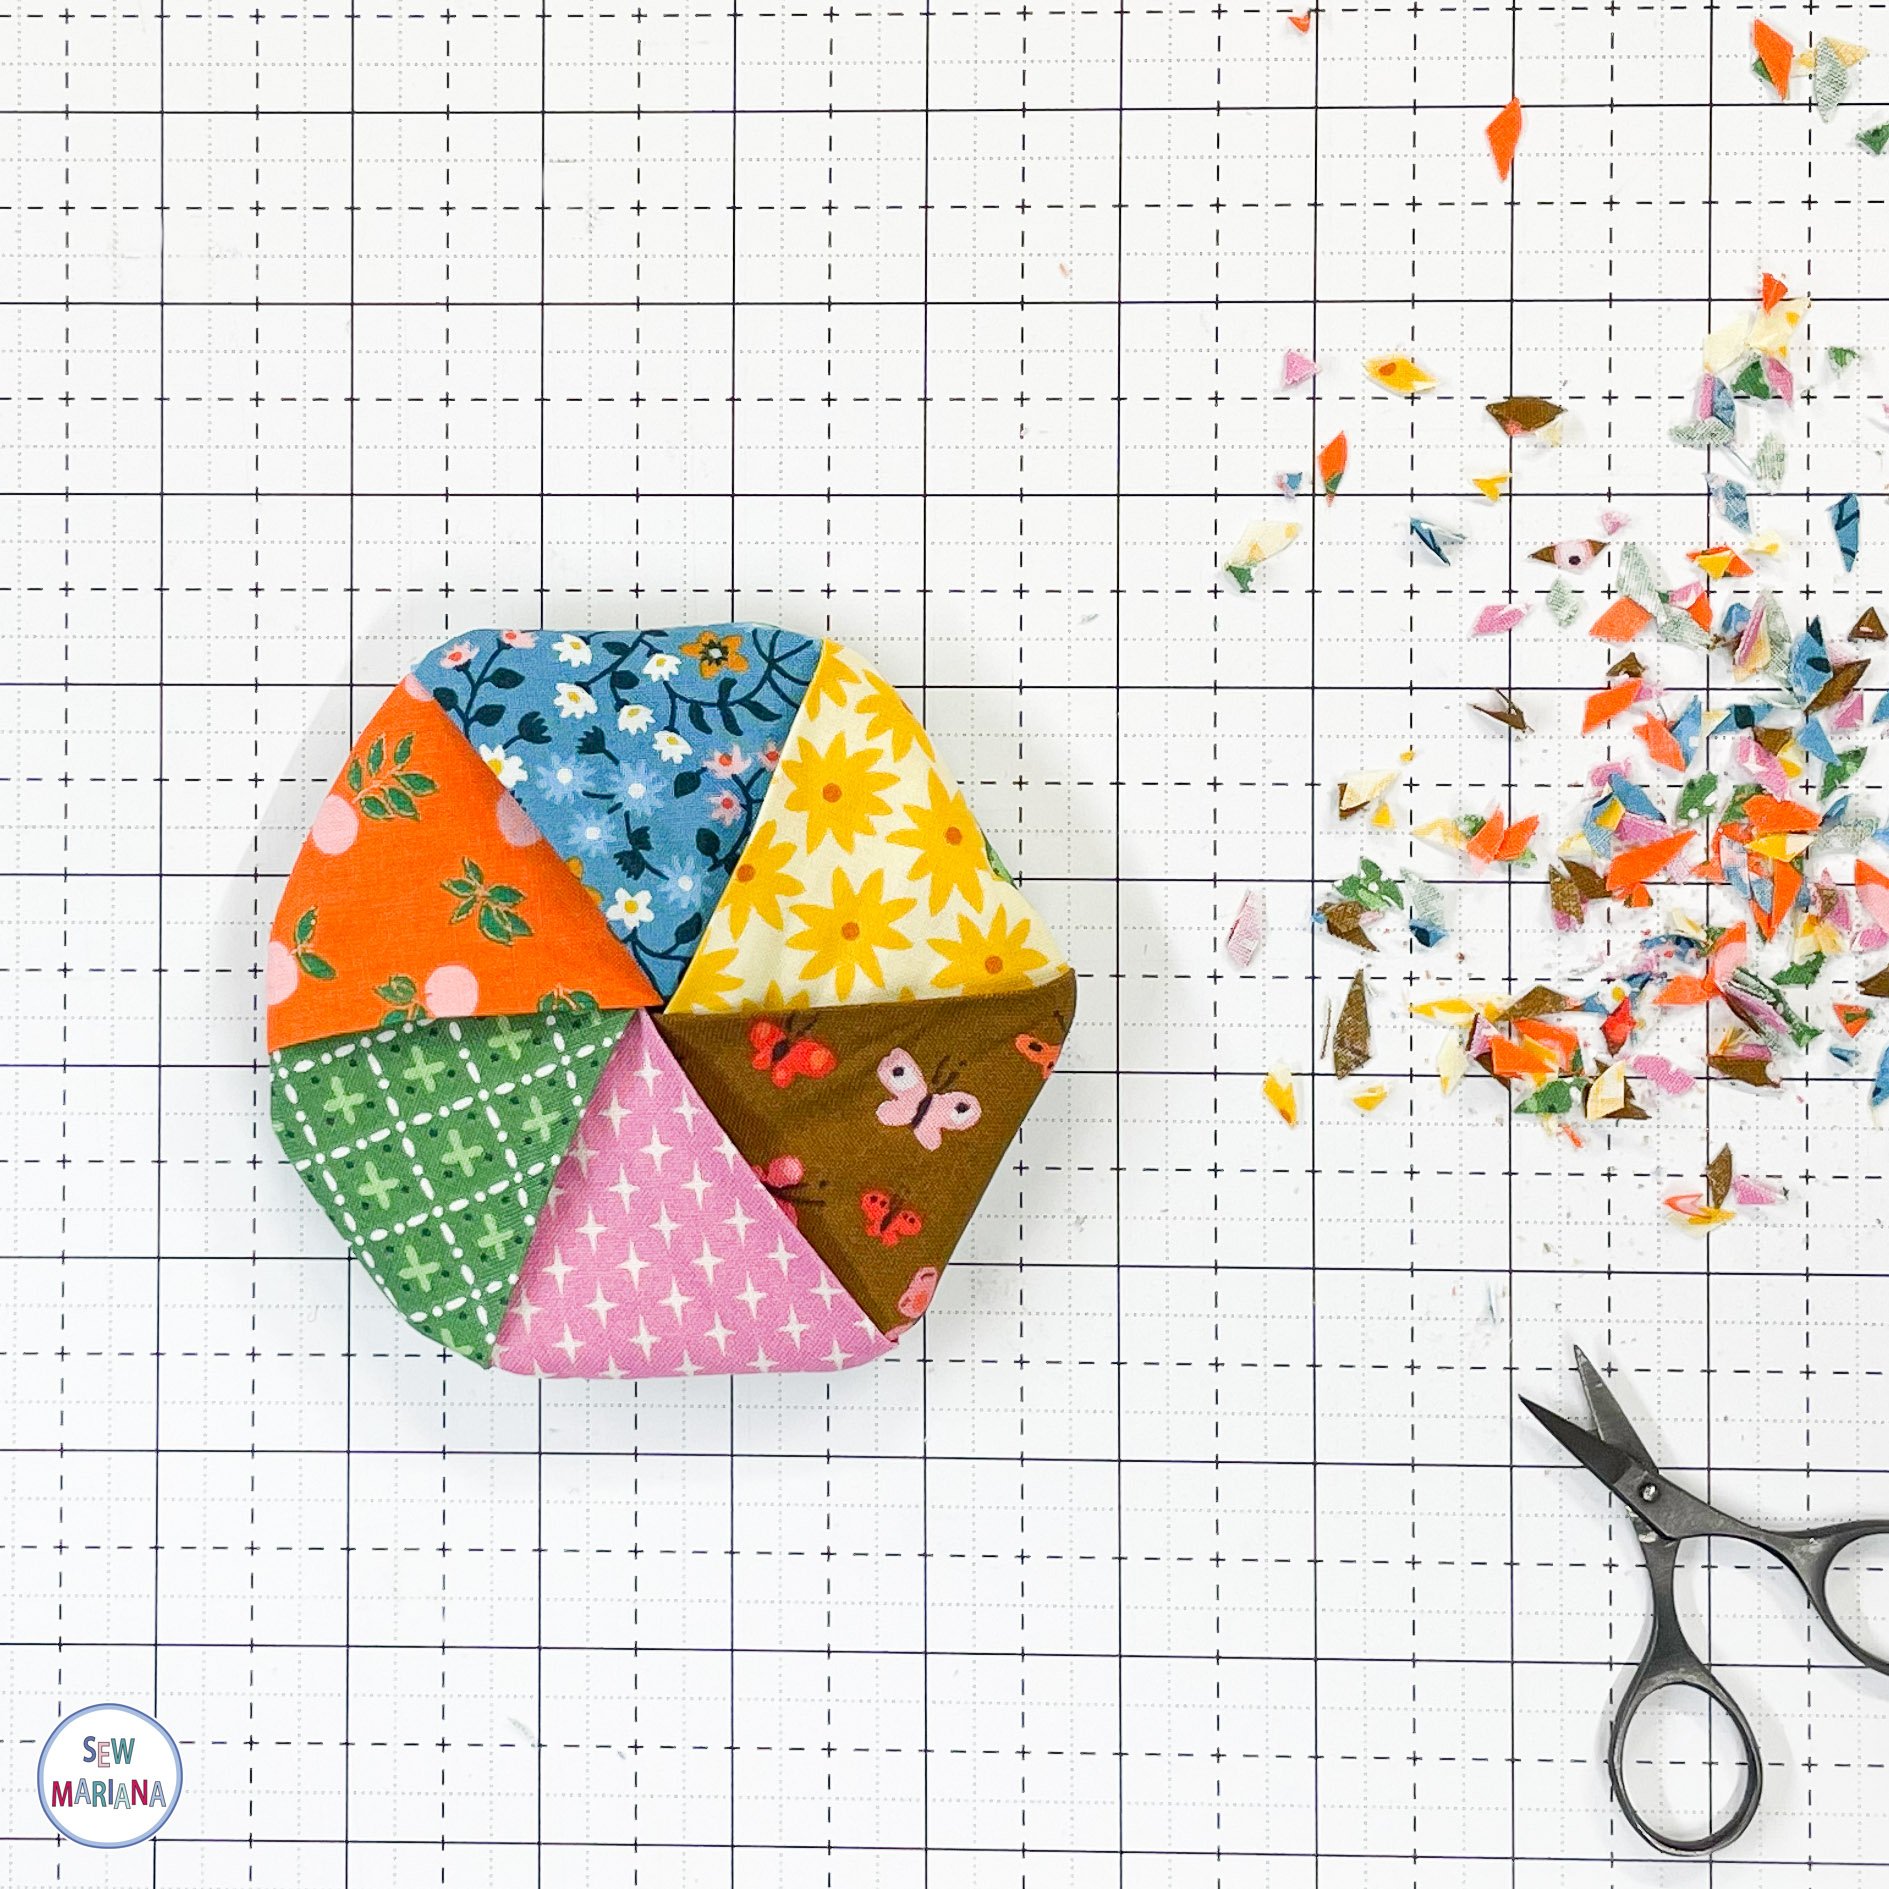
Trim the points in a V shape.


STEP 12
Turn the coasters right side out. Push out the points.

STEP 13
Iron both sides of each coaster.

STEP 14
Top stitch with a 1/8" seam.

And you are all done!


These coasters are really fun to make, and you can also use your scraps (the pieces should be at least 4 ½" x 5 ½").
You can make just one with children’s fabric and gift it to that special kiddo to use on their bedside table or make a set with seasonal fabrics as a thoughtful present or just to enjoy yourself. Use solids for a more modern look. The possibilities are endless!

If you make these coasters, tag me with #sewmarianatutorial so I can find it.
Have fun!

My Jolly Tree quilt pattern uses the same ruler!

